Showing posts with label Nuts. Show all posts

Thursday, April 2, 2009

Peanut Chocolate Chunk Blondies


"What are blondies? I've never had one." asked a little friend of mine. "No.. no way." I said, "I can't believe you've never had a blondie! Your... your missing out!" "What are the exactly?" she asked. I simply answered, "I'll show you."

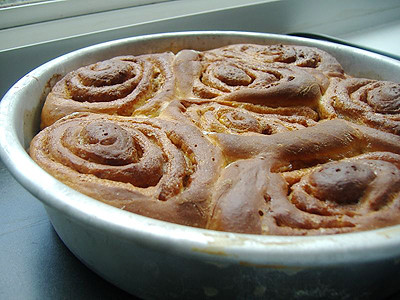
I was inspired to make these for a friend whom has never had a blondie before. I was going to make my favorite blondies, but since I was at it, I decided to try a new recipe for a blondie, and one with nuts (for what ever reason, I've been going nutty for some reason).

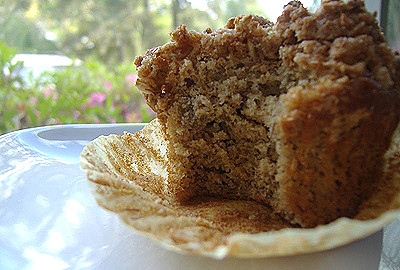
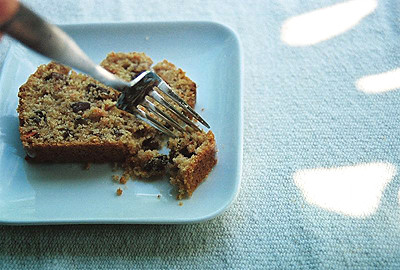
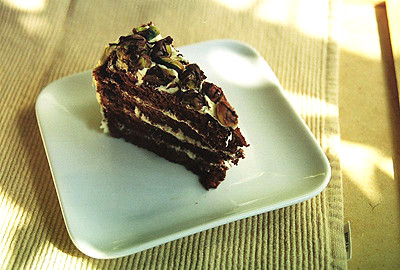
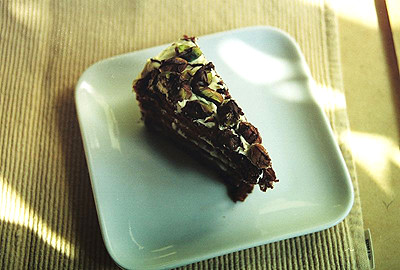
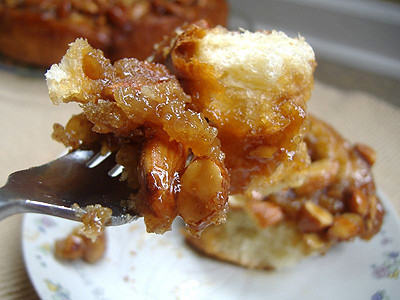
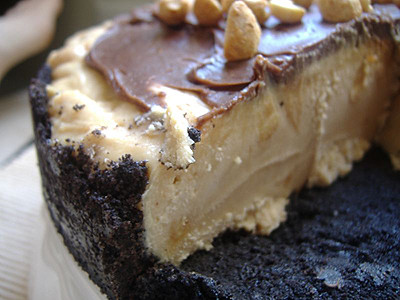
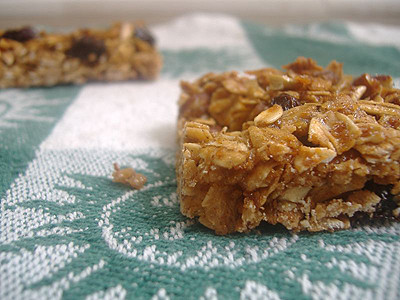
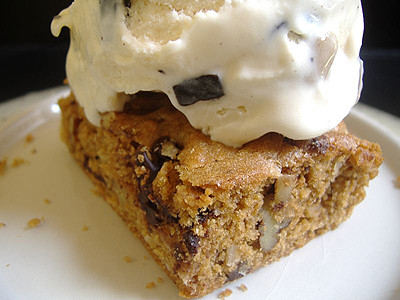
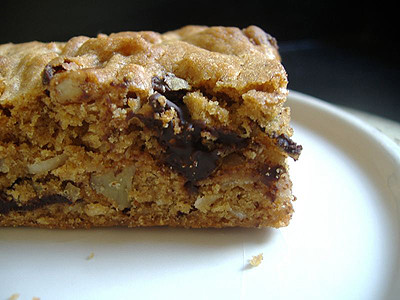
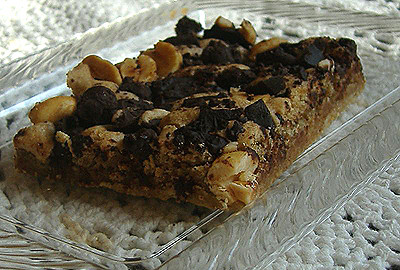
They came out pretty good. My friend really liked them. I'm going to make my favorite ones to give her the better experience of the blondies. These blondie don't beat my favorite blondies :P But, these are really chewy, delicious. I think it's best warm, and of course, with a scoop of ice cream!


Recipe

2 cups flour
1 tsp. baking powder
1/2 tsp. salt
1/4 tsp. baking soda
10 tbsp. salted butter
2 cups packed brown sugar
2 egg
2 tsp. vanilla extract
4 oz. bittersweet chocolate, chopped
3 oz. roasted peanuts, chopped

1. Preheat oven to 350 degrees F. Butter and a flour a 13 x 9 x 2-inch baking pan. Set aside.

2. In a medium bowl, mix together the flour, baking powder, salt, and baking soda. Set aside. Melt the butter in a large sauce pan over low heat. Turn off the heat and whisk in the sugar to blend. Whisk in eggs and vanilla extract.

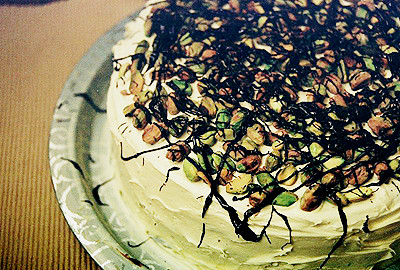
3. Gradually stir in the flour mixture. Pour into prepared pan and smooth with a spatula. Sprinkle the top with the chopped chocolate and nuts.

4. Bake for about 25 minutes, or until a cake tester inserted in the middle of the pan comes out with moist crumbs attached.

Makes 24 bars


Also, go see Slumdog Millionaire. Quite possibly the best movie I've ever seen.


Sunday, March 15, 2009

Banana Muffins w/ Streusel Topping


Muffin lover here.

I've come to realize that when it comes to baking lately, I'm always wanting to make muffins. Though, I don't necessarily find that to be a bad thing. Muffins are amazing!! I guess I'd prefer portion sized treat compared to craving tall, calorie filled cakes... which sounds good, now that I'm thinking of it...

The weather is starting to rise here (or should I say, it's gradually getting hotter and hotter here in Floirda!!) and we've bee stocking up on our fresh fruits and veggies. We've been buying tons of bananas more so compared to everything else (my mothers on this banana diet, strange as it might sound). So, me being me, taking any opportunity to bake with bananas, I decided to make Banana Muffins. I came across this post for Banana Muffins with a streusel topping not to long ago. Decided to give it a try to day.

What really makes these muffins is the topping. Oh the topping is so good! I could use this topping on other things (which I'm going to) and it'd taste fantastic! These are a must make when bananas are ripe!


Recipe

Streusel

1/2 cup finely chopped walnuts, toasted
1/4 cup old fashioned oats
1/4 cup firmly packed light brown sugar
2 tbsp. flour
1/4 tsp. baking powder
1/8 tsp. salt
2 tbsp. unsalted butter, cut into tiny pieces

Muffin

1 1/2 cups all-purpose flour
1 1/4 tsp. baking powder
1/2 tsp.baking soda
1/4 tsp. salt
3/4 tsp. ground cinnamon
1/4 tsp. ground ginger
1/4 tsp.freshly grated nutmeg
2 medium mashed ripe bananas
1 large egg
1/2 cup half-n-half or whole milk
1/4 cup unsalted butter, melted
1/3 cup firmly packed light brown sugar
1 tsp. vanilla extract

1.Preheat oven to 350 degrees F. Line 10 muffin cups with liners.

2To make the streusel, in a medium sized bowl, stir together walnuts, oats, brown sugar, flour, baking powder and salt, until well combined. Knead in butter using fingertips until well combined and clumpy; set aside.

3.To make the muffins, in a medium sized mixing bowl, sift together flour, baking powder, baking soda, salt, cinnamon, ginger and nutmeg.
In a large mixing bowl, whisk together banana, egg, half-n-half, butter, brown sugar and vanilla until well combined; whisk in dry ingredients until just combined.

4Divide batter into muffin cups and evenly top with streusel. Bake for 25-30 minutes, or until golden brown and well risen. Cool for 5 minutes before transferring to wire rack to cool completely.

Makes 10 muffins


My reaction once I tried these muffins...


http://cacaococoa.tumblr.com/

Sunday, February 1, 2009

Vanilla Bourbon Bread with Walnut Coffee Crumble


It's pretty hard to start this.. I don't know if there are really any words to say to state how much I've fallen for this simple quick bread. It's... ridiculously scrumptious and delicious. Moist and sweet, great with adding icing or a cup of coffee or tea... I got the idea while trying to find something to make in the small amount of ingredients that I had.

I didn't have any granulated sugar, so I decided to try using powdered sugar and brown sugar together (which turned out to be really good) and used a bunch of vanilla. I wanted something simple. I got the walnut coffee crumble idea from here off of a banana bread recipe. I thought that it'd be a perfect topping to a simple bread; and it indeed was.

This has become my new favorite quick bread recipe for this year, no doubt.


Recipe

For Crumble Topping

1/2 cup walnuts
2 tbsp. brown sugar
2 tbsp. flour
2 tbsp. cold butter
1 tsp. instant coffee
1/4 tsp. cinnamon

For the Bread

2 cups flour
3/4 cup powdered sugar
3/4 cup brown sugar
2 tsp. baking powder
1 1/2 cup heavy cream
3 large eggs
2 tbsp. bourbon
2 tbsp. vanilla extract
3/4 tsp. salt


1. Preheat oven to 350 degrees. Grease a 9 x 5-inch loaf pan; set aside.

2. In a small bowl, combine the ingredients for the crumble; set aside.

3. In a large bowl combine flour, sugars, baking powder and salt. With electric mixer at low speed, beat until well blended. Add the cream, eggs, bourbon and vanilla. Beat at low speed until dry ingredients are evenly moistened and smooth.

4. Pour batter into prepared loaf pan. Top the batter off with the crumble. Bake in the oven for 40 to 50 minutes or until bread tests done.


Sunday, November 23, 2008

Carrot Bread


Around here, it's been pretty hectic. First, my birthday just passed. The 18th. I'm eighteen now. My parents feel like they're ancient now and I never stopped to kid with them with how old I've gotten. So with that, my entire family has been trying to do something with me. From going to the movies to dinner with each one, it's tiring.

My friends wanted to celebrate with me as well. For fun, we decided to go to the first showing of the movie Twilight. Yes, I am one of those Twilight fans. As a matter of fact, I'm a bit obsessed. It's a hands down amazing book. I remember when I first read the book Twilight by Stephenie Meyer; Couldn't stop. I read the entire book in one day (as did I with all the other books to the series).

The movie was amazing! I'll admit that I don't like some of the characters and how they are picture (I have my own image as to what the characters look like) but they really did a magnificent job on the movie! Robert Pattinson and Kristin did great as the characters Edward and Bella. I'm even more excited to of heard that they are in fact making the second movie, New Moon! I'm thrilled!!

Enough of my fan girl moment over my movie. I had the time to bake something but I didn't want to make something extremely heavy (Thanksgiving is right around the corner!!). We had some carrot in the fridge and originally what came to mind was Carrot Cake, which, wasn't something I really wanted though since that would be way high in calories. Then, bread came to mind. It sounded perfect.

It turned really good and it was well loved. I bit dense, but nice and moist. I really wish now though that I had some kind of cream cheese spread (I don't know how I didn't think to make some!). Believe me, it would have been perfect for this!!


Recipe

For Bread

3/4 cup whole wheat flour
3/4 cup all-purpose flour
1 1/2 tsp. baking soda
1 1/2 tsp. cinnamon
1/2 tsp. salt
1 1/2 cup shredded carrots
1 1/2 cups chopped nuts
1 cup vegetable oil
3/4 cup sugar
2 eggs
1 tsp. vanilla

For Glaze

1/2 cup powdered sugar
1 tsp. grated lemon peel
1 tbsp. lemon juice


1. Preheat oven to 350 degrees. Spray 9x5 inch loaf pan.

2. In a large bowl, combine flours, baking soda, cinnamon and salt. In a separate bowl, combine oil, sugar, eggs and vanilla; mix well. Slowly add the flour mixture to the oil mixture, mixing until moistened. Stir in carrots and nuts. Pour into loaf pan.

3. Bake 60-70 minutes or until toothpick inserted in center comes out clean. Cool in pan on wire rack for 10 minutes. Remove from pan and let cool completely.

4. For the glaze, shift the powdered sugar. Add lemon peel and juice. Drizzle over top of cooled bread. Store i fridge.


Monday, September 29, 2008

Chocolate Pistachio Cake


Remembering birthday is something most of my family does not seem to know how to do, for it seemed everyone almost forgot about my Nana's birthday. My dad is the worst at remembering birthday. Sadly, he'll forget mine, my moms and my brothers from time to time. I try my best not to forget birthdays. I feel horrible if I forget one. I feel as though that I need to have they're birthday to be a great day!

My Nana's didn't want much for her birthday. She really just wants to ignore the fact that it is her birthday. I think anyone that gets older and older doesn't want to get older and older, you know?

Any who, all she wanted to do was have a family get together. Which included her sisters, my grandfathers brothers, her son (my dad) and his family, and a handful of her friends. I adore my Nana, really, I do. So I wanted to make a nice cake that I know she'd like. She loves chocolate (any woman would) and she's a big pistachio eater. She always has some around the house, ready to be snacked on.

When I came across this recipe on Jens blog at use real butter, it was perfect! It was absolutely perfect for her! And she agreed. She loved it. As well as everyone else. It has a nice salty addiction to it (and we all love salt) and it was just an overall huge hit with everyone. Not to sweet, soft and had enough in each bite.


Recipe

Chocolate cake
Makes one 9×3-inch round cake. Double this recipe to get a 4 layer cake.

1 1/2 cups plus 1 tbsp. all-purpose flour
6 tbsp. unsweetened cocoa
1 tsp. baking soda
1 tsp. salt
1/2 cup butter, plus extra for greasing
2 oz unsweetened chocolate, broken into pieces
1 cup sugar
2 eggs
1 tsp. vanilla extract
1 tsp. red raspberry vinegar
1 cup water

Pistachio Vanilla Buttercream

8 oz egg whites
16 oz sugar
1 lb butter, room temperature
2 tsp vanilla extract
1.5 cups shelled pistachios

Ganache

6 tbsps heavy cream
4 oz semi-sweet chocolate, chopped

1. Preheat oven to 325 degrees. Combine flour, cocoa, baking soda, and salt in a sifter and sift onto wax paper or a bowl and set aside. Coat 2 9×3-inch round pans with butter on the base and sides. Place circular parchment in the bottom and brush with more butter.

2. Melt the unsweetened chocolate over water bath or in the microwave (be suer to keep stirring to prevent burning). Set aside.

3. Beat sugar and butter together in mixer fitted with paddle. Beat on medium for 1 minute, then on high for 1 minute. Scrape down the sides and beat on high for 15 seconds after the addition of each egg. Add vanilla and vinegar and beat on high for 20 seconds. Add the melted chocolate and mix on low for 10 seconds. Scrape down the sides of the bowl.

4. Boil water and operate the mixer on low while adding the sifted dry ingredients. Mix for 10 seconds. Carefully add the boiling water and continue to mix on low for 10 seconds. Increase speed to medium and beat for 5 seconds. Pour batter into pans.

5. Bake for about 45-50 minutes or until toothpick test is clean. Remove from oven and allow cakes to cool in pans for 20 minutes. Remove the cakes from the pans and refrigerate for at least 1 hour.


1. For the pistachio and vanilla buttercreams, combine egg whites and sugar in a mixing bowl. Whisk constantly over a bain marie until 140F is reached. Place on mixer with balloon whisk and whip until stiff. Turn down whip speed to 3rd and whip until cool to the touch (this takes a while - should be cooler than your hand).

2. Change to a paddle and gradually add soft butter by tablespoon pieces. Mix to emulsify. Once desired consistency has been reached, add vanilla. Blanche the pistachios in boiling water for 3 minutes, then drain and place the nuts in a cotton towel. Fold the towel over the nuts and rub vigorously to loosen and remove the skins. Toast the skinned pistachios on a baking sheet for 15 minutes at 325°F. Remove from oven and allow to cool to room temperature. Reserve a few whole ones for garnish. Finely chop the remaining pistachios.

3. Take 2/3 of the buttercream frosting and fold in the pistachios. Save the remaining third of the buttercream for frosting the cake.

4. For the ganache, bring the cream to a boil and remove from heat immediately. Pour over the chocolate (making sure to cover all of the chocolate) and let sit for a minute. Stir until the ganache is smooth and evenly mixed. Put in the refrigerator until firm enough for piping.


To assembly
, cut off the dome tops of the cakes. Slice your cakes into two layers. Place the base of one cake on the serving plate or a cake board. Spread 1/3 of the pistachio buttercream over the layer. Repeat twice more. Top the cake with the other base slice (upside down, so base it facing up). Coat the sides with the vanilla buttercream (a thin layer spread around the entire cake). Then frost the entire cake with the rest of the vanilla buttercream. Decorate the cake with chocolate ganache however you like and garnish with whole pistachios and/or any extra chopped pistachios. Serve at room temperature.


Friday, May 30, 2008

White Chocolate Blueberry Tart


Blueberries have been going on sale a lot lately here in Florida, so, I decided to take the opportunity to stock up on a few blueberries since they're always so expensive! And I love blueberries, but buying them as much as I'd like kind adds up to be pretty costly. There were actually a lot of things that I thought of to make with the blueberries, but one thing really stuck with me. A blueberry tart; With chocolate! Oh yea. Winner. Ding, ding, ding! So, that's exactly what I did. Made one awesome blueberry tart.

What I loved most about this was defiantly the crust! The cashews really gave it a awesome taste! If you don't really like cashews though, you could always use other nuts that you prefer. Pecans, almonds, walnuts; Whatever to your choosing. But, I'd have the say that the cashews really complemented with the blueberries and chocolate. I would say try it. I'll defiantly be keeping this recipe for the crust in memory for the future. It was just so good.

The whole things was awesome in general. You have to keep in in the fridge or freezer. For me however, living in the Sunshine State where heat is out enemy, I had to keep it in the freezer since it has been killer hot out. If you were to take ice out of the freezer, it would begin to melt. So I thought I'd be safe and put the tart in the freezer so that I wouldn't have to fear that it would melt! Anyways, I really liked this recipe. Everything came together really well and very much enjoyed it! It's typically a very easy dessert, too! You'll love it!


Recipe

For the Crust

2/3 cup cashews, finely chopped
1 egg, slightly beaten
1/4 cup butter
2/3 cup flour
1/4 cup sugar
1 tsp. orange zest

For the Filling

1 cup white chocolate
2 tbsp. butter
2/3 cup heavy cream
1/2 cup fresh blueberries


1. For the crust, preheat oven to 375 degrees degrees. Lightly grease a 9-inch tart pan or 4 small tarts pans. Place all ingredients for the crust into a food processor, and mix until combined well. Press the mixture into prepared tart pan (or 4 small tart pans), using the back of a small spoon (the mixture will have a crumbly texture). Refrigerate crust for 15 minutes. Bake in preheated oven for 25 to 30 minutes. Let crust cool.

2. Break the chocolate into pieces in a large glass bowl placed over a saucepan of boiling water. Stir occasionally until melted. Remove from heat, and stir in the 2 tbsp. butter until melted. Mix in the heavy cream, and whisk until smooth.

3. Spread the blueberries over the tart crust, then pour the chocolate mixture evenly over the top. Chill in refrigerator for at least 3 hours, so that the chocolate sets. Garnish with walnut halves.

Makes 6 to 8 servings.


Tuesday, May 27, 2008

Almond Honey Sticky Buns


Sticky Buns. Just saying it gets people excited. And I was so excited to hear that this weeks recipe for Tuesdays with Dorie was Sticky Buns! I'd been wanting to make it for sometime, but never seemed to get around it. But, this time, I had a reason to do it!

Making these are fairly easy. Just some patients. It's not near as difficult as people come to think of it. The only part I hate is when it comes to flipping the sticky buns out of the pan while it still hot. Reason doing it is so that it won't stick to the pan; Which is will if you don't get it out soon enough! And I'd burnt myself several time doing it. Every time. I always tell myself to be extra careful, but I never seem to do a good job at it since I burn myself anyways. I'm cursed as a klutz I guess.

Anyways, I've instantly fallen in love with this recipe! I moment I took my first bite, I was just completely speechless. It was just to good to be true. The recipe actually called for Pecans, and, normally, I'm a pecan kind of girl. However, this time, I was really wanting almonds. Which, was kind of odd, but I wanted almonds. And I really liked the almonds in this. It turned out so sticky, gooey, and sooo delicious! This is seriously my new favorite recipe.


Recipe

For the Buns

2 pks. (4 tsp.) active dry yeast
1/3 cup warm water
1/3 cup warm milk
3 3/4 cups flour
2 tsp. salt
3 eggs
1/4 cup sugar
12 ounces (3 sticks) butter, room temperature

For the Filling

1/4 cup sugar
3 tbsp. light brown sugar
1 tbsp. ground cinnamon
3 tbsp. butter, room temperature


For the Glaze

1 cup light brown sugar, packed
1/2 cup (1 stick) butter, cut into 4 pieces
1/4 cup honey
1 1/2 cups almonds


1. For the buns, put the yeast, water and milk in the bow of a stand mixer and, using a wooden spoon, stir until the yeast is dissolved. Add the flour and salt, and fit the mixer with the dough hook, if you have one.

2. Toss a kitchen towel over the mixer, covering the bowl as completely as you can - this will help you, the counter and the kitchen floor from being showered in flour. Turn the mixer on and off in a few short pulses, just to dampen the flour, then remove the towel, increase the speed to medium-low and mix for a minutes or two, just until the flour is moistened. At this point, you'll have a fairly dry, shaggy mass

3. Scrape the sides and the bottom of the bowl with a rubber spatula, set the mixer to low and add the eggs, followed by the sugar. Increase the miser speed to medium and beat for about 3 minutes, until the dough forms a ball. Reduce the speed to low and add the butter in 2 tablespoon size chunks, beating until each piece is almost incorporated before adding the next. You'll have a dough that is very soft, almost like a batter. Increase the speed to medium-high and continue beating until the dough pulls away from the sides of the bowl, about 10 minutes.

4. Transfer the dough to a clean bowl, cover with plastic wrap and leave at room temperature until nearly doubled in size, 40 to 60 minutes, depending upon the warmth of your room.

5. Deflate the dough by lifting it up around the edges and letting it fall with a slap into the bowl. Cover the bowl with plastic wrap and put it in the refrigerator. Slap the dough in the bowl every 30 minutes until it stops rising, about 2 hours. Then leave covered dough in the refrigerator to chill overnight.

6. The next day, butter a 9 x 13 inch baking pan and one loaf pan (or you can use two 9 x 13 inch baking pans. This dough is that of a Brioche Loave and the recipe makes 2 loaves, but we only need half of the dough for the sticky buns. You can half the recipe, or use the the other half the dough to make a loaf of Brioche or another pan of sticky buns. It's up to your own choosing).

7. For the glaze, bring the brown sugar, butter and honey to a boil over medium-low heat in a heavy saucepan. Stir frequently to dissolve the sugar. Pour the glaze unto the buttered pan, evening it out as best as you can by tilting the pan or spreading the glaze with a heatproof spatula. Sprinkle over the almonds.

8. On a flour-dusted work surface, roll the chilled dough into a 16-inch square. Using you fingers or a pastry brush, spread 3 tablespoons of butter over the dough. In a small bowl, mix the sugars and cinnamons for the filling. Sprinkle it over the dough, leaving a 1-inch strip base on the sides farthest from you. Starting with the sides nearest you, roll the dough into a cylinder, keeping the roll as tight as you can.


9. With a chef's knife, using a gentle sawing motion, trim just a tiny bit from the ends of the roll if they're very ragged or not well filled, then cut the log into 1-inch thick buns. Should make 15 buns. Fit the buns into the pan cut side down, leaving some space between them. Lightly cover the pan with wax paper and leave in a warm place for about 1 hour and 45 minutes, until doubled in volume.

10. When buns have almost fully risen, preheat the over to 375 degrees. Remove the wax paper and put the pan on a baking sheet lined with parchment paper. Bake the sticky buns for about 30 minutes, or until puffed and gorgeously golden; the glaze will be bubbling away merrily. Pull the pan from the over.


11. The sticky buns MUST be unmolded minutes after they come out of the oven. If you do not have rimmed platter large enough to hold them, use a baking sheet lined with a silicone mat or buttered foil. Be careful - the glaze is super hot and super sticky.


Tuesday, May 20, 2008

Bill's Big Carrot Cake


This months challenge for Tuesdays with Dorie was suppose to be Madelines. However, I do not have one of those pans. And, sadly, I could not find one. I went to a craft store where I normally buy my baking equipment, however, they did not have the madeline pan. I was going to order it, but it would not be in till around Wednesday. It really bummed me out because I really wanted the madelines. But, I did get to make these delicious little cakes!

For the people that didn't have the madeline pan (like myself), we were able to use a recipe that was completed in the past. At first, I was going to make the Gooey Chocolate Cakes. After thinking about it, I really wanted to have the Carrot Cake. I hadn't had one in so long. The last one I had was when I was a little girl! My best friends mother made the best Carrot Cake I had ever had. I've really missed that cake. So, I decided that I was going to make Bills Big Carrot Cake. Instead of making it into a cake, I thought making it into cupcakes would be great. They were so good. Brought back memories. I couldn't believe how moist they were! They were amazing! A total must try I have to say.


Recipe

For Cake

1 1/2 cups all purpose flour
1/2 cup almond flour
2 teaspoons baking powder
2 teaspoons baking soda
2 teaspoons ground cinnamon
3/4 teaspoon salt
3 cups grated carrots
1 cup shredded coconut
1/2 cup plump golden raisins
2 cups sugar
1 cup canola oil
4 large eggs


Cream Cheese Frosting

8 ounces cream cheese, softened
4 tbsp. butter, softened
2 tbsp. sour cream
2 tsp. vanilla extract
2 cups confectioners' sugar


1. Preheat the oven to 325 degrees. Butter three 9-x-2-inch round cake pans, flour the insides, and tap out the excess (Or divide it among muffin cups).

2. In a bowl, whisk the flours, baking powder, baking soda, cinnamon and salt. In another bowl, stir together the carrots, chopped nuts, coconut, and raisins.
Working with a stand mixer, preferably fitted with a paddle attachment, or with a hand mixer in a large bowl, beat the sugar and oil together on a medium speed until smooth.

3. Add the eggs one by one and continue to beat until the batter is even smoother. Reduce the speed to low and add the flour mixture, mixing only until the dry ingredients disappear. Gently mix the chunky ingredients. Divide the batter among the baking pans.

4. Bake for 40-50 minutes, until a thin knife inserted into the centers comes out clean. The cakes will have just started to come away from the sides of the pans. Transfer the cakes to cooling racks and cool for about 5 minutes, then run a knife around the sides of the cakes and unmold them. Invert and cool to room temperature right side up.

5. The cakes can be wrapped airtight and kept at room temperature overnight or frozen for up to 2 months.

6. For the frosting, beat cream cheese, butter and sour cream in a medium bowl. Add the vanilla and the confectioners' sugar and mix until smooth. Cool cake completely before frosting. If desired, sprinkle top of cake with chopped nuts and/or sprinkles.


Tuesday, May 6, 2008

Peanut Butter Torte


Theres been a blogging group that I've really been wanting to join for awhile now. Tuesdays with Dorie. You have to have a book to join this group, and I didn't have the book; Till now. I finally got the book so that I could finally join the group, and I didn't hesitate to join.

It was actually kind of funny. Before I saw what the next challenge was, I looked threw the book to see what all recipes there was. And one of them that really shout out to me was the Peanut Butter Torte. It was just beautiful, and sounded, as well as looked, unbelievable. I knew that I wanted to make it soon; And who knew that'd it'd be one of the first things that'd I'd bake!

This weeks challenge was the Peanut Butter Torte. I knew that I was going to love this because, I mean, come on. It's peanut butter! One of those things that make you happy and certainly bring bake being a kid.

I really liked the crust for this. An Oreo crust is my favorite kind of crust to have on an cake, cheesecake, or anything else that has a crust. I was kind of unsure as to if it'd pair will with the peanut butter. I didn't really think that'd be that good together. But they were! They were excellent together! And I defiantly have gotten my peanut butter dose!


Recipe


1 1/4 cup peanuts, finely chopped
1/4 tsp. instant espresso powder
1/4 tsp. ground cinnamon
Pinch of nutmeg
2 tsp. sugar
1/2 cup mini chocolate chips
24 Oreo cookies, finely crumbled
4 tbsp. (1/2 stick) butter, melted
Pinch of salt
2 1/2 cup heavy cream
1 1/4 cup confectioner sugar, sifted
12 ounces cream cheese, softened
1 1/2 cup peanut butter
2 tbsp. milk
4 ounces chocolate, finely chopped


1. Preheat oven to 350 degrees. Butter a 9-inch springform pan and place on a baking sheet lined with parchment paper. Toss 1/2 cup of the chopped peanuts, the sugar, espresso powder, cinnamon, nutmeg and chocolate chips together in a small bowl. Set aside.

2. Put the Oreo crumbs (you can crumbled in a food processor or a blender), melted butter and salt in a small bowl and stir to combine until moistened. Press the crumbs evenly over the bottom and the sides of a springform pan (they should go up about 2 inches up on the sides). Freeze the crust for 10 minutes.

3. Bake the crust for 10 minutes, then transfer to a rack and let cool completely before filling. With a stand mixer, whip 2 cups on the cream until it holds medium peaks. Beat in 1/4 cup of confectioner sugar. Scrape the cream into a bowl and refrigerate until needed.

4. Wipe out the bowl (no need to wash) and beat in the cream cheese with the remaining 1 cup of confectioner sugar on medium speed until cream cheese is satiny smooth. Beat in the peanut butter, 1/4 cup chopped peanuts and the milk.

5. Using a spatula, gently stir in about one quarter of the whipped cream, just to lighten the mousse. Stir in the crunchy peanut butter mixture, gingerly fold remaining whipped cream.

6. Scrape the mousse into the crust, mounding and smoothing the top. Refrigerate for at least 4 hours, or overnight; cover with plastic wrap as soon as the mousse firms.


To Finish it Up

7. To finish the torte, put the chocolate in a heatproof bowl and set the bowl over a saucepan of simmering water. Leave bowl over the water till it starts to melt. Remove from the saucepan.

8. Bring the remaining 1/2 cup cream to a full boil. Pour the cream over the chocolate and blend until glossy. Pour over torte, smoothing with a metal spatula. Scatter remaining 1/2 cup peanuts over torte and chill until the top is set. Refrigerate until ready to serve.


Wednesday, April 16, 2008

Raisin Nut Granola


Aside from having cereal for breakfast, granola is one of my favorite food to have for breakfast. And I've finally gotten around to posting about this; My favorite granola. It's such a great breakfast food. Gives you plenty of energy to start off your day, and, the good perk about it is; its great for you! But, I would say, that making it homemade is the way to go. I don't really enjoy the store bought granola.

I had one experience when I thought about buying a store bought brand... Me being me, I look at the nutritional facts all the time. I try to make sure what it is I'm buying is actually good for you (I think this habit is rubbing off on my little brother; He now points out whats on the nutrition label). I forget what brand of granola this one I look at, for I'm not to familiar with the different kinds of brands, but I kid you not; This granola was loaded with 40g of sugar!! That'd cause a diabetic to drop down in a heart beat!

It just shocked me. I feel bad for the people who didn't look at the nutritional label. I mean, god... Thats a lot of sugar. And that's just ridiculous! Thats when I decided to just stick to making homemade granola. And this granola; It's killer. This is my favorite granola to make. I totally go bonkers for it, and I've even gotten my boyfriend into it (who is trying to eat more healthy..). A lot of the time, I just eat this plain. I don't usually add milk to it. From time to time, when I've been wanting milk, I'll add a little. But I think it's great just as it.

I'll even make parfaits with this. With some yogurt, or, make caramlized bananas with granola. Either ways, its great. And my dad is crazy for this stuff. He'll usually have some before working out. My mom however... She's not a breakfast eater. Which I tell her is bad!! But not that she listens...

"The most important meal of the day, lalalala, yay!" - Spongebob

Listen to Spongebob people!


Recipe

3 cups rolled oats
1 cup pecans, chopped
1 cup cashews, chopped
1/2 cup shredded sweet coconut
1/4 cup plus 2 tablespoons dark brown sugar
1/4 cup plus 2 tablespoons maple syrup
1/4 cup honey
3/4 teaspoon salt
2 tsp. cinnamon
1 tsp. vanilla
1 cup raisins


1. Preheat oven to 250 degrees.

2. In a large bowl, combine the oats, nuts, coconut, and brown sugar. In a separate bowl, combine maple syrup, honey, and salt. Combine both mixtures and pour onto 2 sheet pans. Bake for 1 hour and 15 minutes, stirring every 15 minutes to achieve an even color.

3. Remove from oven and transfer into a large bowl. Add raisins and mix until evenly distributed. Store at room temperature for up to a week.


Tuesday, April 15, 2008

Pecan Crunch Granola Bars


So, I've seen plenty of granola bar recipes floating around on several websites, that I finally decided to make my own granola bars. My dad was especially happy about this; Being that these were going to be homemade granola bars. He doesn't like anything store bought. He likes anything that is homemade and thats the way he likes it. So he was especially happy about this.

I originally wanted to have dried blueberries in these, however, I could not find any in the store, and I didn't have the time or the patients to make my own dried blueberries. I wanted to make granola bars today. And I had to make granola bars with my favorite nut; Pecans! In the end, it was much better that I used raisins instead of blueberries. I have a feeling that the blueberries the pecans wouldn't have made a good pair. With the cinnamon, everything just came together wonderfully.

One tip I have when making these; LET THEM COOL! If you do not let them cool completely, they will fall apart on you. Then you would had destroyed a beautiful creation.


Recipe

2 cups rolled oats
1/2 cup sunflower seeds
1/4 cup wheat germ
1/4 cup shredded coconut
1 cup pecans, chopped into little pieces
1/2 cup honey
1/4 cup brown sugar, packed
2 tbsp. butter, melted
2 tsp. cinnamon
1 tsp. salt
2 tsp. vanilla
1 cup dried raisins (or any dried fruit)


1. Butter a 9 by 9-inch glass baking dish and set aside. Preheat the oven to 350 degrees F.

2. Spread the oats, sunflower seeds, almonds, and wheat germ onto a half-sheet pan. Place in the oven and toast for 15 minutes to toast.

3. While thats going, combine the honey, brown sugar, butter, cinnamon, extract and salt in a medium saucepan over medium heat. Cook just until the brown sugar has completely dissolved.

4. Once the oat mixture is done, remove it from the oven and reduce the heat to 300 degrees. Immediately add the oat mixture to the liquid mixture, add the dried fruit and coconut, and stir to combine.

5. Turn mixture out into the prepared baking dish and press down, evenly distributing the mixture in the dish and place in the oven to bake for about 35 minutes. Remove from the oven and allow to cool completely. Cut into squares and wrap up for snacks or store in an airtight container for up to a week.


Thursday, April 10, 2008

Peanut Butter Chocolate Chunk Blondies


You know, I think that maybe no one would ever have guessed that I liked blondies more than I liked brownies. Since I make brownies all the time, one would most likely think that I loved brownies more than a decadent, lushes blondie. Oh how wrong people would be if they were to believe such a thing...

I'm a serious addict when it comes to blondies. One of the reasons that I don't make them that often is because, if I have the chance to eat the entire thing of baked blondie, I will... No joke. Not it one day, but I'll defiantly be snatchy when it comes to my blondies. If I see someone taking one, I'll be right behind them as they walk, staring them down with evil eyes for they had taken one of my precious blondies! Haha, ok, that may seem crazy, and I'm not to the extreme of such, but I really do love blondies and I will eat loads and loads of them, which, is the reason why I don't make them all the time.

With brownies, being that they are so extremely rich, that just having one is far enough for me. It's to rich that I can't extend even just one. With blondies however, I never get tired of the chewy, melt in your mouth taste. I find that any blondie taste amazing and I also find it hard for there to be a 'bad' blondie. Same as how I feel about brownies. I don't think there is really a 'bad' brownie; Not that I've experienced yet.

I find that blondies are best with pecans, chocolate, and coconut. I think the combination is just wonderful and amazing together. I think the combination of pecans, chocolate, and coconut alone is a great combination (as you will seem to find out...)! But, when you put that combination into a blondie; Ohh! It's just to die for. But, you'll die of true bliss happiness if you take a big, huge scoop of ice cream and top it on a blondie. Just to die for.


Recipe

1 1/2 cups all-purpose flour
1 tsp. baking powder
1 tsp. cinnamon
1/4 tsp. salt
1/2 cup butter, softened
1/2 cup peanut butter
1 1/4 cups firmly packed light brown sugar
2 large eggs
1 1/2 tsp. vanilla
1 cup semi-sweet chocolate, chopped
1/2 cup pecans, chopped
1/2 cup flaked coconut


1. Preheat the oven to 350. Butter and flour a 9" x 12" baking pan. In a medium bowl, whisk or sift together the flour, baking powder, cinnamon and salt. Set aside.

2. In another bowl, mix the butter and peanut butter until fluffy. Add the sugar and mix until combined. Add the eggs and vanilla and mix until combined. With the mixer running on low speed, slowly add the dry ingredients, mixing until just combined.

3. Using a spatula or wooden spoon, fold in the chocolate, peanuts and coconut. Bake for about 30 minutes, or until the blondies have just begun to brown around the edges. Allow them to cool completely before cutting.


Tuesday, February 26, 2008

Heath Bar Cookies


I think I've become addicted to cookies. I really never liked cookies to much till a few months ago. I was always able to pass off a cookies; But now, I can't! I've just come to absolutely love cookies! And I really wanted to make cookies these afternoon; Reaaalllly wanted to make some. But I wanted to make a cookie I hadn't made yet.

I've always been a pretty big fan of the Heath Bars and I usually always have the heath bar toffee pieces or heath bars somewhere floating in the pantry. And I happened to have some in there today. So I decided to make a cookie with the heath bar toffee pieces. I really wanted to add walnuts to this, however, sadly, I had none. It would had been so much better if I had walnuts!

But the cookies came out so good! They were very soft cookies; Really, really soft actually. Which I really liked. You can had 2 minutes to the baking time to have cookies that aren't so soft; But I these cookies are a must try.


Recipe

2 1/2 cups flour
1 tsp. salt
1 tsp. baking soda
1 cup (2 sticks) butter, softened
1 1/2 cups sugar
2 eggs
1 tsp. vanilla
1 1/2 cups chopped Heath Bar pieces (toffee bites)
1/2 cup walnuts (optional)


1. Preheat oven to 350 degrees. Sift flour, salt ad baking soda in a bowl. Set aside. In a separate bowl, combine the heath bar pieces and walnuts. set aside.

2. Cream butter until fluffy. Add the sugar and continue to beat until light and fluffy. Beat in the eggs, one at a time. Beat well. Add vanilla.

3. Alternatively add the heath bar mixture and the flour mixture, a third at a time, until well blended. Chill the cookie dough for at least 30 minutes. An hour would be better.

4. On a cookie sheet lined with parchment paper, spoon the cookies dough in 1-inch diameter balls. Place 3 inches from each other. These cookies do spread, so be careful.

5. Bake for 10-12 minutes, until edges are just starting to brown. Remove from oven then let cool for a few minutes. Then transfer to wire rack to cool completely.

Makes about 6 dozen cookies

Wednesday, February 13, 2008

Dark Chocolate Coconut Cookies


Ok. So, I've become a huge fan of watching Bobby Flays show 'Throwdown with Bobby Flay.' I love to see all the people he goes up against and the real people out there that can bake and/or cook so good, that it even better than Bobby Flay (And I use to think Bobby Flay was the best!). The latest episode, Bobby Flay had a cookie throwdown against one of New Yorks favorite bakeries; Levain Bakery.

I've seen this little bakery a few times when walking down 74th st., but, I've never gone in to try anything of theirs. I really wish I did now. After seeing this episode of throwdown, I just wanted to kick myself in the butt and tell myself just how dumb I was for never going into they're bakery while I had the chance.

Soon after watching the show, I was on the internet in search for a recipe of they're delicious looking cookies. It took me awhile, but I came across one. Tried it right away, didn't waste time, wanted to have the cookies right away. And oh my lord! They were so sinful, you can tell just by looking at they're size, but, they were so, so, so flippin delicious! It was heaven...

Now, their original cookies were with walnuts instead of pecans, however, I'm a pecan girl. So I replaced the walnuts with pecans. I'll be sure to go to they're bakery next time I'm in New York. I need to try the real things!


Recipe

2 1/2 cup flour
1/2 cup dark cocoa powder
1/4 tsp. baking powder
pinch of salt
2 sticks butter, softened
1 1/4 cup sugar
2 eggs
1 cup semi-sweet chocolate chips
1 cup large pecan pieces
1 1/8 unsweetened shredded coconut


1. Preheat oven to 350 degrees.

2. In a medium bowl, cream the butter and the sugar together until well blended and fluffy. Add the eggs and beat until well incorporated, then beat in cocoa powder.

3. Mix in flour, salt and baking powder until just combined. Gently fold in remaining ingredients.

4. Transfer dough to a clean work surface and gently mix dough by hand to ensure even distribution of ingredients. Divide into 12 equal portions and transfer on a sheet pan with parchment paper.

5. Bake in the oven for 12-15 minutes. Take care not to over bake. Let cool on rack.


Be sure to store in an airtight container!
 
 
Genesis of a Cook
check out Tastespotting