Showing posts with label Baked Goods: Cake. Show all posts

Monday, May 25, 2009

Classic Coffee Cake


For the Topping

16 tbsp butter, cut up
1/2 cup sugar
3/4 cup packed light brown sugar
1 1/2 tsp. ground cinnamon
1/4 tsp. ground nutmeg
1/4 tsp. salt
2 2/3 cups flour

For the Cake

3 cups flour
1 1/4 cups granulated sugar
1 1/2 tsp. baking powder
1/2 tsp. salt
2 eggs
1 cup whole milk
12 tbsp butter, melted
2 tsp. vanilla


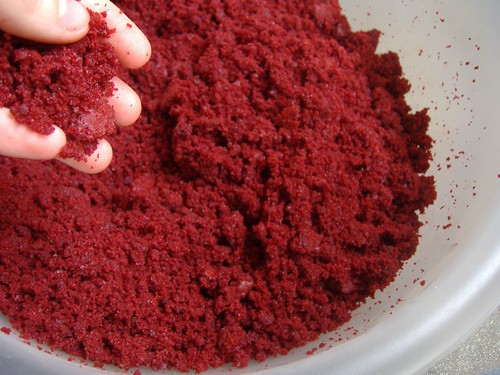
1. For the topping, in a large saucepan, melt the butter over medium heat. Remove pan from heat and add the sugar, brown sugar, cinnamon, nutmeg, and salt. Stir, pressing when necessary, until there are no lumps of sugar. Add the flour and mix until well blended. Set aside.

2. For the cake, preheat oven to 350 degrees. Lightly grease the bottom and sides of a 9 x 13" baking pan.

3. In a large bowl, combine flour, sugar, baking powder, and salt. Whisk until well blended. In a medium bowl, combine the eggs, milk, melted butter, and vanilla. Whisk until well blended.

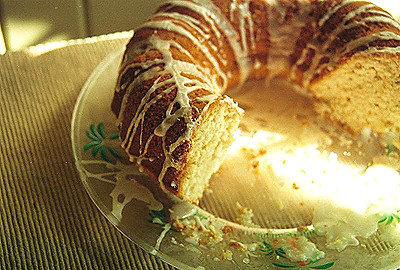
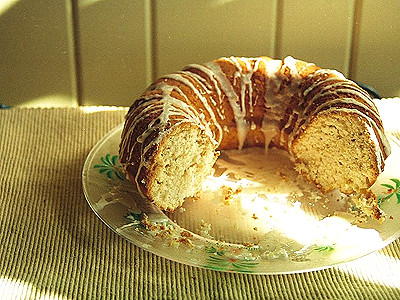
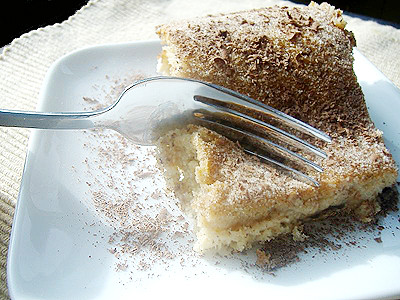
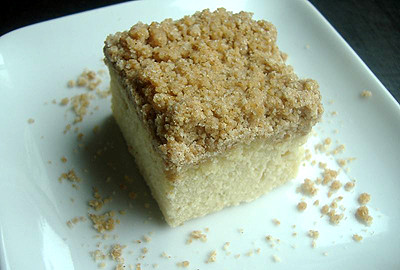
4. Pour the wet ingredients with the dry ingredients and gently stir just until blended. Pour batter into the prepared pan and spread evenly. Break up the topping mixture with your fingers into medium sized pieces and sprinkle evenly over the cake batter to form a generous layer.

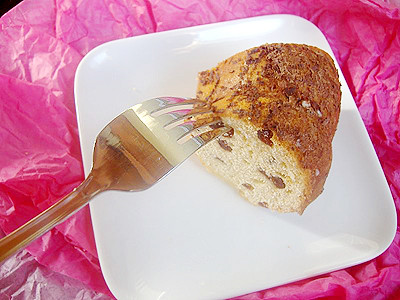
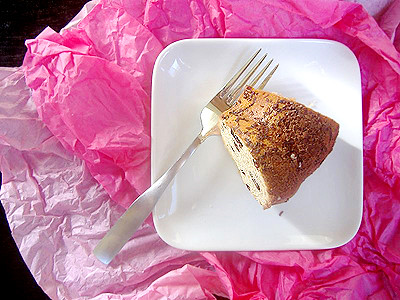
5. Bake until the cake springs back lightly when pressed in the center and a toothpick inserted in the center comes out clean, about 40 minutes. Transfer to a rack to cool. Serve warm or at room temperature.


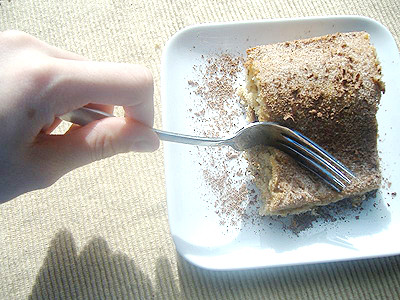
Me and my boyfriend ;3


Saturday, February 28, 2009

Chocolate Valentino


One of my favorite Daring Bakers Challenge, I must admit. Really simple, and really good. That's all I really have to say.


Recipe

February’s challenge is a Flourless Chocolate Cake, Chocolate Valentino, inspired by Malaysia’s “most flamboyant food ambassador”, Chef Wan. Recipe comes from Sweet Treats by Chef Wan

What we Want You to Do:

-Use the following recipe

-Serve with - The original recipe calls for the cake to be served with whipping cream. BUT we decided to make this more of a challenge and ask you to make your own Ice Cream – a first for the DBrs. You can choose any flavour you want and any recipe although we provided two vanilla ice cream recipes. But we are giving you a little freedom here and will allow whipped cream as a topping as well or of course non-dairy whip. Be as creative as you want with your topping. Any fruit puree or sauce would be lovely with this cake.

- Use your favorite chocolate – the finished cake will taste exactly like the chocolate you use. Be creative with your chocolate, if you like a sweeter cake use milk chocolate or a combination of the semisweet and milk chocolate. If you like bittersweet chocolate use that and add sweetness by mixing the semi sweet with bittersweet. If you are daring, try white chocolate. (Dharm used all bittersweet and Wendy used a half bitter/half semi sweet chocolate).

- A higher cocoa percentage increases the bitterness of the chocolate.

-Equipment - it is optional to use a heart shaped pan. For a real Valentino, bake it in a heart shaped pan or cut it out into a heart shape. You may use any shape pan that gives you an area of 50” - 6x8 or 7x7. An 8” spring form pan works with great results as do smaller pans or ramekins.

-An instant read thermometer highly recommended.

Note on recipe - the recipe consists of 3 simple ingredients and how you interpret them is part of the challenge. The simplicity of this recipe gives credit to the ingredients much in the same way of French baguette.

-This recipe comes together very quickly with a hand mixer.

-This is a very decadent cake that will sink a little as it cools but will still hold its shape.

-Very dense and fudgy cake that tastes divine.

-The top forms a light crust kind of like a brownie

Posting Date: February 28, 2009

Printable Recipe:

Chocolate Valentino
Preparation Time: 20 minutes
16 ounces (1 pound) (454 grams) of semisweet chocolate, roughly chopped
½ cup (1 stick) plus 2 tablespoons (146 grams total) of unsalted butter
5 large eggs separated

1. Put chocolate and butter in a heatproof bowl and set over a pan of simmering water (the bottom of the bowl should not touch the water) and melt, stirring often.
2. While your chocolate butter mixture is cooling. Butter your pan and line with a parchment circle then butter the parchment.
3. Separate the egg yolks from the egg whites and put into two medium/large bowls.
4. Whip the egg whites in a medium/large grease free bowl until stiff peaks are formed (do not over-whip or the cake will be dry).
5. With the same beater beat the egg yolks together.
6. Add the egg yolks to the cooled chocolate.
7. Fold in 1/3 of the egg whites into the chocolate mixture and follow with remaining 2/3rds. Fold until no white remains without deflating the batter. {link of folding demonstration}
8. Pour batter into prepared pan, the batter should fill the pan 3/4 of the way full, and bake at 375F/190C
9. Bake for 25 minutes until an instant read thermometer reads 140F/60C.
Note – If you do not have an instant read thermometer, the top of the cake will look similar to a brownie and a cake tester will appear wet.
10. Cool cake on a rack for 10 minutes then unmold.


Tuesday, October 7, 2008

Pineapple Bundt Cake


Before summer officially ends in my book and I let the wonderful fall season roll on threw, I had to bake something that had a summer sense to it. The heat is still already looming around in Florida (no surprise), so it really does feel like it's summer still (which, honestly, kind of sucks).

My boyfriends has been wanting me to bake a Pineapple Cake forever. I just haven't had time for the past couple weeks. I've been so busy that I never have to much time for myself, sadly. School is getting pretty hectic and it doesn't help that I'm attending night school as well. So I'm always at school.

Since I had a little time at hand and I too was craving sweets (since I've been on the school diet!!), I finally came around to bake the Pineapple Cake that someone has been nagging at me to bake. I didn't do the traditional Pineapple Cake, I guess you could say. Honestly, I don't like the idea of Pineapple on top. I much preferred the idea of the Pineapple being inside the cake. So I used shredded pineapple.

The cake was dense, but moist and sweet. Really great with morning tea (which is what I've been doing for the past couple morning). A great way to end the summer and let in the flavors of fall crawl in.


Recipe

Pineapple Cake

2 2/3 cups all-purpose flour
1 tsp. baking powder
1 cup butter, softened
1 1/2 cups sugar
1 tsp. cinnamon
1 tsp. salt
2 eggs, lightly beaten
2 egg whites
2 tsp. lemon extract
1 (16 ounce) can crushed pineapple, undrained

Glaze

1 cup powdered sugar
1 tbsp. milk
1/2 tsp. lemon extract


1. Preheat oven to 350 degrees. Grease a 10 inch bundt cake pan.

2. In a mixing bowl, cream butter and sugar until soft. Add cinnamon and salt. Add eggs, egg whites. Add lemon extract. Beat together until fluffy.

3. In another bowl, combine flour and baking powder. Slowly, combine wet ingredients with dry ingredients. Stir in pineapple. Pour into greased bundt pan.

4. Bake at for 55-60 minutes. Cool in pan 10 minutes before removing to a wire rack. Cool. For the glaze, get a small bowl. Sift the powdered sugar. Add milk and lemon extract. If needed more, add in small drops (1/4 to 1/2 tsp. drops). Drizzle over cake.


Monday, September 29, 2008

Chocolate Pistachio Cake


Remembering birthday is something most of my family does not seem to know how to do, for it seemed everyone almost forgot about my Nana's birthday. My dad is the worst at remembering birthday. Sadly, he'll forget mine, my moms and my brothers from time to time. I try my best not to forget birthdays. I feel horrible if I forget one. I feel as though that I need to have they're birthday to be a great day!

My Nana's didn't want much for her birthday. She really just wants to ignore the fact that it is her birthday. I think anyone that gets older and older doesn't want to get older and older, you know?

Any who, all she wanted to do was have a family get together. Which included her sisters, my grandfathers brothers, her son (my dad) and his family, and a handful of her friends. I adore my Nana, really, I do. So I wanted to make a nice cake that I know she'd like. She loves chocolate (any woman would) and she's a big pistachio eater. She always has some around the house, ready to be snacked on.

When I came across this recipe on Jens blog at use real butter, it was perfect! It was absolutely perfect for her! And she agreed. She loved it. As well as everyone else. It has a nice salty addiction to it (and we all love salt) and it was just an overall huge hit with everyone. Not to sweet, soft and had enough in each bite.


Recipe

Chocolate cake
Makes one 9×3-inch round cake. Double this recipe to get a 4 layer cake.

1 1/2 cups plus 1 tbsp. all-purpose flour
6 tbsp. unsweetened cocoa
1 tsp. baking soda
1 tsp. salt
1/2 cup butter, plus extra for greasing
2 oz unsweetened chocolate, broken into pieces
1 cup sugar
2 eggs
1 tsp. vanilla extract
1 tsp. red raspberry vinegar
1 cup water

Pistachio Vanilla Buttercream

8 oz egg whites
16 oz sugar
1 lb butter, room temperature
2 tsp vanilla extract
1.5 cups shelled pistachios

Ganache

6 tbsps heavy cream
4 oz semi-sweet chocolate, chopped

1. Preheat oven to 325 degrees. Combine flour, cocoa, baking soda, and salt in a sifter and sift onto wax paper or a bowl and set aside. Coat 2 9×3-inch round pans with butter on the base and sides. Place circular parchment in the bottom and brush with more butter.

2. Melt the unsweetened chocolate over water bath or in the microwave (be suer to keep stirring to prevent burning). Set aside.

3. Beat sugar and butter together in mixer fitted with paddle. Beat on medium for 1 minute, then on high for 1 minute. Scrape down the sides and beat on high for 15 seconds after the addition of each egg. Add vanilla and vinegar and beat on high for 20 seconds. Add the melted chocolate and mix on low for 10 seconds. Scrape down the sides of the bowl.

4. Boil water and operate the mixer on low while adding the sifted dry ingredients. Mix for 10 seconds. Carefully add the boiling water and continue to mix on low for 10 seconds. Increase speed to medium and beat for 5 seconds. Pour batter into pans.

5. Bake for about 45-50 minutes or until toothpick test is clean. Remove from oven and allow cakes to cool in pans for 20 minutes. Remove the cakes from the pans and refrigerate for at least 1 hour.


1. For the pistachio and vanilla buttercreams, combine egg whites and sugar in a mixing bowl. Whisk constantly over a bain marie until 140F is reached. Place on mixer with balloon whisk and whip until stiff. Turn down whip speed to 3rd and whip until cool to the touch (this takes a while - should be cooler than your hand).

2. Change to a paddle and gradually add soft butter by tablespoon pieces. Mix to emulsify. Once desired consistency has been reached, add vanilla. Blanche the pistachios in boiling water for 3 minutes, then drain and place the nuts in a cotton towel. Fold the towel over the nuts and rub vigorously to loosen and remove the skins. Toast the skinned pistachios on a baking sheet for 15 minutes at 325°F. Remove from oven and allow to cool to room temperature. Reserve a few whole ones for garnish. Finely chop the remaining pistachios.

3. Take 2/3 of the buttercream frosting and fold in the pistachios. Save the remaining third of the buttercream for frosting the cake.

4. For the ganache, bring the cream to a boil and remove from heat immediately. Pour over the chocolate (making sure to cover all of the chocolate) and let sit for a minute. Stir until the ganache is smooth and evenly mixed. Put in the refrigerator until firm enough for piping.


To assembly
, cut off the dome tops of the cakes. Slice your cakes into two layers. Place the base of one cake on the serving plate or a cake board. Spread 1/3 of the pistachio buttercream over the layer. Repeat twice more. Top the cake with the other base slice (upside down, so base it facing up). Coat the sides with the vanilla buttercream (a thin layer spread around the entire cake). Then frost the entire cake with the rest of the vanilla buttercream. Decorate the cake with chocolate ganache however you like and garnish with whole pistachios and/or any extra chopped pistachios. Serve at room temperature.


Monday, September 8, 2008

Orange Cranberry Bundt Cake


Football is back. Honestly, I'm not a huge fan of football. I'm more of a baseball kind of girls. However, here at my house, football is everything. My father is obsessed with football and has since he was in high school to college. You'll definitely know if footballs on or not with him here. You'll hear him screaming at the top of his lungs going "Go, go, go, go!!!" or "What was that!?", and of course, "Yea!!!!!!"

We're FSU fans here. Go Seminoles. I usually watch the big games with my family when they're on. It can be pretty entertaining. Especially when you see the coaches faces turn red from anger. Or when the ref just does a horrible call. I get a kick out of it. I find it funny to see how everyone reacts. It's usually the same. Everyone yells.

Anyways, for the fact that football is coming back, my dad decided to have a family BBQ on Saturday. I wanted to do something to. So I baked. I was going to do a Carrot Cake, but then I came across this recipe over at Culinary Concoctions by Peabody and decided to try it out.

I've never never gotten a bad recipe from her site. All her recipes are fantastic and they never let me down. They're all just amazing. And so was this. I decided to switch the dates that she used and added dried cranberries instead. The smell of is was lovely. Moist and dense and so mouth watering delicious.


Recipe

For the Cake

1/2 cup unsalted butter, at room temperature
1 cup sugar
2 large egg
Zest of 1 medium orange
1 tsp. vanilla
2 cups all-purpose flour
1/2 tsp. baking soda
1/2 tsp. salt
2/3 cup buttermilk
1 cup dried cranberries

For the Glaze

1 cup powder sugar
1/2 cup freshly squeezed orange juice
1 Tbsp. grated orange zest


1. Preheat oven to 350 degrees. Grease and lightly flour a 10-12 cup Bundt pan.

2. Using a mixer fitted with a paddle attachment, cream the butter on medium-high speed about 1 minutes, until fluffy. Add the sugar and cream on medium-high speed about 30 seconds. Add the eggs all at once and continue creaming for one minute. Add the orange zest and vanilla; beat until combined.

3. Add about half the flour, the baking soda, and the salt; mix on medium-low speed until just combined. Add the buttermilk and mix on medium-low speed until just combined. Add the rest of the flour and mix until just combined. Gently stir in the dates.

4. Spoon the batter evenly into the pan. Bake for 40-45 minutes. Let cake cool in the pan about 10 minutes. Invert it onto a rack and cool at least 20 minutes before glazing. Transfer cake to a serving plate.

5. For the glaze, combine the ingredients together and whisk until it becomes a creamy orange color. Pour glaze over cake.Serve at room temperature.


Wednesday, September 3, 2008

Chocolate Chunk Coffee Cake


During this time of the year, when summer is slowing starting to traverse into fall, that I start to get tired of eating anything light and want something a little more heavy. Not so heavy that I feel like I'll gain weight from eating, but heavy enough to where I feel more satisfied about what I just ate. Having to avoid all the sweet I did, it gets rather depressing.

I love eating coffee cake. But its something that I don't care to eat till fall and winter are here. It like how I don't really enjoy pie unless it's fall, or smoothies unless it's summer. I'm pretty picky as to what I eat and when in the year I eat it. It's just how I've been raised I guess.

I didn't come up with this recipe. I found this fabulous recipe from Pete at pete-bakes.com. The only different that I did from his was I did chocolate chunks aside from chocolate chips. Chocolate chunks just sounded better to me at the moment. I also added nutmeg to the cake batter and salt. I thought it would give it more of a tasty kick.

The cake was very enjoyable. The was chocolate chunks to every bite (which I really liked!!). It turned out so light and fluffy and just melt in your mouth delicious. It made a very delicious breakfast with coffee.


Recipe

1/2 cup butter
1 1/2 cups sugar
1/3 cup brown sugar
2 eggs
1 cup sour cream
1 tsp. vanilla
1 tsp. water
2 cups flour
1 1/2 tsp. baking powder
1 tsp. baking soda
1 tsp. cinnamon
1 tsp. salt
1/2 tsp. nutmeg
3/4 cup chocolate chunks


1. In a small bowl, mix 1/2 cup white sugar, brown sugar, cinnamon, chocolate chunks. Set aside.

2. In a large bowl, cream butter, 1 cup white sugar, and eggs. Add the sour cream, vanilla and water.

3. In a separate bowl, mix flour, baking powder, soda, nutmeg and salt. Combine into the wet ingredients.

4. Pour half of the batter into a greased and floured 9×13 inch pan. Sprinkle half of the cinnamon, sugar and chocolate chip mixture on the batter. Pour in the rest of the batter and top with the rest of the cinnamon, sugar and chip mix.

5. Bake at 350 degrees for 30 minutes. Let it cool for at least an hour before cutting into it, or the chocolate chips will be too melty and it will be hard to get out of the pan.


Monday, August 4, 2008

Strawberry Almond Cake


Sadly, I was unable to do this months Daring Bakers Challenge. Which, really, I was so anger at myself for never getting around to it. By the time I actually had time to do anything, this month was already over. I couldn't believe just how fast this summer has been going! And this months challenge was one that I really wanted to do! It look really good! I know I'm going to bake it sometime soon when I have time.

Though I haven't had time to really bake much, I had enough time to make a quick cake. Not a difficult cake (though, I'd really want to). We still have so many strawberries that I still don't now what else to do with them. I knew that I wanted to use strawberries, but I wanted a nut of some sort. An almond cake sounds really good with strawberries. I also used the strawberry filling I used for my Strawberry Cream Cake, which was really good with the Almond Cake.

The cake itself was amazing. The texture was just right. Soft and light, nice and moist. First bite, you just have to close your eyes and savor the taste. It's just so luscious. The strawberry filling and the strawberry frosting with the cake was really good. I might ever try blueberries or blackberries next time. That sounds really good!!


Recipe

Cake

3/4 cup cake flour
1/4 cup yellow cornmeal
1 tsp. baking powder
1/2 cup butter, softened
1/4 cup almond paste, cut into pieces
1 1/4 cups confectioners' sugar
1/2 tsp. vanilla
2 eggs
4 egg yolks
1/4 cup sour cream

Strawberry Filling

2 quarts fresh strawberries, washed, dried, and stemmed
4–6 tbsp. sugar
2 tbsp. kirsch
Pinch of salt

Strawberry Frosting


8 ounces strawberries
1/4 cup sugar
4 tbsp. butter, softened
3 to 4 cups powdered sugar


1. For the cake,Preheat oven to 325 degrees. Grease and flour round 8-inch cake pan. In a medium bowl, whisk together the cornmeal, cake flour and baking powder and set aside.

2. Using a stand mixer with a paddle attachment, beat the butter and almond paste on high speed until smooth, about 5 minutes. Reduce speed to low and slowly add confectioners' sugar. Mix until thoroughly combined and light and fluffy.

3. Raise speed to high and add the vanilla extract, whole eggs and egg yolks, 1 at a time. Mix until well combined. Reduce speed to medium and add the sour cream and dry ingredients and mix until just incorporated.

4. Pour the batter into the prepared cake pan and smooth the surface with a spatula. Bake in the lower third of the oven for 35 minutes, or until the cake is golden and pulls away from the sides of the pan. Transfer pan to a wire rack and let cool. Remove from pan.

5. For the strawberry filling, Halve 24 of best-looking berries and reserve. Quarter remaining berries; toss with 4 to 6 tablespoons sugar (depending on sweetness of berries) in medium bowl and let sit 1 hour, stirring occasionally. Strain juices from berries and reserve (you should have about 1/2 cup). In a food processor fitted with metal blade, give macerated berries five 1-second pulses (you should have about 1 1/2 cups). In small saucepan over medium-high heat, simmer reserved juices and Kirsch until syrupy and reduced to about 3 tablespoons, 3 to 5 minutes. Pour reduced syrup over macerated berries, add pinch of salt, and toss to combine. Set aside until cake is cooled.

6. For Strawberry Frosting, first wash the strawberries well, then hull and slice. Put the slices into a bowl and sprinkle sugar onto and toss well. Cover and refrigerate for at least 2 hours or overnight. Drain excess juices from strawberries. Crush and mash strawberries. Beat butter until smooth. Add 3 cups of powdered sugar and the crushed strawberries. Slowly beat until sugar is blended in, then beat on medium speed until fluffy. Add more powdered sugar as needed until frosting is a nice spreading consistency. Frost the cooled cake and decorate with sliced strawberries.

7. To assemble the cake, slice cake into two even layers. Place bottom layer on cardboard round or cake plate and arrange ring of 20 strawberry halves, cut sides down and stem ends facing out, around perimeter of cake layer. Pour about 1/2 cup of pureed berry mixture in center, then spread to cover any exposed cake. Gently spread about 1 t 1 1/2 cup of Strawberry Frosting over berry layer, leaving 1/2-inch border from edge. Place top layer on cake and press down gently. Spread Strawberry Frosting on top layer. Decorate as you want. Serve, or chill for up to 4 hours.


Wednesday, July 2, 2008

Strawberry Cream Cake


Seems likes it's getting muggier and muggier here in Florida each day. The non stop pouring rain and the rising heat is killer. I love and hate Florida. This being one of the reasons I hate Florida.

Since it's been so very hot out, I haven't really been baking as much as I use to. I mean, why would I stand around a hot oven and sweat my butt off even more than I already am? It also doesn't help that our air conditioner seriously sucks. I swear out conditioner literally loathes us. We've tried so many times to get it fixed, yet, it always decides to brake down and not work. It's always pms-ing!

But, I wasn't going to let the heat keep me from baking for to long. I've been really craving cake lately, which is strange because I don't exactly love cake. I like it, but it's not something I necessarily love. But I wanted it. And the heat was not going to keep me from making cake, no I was not. My mom found a recipe awhile back for a Strawberry Cream Cake in Cooks Illustrated that I knew I wanted to make eventually, but after seeing Lisa's, Pittsburgh Needs Eated, post on the cake, I decided that this was what I was going to make.

The cake turned out excellent! One of the best I've had, seriously. It was so light and so tasty. I couldn't help but get another slice. It was so good. It's a great light and refreshing cake for the summer!


Recipe

Cake

1 1/4 cups flour
1 1/2 tsp. baking powder
1/4 tsp. salt
1 cup sugar
5 large eggs (2 whole and 3 separated)
6 tbsp. butter , melted
2 tbsp. water
2 tsp. vanilla

Strawberry Filling

2 quarts fresh strawberries, washed, dried, and stemmed
4–6 tbsp. sugar
2 tbsp. kirsch
Pinch of salt

Whipped Cream

8 ounces cream cheese, room temperature
1/2 cup sugar
1 tsp. vanilla
1/8 tsp. salt
2 cups heavy cream


1. For the cake,Preheat oven to 325 degrees. Grease and flour round 9 by 2-inch cake pan or 9-inch springform pan and line with parchment paper. Whisk flour, baking powder, salt, and all but 3 tablespoons sugar in mixing bowl. Whisk in 2 whole eggs and 3 yolks (reserving whites), butter, water, and vanilla and whisk until smooth.

2. In clean bowl of standing mixer fitted with whisk attachment, beat remaining 3 egg whites at medium-low speed until frothy, 1 to 2 minutes. With machine running, gradually add remaining 3 tablespoons sugar, increase speed to medium-high, and beat until soft peaks form, 60 to 90 seconds.

3. Stir one-third of whites into batter to lighten; add remaining whites and gently fold into batter until no white streaks remain. Pour batter into prepared pan and bake until toothpick or wooden skewer inserted into center of cake comes out clean, 30 to 40 minutes. Cool in pan 10 minutes, then cool completely for about 2 hours.

4. For the strawberry filling, Halve 24 of best-looking berries and reserve. Quarter remaining berries; toss with 4 to 6 tablespoons sugar (depending on sweetness of berries) in medium bowl and let sit 1 hour, stirring occasionally. Strain juices from berries and reserve (you should have about 1/2 cup). In a food processor fitted with metal blade, give macerated berries five 1-second pulses (you should have about 1 1/2 cups). In small saucepan over medium-high heat, simmer reserved juices and Kirsch until syrupy and reduced to about 3 tablespoons, 3 to 5 minutes. Pour reduced syrup over macerated berries, add pinch of salt, and toss to combine. Set aside until cake is cooled.

5. For the whipped cream, place cream cheese, sugar, vanilla, and salt in bowl of standing mixer fitted with whisk attachment. Whisk at medium-high speed until light and fluffy, 1 to 2 minutes, scraping down bowl with rubber spatula as needed. Reduce speed to low and add heavy cream in slow, steady stream; when almost fully combined, increase speed to medium-high and beat until mixture holds stiff peaks, 2 to 2 1/2 minutes more, scraping bowl as needed.

6. To assemble the cake, slice cake into three even layers (or two like me). Place bottom layer on cardboard round or cake plate and arrange ring of 20 strawberry halves, cut sides down and stem ends facing out, around perimeter of cake layer. Pour one half of pureed berry mixture (about 3/4 cup) in center, then spread to cover any exposed cake. Gently spread about one-third of whipped cream (about 1 1/2 cups) over berry layer, leaving 1/2-inch border from edge. Place middle cake layer on top and press down gently (whipped cream layer should become flush with cake edge). Repeat with 20 additional strawberry halves, remaining berry mixture, and half of remaining whipped cream; gently press last cake layer on top. Spread remaining whipped cream over top; decorate with remaining cut strawberries. Serve, or chill for up to 4 hours.


Sunday, May 25, 2008

Red Velvet Cupcake Bites


Nope, those are not what you may think they are. They are not cupcakes. They are in fact the red velvet balls that I made at one point. But, they are decorated to look like they are cute, tiny little cupcakes!

I can not take credit for these adorable little cute cupcake bites. I got the idea from the creative genius at bakerella. The idea's she comes up with always leave me speechless. Everything she makes are so cute and so beautifully done. Everything always amazes me. I came across this idea from here when she posted her here. I defiantly saved it to my memory as soon as I saw it. I wanted to make them soon!

It made me so excited when I was told a few people at my moms work wanted me to make the red velvet cake balls I made one time. I couldn't wait to make these. They were so much fun to make and so cute! And of course, they were soo good!


Recipe

1 box cake mix (cook as directed on box for 13 X 9 cake)
1 can cream cheese frosting (16 oz.)
1 package chocolate bark (or candy melts for cupcake bottom)
Colored Candy Melts (for cupcake top)
Candy Cup Mold
Sprinkles and m&ms for decoration


1. After cake is cooked and cooled completely, crumble into large bowl. (The texture should be fine/fluffy)

2. Using the back of a large spoon, mix thoroughly with 1 can cream cheese frosting. (It may be easier to use fingers to mix together, but be warned it will get messy.)

3. Roll mixture into quarter size balls (make sure they are smaller in diameter than that of your candy mold) and lay on wax paper covered cookie sheet.

4. Chill in the freezer for a few minutes, until they are slightly firm, not frozen.

5. Melt chocolate bark and candy melts in microwave per directions on package.

6. Using a spoon or squeeze bottle, fill each mold cavity with a small amount of chocolate. Sorry, I didn't think to measure how much. But as soon as you fill the cavity, go ahead and place one of your rolled balls into it. Carefully push it down until the force causes the chocolate to push up and fill in around the sides of the ball. You may have to experiment with a couple to get the right amount. Stop pushing once the chocolate reaches the top edge.

7. Place the mold tray filled with cupcakes in the freezer for just a few minutes to let the chocolate set. Remove and then gently pull up on the cake ball top to release from candy mold.

8. Now, holding the bottom of the cupcake, dip the top in another color of melted chocolate.

9. Decorate.


Tuesday, May 20, 2008

Bill's Big Carrot Cake


This months challenge for Tuesdays with Dorie was suppose to be Madelines. However, I do not have one of those pans. And, sadly, I could not find one. I went to a craft store where I normally buy my baking equipment, however, they did not have the madeline pan. I was going to order it, but it would not be in till around Wednesday. It really bummed me out because I really wanted the madelines. But, I did get to make these delicious little cakes!

For the people that didn't have the madeline pan (like myself), we were able to use a recipe that was completed in the past. At first, I was going to make the Gooey Chocolate Cakes. After thinking about it, I really wanted to have the Carrot Cake. I hadn't had one in so long. The last one I had was when I was a little girl! My best friends mother made the best Carrot Cake I had ever had. I've really missed that cake. So, I decided that I was going to make Bills Big Carrot Cake. Instead of making it into a cake, I thought making it into cupcakes would be great. They were so good. Brought back memories. I couldn't believe how moist they were! They were amazing! A total must try I have to say.


Recipe

For Cake

1 1/2 cups all purpose flour
1/2 cup almond flour
2 teaspoons baking powder
2 teaspoons baking soda
2 teaspoons ground cinnamon
3/4 teaspoon salt
3 cups grated carrots
1 cup shredded coconut
1/2 cup plump golden raisins
2 cups sugar
1 cup canola oil
4 large eggs


Cream Cheese Frosting

8 ounces cream cheese, softened
4 tbsp. butter, softened
2 tbsp. sour cream
2 tsp. vanilla extract
2 cups confectioners' sugar


1. Preheat the oven to 325 degrees. Butter three 9-x-2-inch round cake pans, flour the insides, and tap out the excess (Or divide it among muffin cups).

2. In a bowl, whisk the flours, baking powder, baking soda, cinnamon and salt. In another bowl, stir together the carrots, chopped nuts, coconut, and raisins.
Working with a stand mixer, preferably fitted with a paddle attachment, or with a hand mixer in a large bowl, beat the sugar and oil together on a medium speed until smooth.

3. Add the eggs one by one and continue to beat until the batter is even smoother. Reduce the speed to low and add the flour mixture, mixing only until the dry ingredients disappear. Gently mix the chunky ingredients. Divide the batter among the baking pans.

4. Bake for 40-50 minutes, until a thin knife inserted into the centers comes out clean. The cakes will have just started to come away from the sides of the pans. Transfer the cakes to cooling racks and cool for about 5 minutes, then run a knife around the sides of the cakes and unmold them. Invert and cool to room temperature right side up.

5. The cakes can be wrapped airtight and kept at room temperature overnight or frozen for up to 2 months.

6. For the frosting, beat cream cheese, butter and sour cream in a medium bowl. Add the vanilla and the confectioners' sugar and mix until smooth. Cool cake completely before frosting. If desired, sprinkle top of cake with chopped nuts and/or sprinkles.


Tuesday, May 6, 2008

Peanut Butter Torte


Theres been a blogging group that I've really been wanting to join for awhile now. Tuesdays with Dorie. You have to have a book to join this group, and I didn't have the book; Till now. I finally got the book so that I could finally join the group, and I didn't hesitate to join.

It was actually kind of funny. Before I saw what the next challenge was, I looked threw the book to see what all recipes there was. And one of them that really shout out to me was the Peanut Butter Torte. It was just beautiful, and sounded, as well as looked, unbelievable. I knew that I wanted to make it soon; And who knew that'd it'd be one of the first things that'd I'd bake!

This weeks challenge was the Peanut Butter Torte. I knew that I was going to love this because, I mean, come on. It's peanut butter! One of those things that make you happy and certainly bring bake being a kid.

I really liked the crust for this. An Oreo crust is my favorite kind of crust to have on an cake, cheesecake, or anything else that has a crust. I was kind of unsure as to if it'd pair will with the peanut butter. I didn't really think that'd be that good together. But they were! They were excellent together! And I defiantly have gotten my peanut butter dose!


Recipe


1 1/4 cup peanuts, finely chopped
1/4 tsp. instant espresso powder
1/4 tsp. ground cinnamon
Pinch of nutmeg
2 tsp. sugar
1/2 cup mini chocolate chips
24 Oreo cookies, finely crumbled
4 tbsp. (1/2 stick) butter, melted
Pinch of salt
2 1/2 cup heavy cream
1 1/4 cup confectioner sugar, sifted
12 ounces cream cheese, softened
1 1/2 cup peanut butter
2 tbsp. milk
4 ounces chocolate, finely chopped


1. Preheat oven to 350 degrees. Butter a 9-inch springform pan and place on a baking sheet lined with parchment paper. Toss 1/2 cup of the chopped peanuts, the sugar, espresso powder, cinnamon, nutmeg and chocolate chips together in a small bowl. Set aside.

2. Put the Oreo crumbs (you can crumbled in a food processor or a blender), melted butter and salt in a small bowl and stir to combine until moistened. Press the crumbs evenly over the bottom and the sides of a springform pan (they should go up about 2 inches up on the sides). Freeze the crust for 10 minutes.

3. Bake the crust for 10 minutes, then transfer to a rack and let cool completely before filling. With a stand mixer, whip 2 cups on the cream until it holds medium peaks. Beat in 1/4 cup of confectioner sugar. Scrape the cream into a bowl and refrigerate until needed.

4. Wipe out the bowl (no need to wash) and beat in the cream cheese with the remaining 1 cup of confectioner sugar on medium speed until cream cheese is satiny smooth. Beat in the peanut butter, 1/4 cup chopped peanuts and the milk.

5. Using a spatula, gently stir in about one quarter of the whipped cream, just to lighten the mousse. Stir in the crunchy peanut butter mixture, gingerly fold remaining whipped cream.

6. Scrape the mousse into the crust, mounding and smoothing the top. Refrigerate for at least 4 hours, or overnight; cover with plastic wrap as soon as the mousse firms.


To Finish it Up

7. To finish the torte, put the chocolate in a heatproof bowl and set the bowl over a saucepan of simmering water. Leave bowl over the water till it starts to melt. Remove from the saucepan.

8. Bring the remaining 1/2 cup cream to a full boil. Pour the cream over the chocolate and blend until glossy. Pour over torte, smoothing with a metal spatula. Scatter remaining 1/2 cup peanuts over torte and chill until the top is set. Refrigerate until ready to serve.


Wednesday, April 30, 2008

Red Velvet Cake


Today, it was my fathers birthday. He usually doesn't like to do anything to extravagant for his birthday. He prefers to just have a relaxing day from everything really. My father is a hard working business man and spends every second of the day dealing with work. He'll get calls at midnight from workers asking him what to do or that they need help. Managing the Orange Business with orange pickers whom tend to forget a lot of things you tell them to do can be rather annoying...

My dad is always thankful whenever he gets a day to just relax and not have a care in the world (though, I think anyone would like days like that). I to like to just relax on my birthday. Its a day in celebration of you. Spend it as you'd want. Which is what my dad did. He had my nana and grandpa (his parents) come over for the day and to have a cook out. Trevor's little friend Phillip as well as Chris also came. My fathers wanted steak, potato's, corn and... His all time favorite cake... Red Velvet Cake.

My dads not to much of a sweet person (nor is many in my family) but when it comes to Red Velvet Cake, my dads all over it. I too have to say that it's a pretty darn delicious cake. One of the best really. And I wanted to make this for my dad on his birthday. The cake is so moist, a very light cake, and so delicious it'll leave you wanting seconds. It's amazing.


Cake

2 1/2 cups all-purpose flour
1/2 cup unsweetened cocoa powder
1 tsp. baking soda
1/2 tsp. salt
1 cup butter, softened
2 cups sugar
4 eggs
1 cup sour cream
1/2 cup milk
1 ounce red food coloring
2 tsp. vanilla extract

Cream Cheese Frosting

8 ounces cream cheese, softened
4 tbsp. butter, softened
2 tbsp. sour cream
2 tsp. vanilla extract
2 cups confectioners' sugar


1. Preheat oven to 350 degrees. Grease and flour two round 9-inch cake pans.

2. For the cake, Sift together flour, cocoa, baking soda and salt; set aside. Cream butter and sugar in a large mixing bowl with electric mixer until fluffy, about 5 to 7 minutes. Beat in eggs one at a time. Mix in sour cream, milk, food color and vanilla. Gradually blend in flour mixture, just until incorporated. Do not over blend.

3. Pour batter into cake pans evenly. Bake 35 to 40 minutes or until toothpick inserted in center comes out clean. Cool 10 minutes before removing from pan to cool completely on wire rack.

4. For the frosting, beat cream cheese, butter and sour cream in a medium bowl. Add the vanilla and the confectioners' sugar and mix until smooth. Cool cake completely before frosting. If desired, sprinkle top of cake with chopped nuts and/or sprinkles.

Makes 12-16 servings


Dad relaxing.


Here's Trevor and his cute little friend Phillip.


My nana. She's a cutie.


My mom... She has a horrible habit.

Sunday, March 30, 2008

DBC: Perfect Party Cake


This month's Daring Bakers Challenge has finally came. And this months was the Perfect Party Cake. I don't know about everyone else, but these last few challenges has been sort of easy. I'm still waiting on something that just really challenges me. But lately that hasn't been the case...

None the less, I was still excited about this months challenge. I'm mean, who doesn't like cake? I pretty much followed the recipe all the way threw, except for the filling. I did not use raspberry because my mothers actually allergic to them. I decided to make a strawberry frosting for the filling because everyone likes strawberries.

I was sort of suprised at how fast this cake went! On the first day I made it, I didn't think to many people would really want to eat some, however, by the time it was 6 pm, more than half the cake was gone! Apparently, my aunt and cousins found out that I had made a cake, and came over to get some. Not that it bothered me, I was actually flattered that they came and got some and loved it.

And it was a very nice came. I especially loved the coconut on top. I toasted my coconut because that how I generally like coconut. It being toasted just tastes so much better in my opinion. This months challenge was a very great cake, and now I'm ready for the next challenge. I'm hoping for something very challenging.


Recipe

For the Cake

2 1/4 cups cake flour
1 tbsp. baking powder
1/2 tsp. salt
1 1/4 cups whole milk or buttermilk
4 large egg whites
1 1/2 cups sugar
2 tsp. grated lemon zest
1 stick (8 tbsp.) unsalted butter, at room temperature
1/2 tsp. pure lemon extract

For the Buttercream
1 cup sugar
4 large egg whites
3 sticks (12 ounces) unsalted butter, at room temperature
1/4 cup fresh lemon juice (from 2 large lemons)
1 tsp. pure vanilla extract

For Finishing
2/3 cup seedless raspberry preserves stirred vigorously or warmed gently until spreadable
About 1 1/2 cups sweetened shredded coconut


1. To make the cake, center a rack in the oven and preheat the oven to 350 degrees F. Butter two 9 x 2 inch round cake pans and line the bottom of each pan with a round of buttered parchment or wax paper. Put the pans on a baking sheet.

2. Sift together the flour, baking powder and salt. Whisk together the milk and egg whites in a medium bowl. Put the sugar and lemon zest in a mixer bowl or another large bowl and rub them together with your fingers until the sugar is moist and fragrant. Add the butter and working with the paddle or whisk attachment, or with a hand mixer, beat at medium speed for a full 3 minutes, until the butter and sugar are very light. Beat in the extract, then add one third of the flour mixture, still beating on medium speed. Beat in half of the milk-egg mixture, then beat in half of the remaining dry ingredients until incorporated.

3. Add the rest of the milk and eggs beating until the batter is homogeneous, then add the last of the dry ingredients. Finally, give the batter a good 2- minute beating to ensure that it is thoroughly mixed and well aerated.

4. Divide the batter between the two pans and smooth the tops with a rubber spatula. Bake for 30-35 minutes, or until the cakes are well risen and springy to the touch – a thin knife inserted into the centers should come out clean

5. Transfer the cakes to cooling racks and cool for about 5 minutes, then run a knife around the sides of the cakes, unfold them and peel off the paper liners. Invert and cool to room temperature, right side up (the cooled cake layers can be wrapped airtight and stored at room temperature overnight or frozen for up to two months).


1. To make the Buttercream, put the sugar and egg whites in a mixer bowl or another large heatproof bowl, fit the bowl over a plan of simmering water and whisk constantly, keeping the mixture over the heat, until it feels hot to the touch, about 3 minutes.

2. The sugar should be dissolved, and the mixture will look like shiny marshmallow cream.
Remove the bowl from the heat. Working with the whisk attachment or with a hand mixer, beat the meringue on medium speed until it is cool, about 5 minutes.

3. Switch to the paddle attachment if you have one, and add the butter a stick at a time, beating until smooth. Once all the butter is in, beat in the buttercream on medium-high speed until it is thick and very smooth, 6-10 minutes. During this time the buttercream may curdle or separate – just keep beating and it will come together again.

4. On medium speed, gradually beat in the lemon juice, waiting until each addition is absorbed before adding more, and then the vanilla. You should have a shiny smooth, velvety, pristine white buttercream. Press a piece of plastic against the surface of the buttercream and set aside briefly.


1. To assemble the cake, using a sharp serrated knife and a gentle sawing motion, slice each layer horizontally in half. Put one layer cut side up on a cardboard cake round or a cake plate protected by strips of wax or parchment paper.

2. Spread it with one third of the preserves. Cover the jam evenly with about one quarter of the buttercream. Top with another layer, spread with preserves and buttercream and then do the same with a third layer (you’ll have used all the jam and have buttercream leftover). Place the last layer cut side down on top of the cake and use the remaining buttercream to frost the sides and top. Press the coconut into the frosting, patting it gently all over the sides and top.


Serving
The cake is ready to serve as soon as it is assembled, but I think it’s best to let it sit and set for a couple of hours in a cool room – not the refrigerator. Whether you wait or slice and enjoy it immediately, the cake should be served at room temperature; it loses all its subtlety when it’s cold. Depending on your audience you can serve the cake with just about anything from milk to sweet or bubbly wine.

Storing
The cake is best the day it is made, but you can refrigerate it, well covered, for up to two days. Bring it to room temperature before serving. If you want to freeze the cake, slide it into the freezer to set, then wrap it really well – it will keep for up to 2 months in the freezer; defrost it, still wrapped overnight in the refrigerator.


Playing Around
Since lemon is such a friendly flavour, feel free to make changes in the preserves: other red preserves – cherry or strawberry – look especially nice, but you can even use plum or blueberry jam.

Fresh Berry Cake
If you will be serving the cake the day it is made, cover each layer of buttercream with fresh berries – use whole raspberries, sliced or halved strawberries or whole blackberries, and match the preserves to the fruit. You can replace the coconut on top of the cake with a crown of berries, or use both coconut and berries. You can also replace the buttercream between the layers with fairly firmly whipped sweetened cream and then either frost the cake with buttercream (the contrast between the lighter whipped cream and the firmer buttercream is nice) or finish it with more whipped cream. If you use whipped cream, you’ll have to store the cake the in the refrigerator – let it sit for about 20 minutes at room temperature before serving.

Tuesday, February 12, 2008

Red Velvet Cake Balls


The blog Bakerella is one of the few blogs that I really like to keep checking to see what new ideas shes come up with. And I've been meaning to try making her Red Velvet Cake Balls, and for Valentines Days seemed like the right time to make these up for everyone.

I was going to make the cake batter from scratch instead of making it from the box since I don't really like the make cakes from a box, however, I haven't been feeling to well this week, and to make it from scratch just didn't appeal to me. So I took the easy way and went with what Bakerella did; Made it from the box.

They turned out really good and delicious. It was like a little Red Velvet Cake, in ball form. Can't wait to give these out on Valentines Day.


Recipe

1 box Red Velvet Cake Mix
1 can of cream cheese frosting
1 package semi-sweet chocolate bark


1. Bake the red velvet cake as directed for a 13 x 9" cake. After cake is cooked and cooled, crumble the cake into a large bowl.

2. Mix throughly with 1 can of cream cheese frosting. This will be messy.

3. Roll mixture into quarter size balls and lay on a cookie sheet. Should make 55-60 balls. You can use a 1/2 tbsp. spoon to form balls, or you can just use your hands to form as you please.

4. Chill for several hour. You can do this in the freezer to quicken this.

5. Melt chocolate in a double boiler. Roll balls in chocolate and lay in cookie sheet on wax paper until firm. Then, enjoy!


Genesis of a Cook
check out Tastespotting