Showing posts with label Baked Goods: Cupcakes. Show all posts

Sunday, May 17, 2009

Banana Cupcakes w/ Cinnamon Cream Cheese Icing


"Still hard to believe that my high school life is coming to an end in the next couple days.. Honestly, it's really hard. Extremely hard. I didn't have much of a high school life for a long time, being that I had several health issues that were holding me back. I missed out on a lot, which also made me rebel a lot.. I don't know if I'm really ready to let go of it just yet, though I know that I'm going to have to..

In the end though, I know everything is going to be fine. I don't regret anything. My senior years could have been better, but I loved every bit of it and I wouldn't take back anything if it meant changing how I am now. Everyone that I've met and everything that has happened to me in these past couple years has really shaped me for who I am today. I have really the best boyfriend I've ever had, and new friends that I really love being with. I'm finally getting my head situated and my goals in go, and I'm finally waking up in the morning with a giddy smile on my face and a desire to do anything. I'm definitely looking forward to the years to come and my new school life ahead..

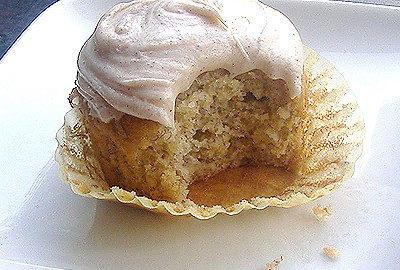
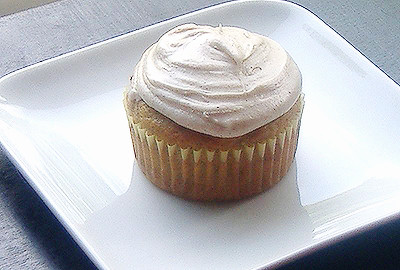
Aside from that, I noticed that a few of our banana's were going bad, so me being me, I always find the need to drop what I'm doing and put those banana's to good use. The recipe is a real simple one. It's the icing that really adds to these. OH do I love this icing! I saw this icing on these cupcakes and decided to try it on a basic banana cupcakes. I think it really complimented these moist cupcakes, as it would with ANY cupcakes I must say! It was just simple really good.


Recipe

Cupcakes

1 1/2 cups flour
3/4 cup sugar
1 tsp. baking powder
1/2 tsp. baking soda
1/4 tsp. salt
1/2 cup unsalted butter, melted
1 1/2 cups mashed bananas (about 4 ripe bananas)
2 large eggs
1/2 tsp. vanilla extract

Cinnamon Cream Cheese Icing

2 sticks (1 cup) butter, slightly softened
12 oz cream cheese
6 cups powdered sugar
2 tsp. vanilla
1 1/2 tsp. cinnamon


1. Preheat oven to 350 degrees. Line a standard 12-cup muffin pan with paper liners. In a medium bowl, whisk together flour, sugar, baking powder, baking soda, and salt.

2. Make a well in center of flour mixture. In the well, mix together the butter, mashed bananas, eggs, and vanilla. Stir to incorporate flour mixture, being sure not to over mix. Spoon batter into muffin cups.

3. Bake for 25 to 30 minutes, or until a toothpick inserted in center of a cupcake comes out clean. Remove cupcakes from pan; cool completely on a wire rack.

4. T H E I C I N G; In the bowl of an electric mixer, beat the butter and cream cheese until smooth. Slowly add the powdered sugar and mix until everything is combined. Add the vanilla and the cinnamon. Ice the cooled cupcakes and enjoy!

Makes 12 cupcakes

Summer of 2009 is just around the corner! OH YEAH!



Friday, July 11, 2008

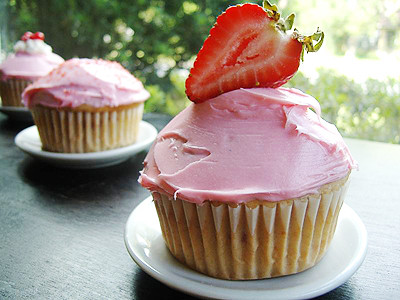
Strawberry Cupcakes


For me, really hate summer. Honestly I do. I do not like the heat or the humidity that comes. I'm the fall and winter kind of person. There isn't really anything at all that I like about summer... Well, I mean, except for the sales.

Fruit sales to be exact. Fruits, like strawberry's, blueberries, raspberries and watermelon are usually pretty pricey during other seasons and I tend to stay away from really getting to much fruit during fall or winter being that they are to expensive! We really don't want to have to pay for it (we're pretty cheap). But when summer comes, we go crazy on buying fruit!

There are so many things to do with fruits. What we usually do is we make a fruit salad (which doesn't last long around here), parfaits, smoothies, baked goods (what I usually do with them), there's so much you can do with fruit. Over here, strawberries have been Buy 1, Get 1, so it's what we've been getting the most. Also, it's my mums favorite. Ever since she started new medication for her lupus, she's been needing to eat a lot of fruit, like strawberries and grapes, because the new medication she's taking will make her gain a lot of weight if she's not careful. And she'd rather not gain weight so she's been trying to be really careful as to what she eats.

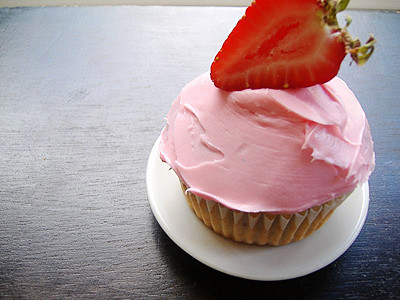
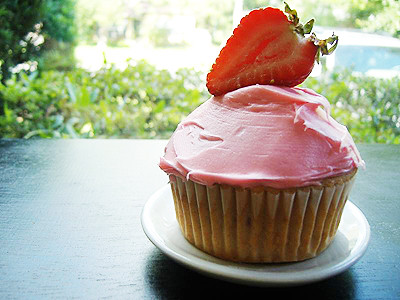
I thought we had a lot of strawberries in the fridge right now so I decided to put the strawberries to better (sweeter) use. It won't be that big of a deal to use some of them for myself. The cupcakes are very simple. The texture of these cupcakes are moist and light and I really, really liked them with the cream cheese frosting. The added flavor to the cream cheese is delicious. I didn't know if it would do much for the frosting but the addiction to it was amazing! It was so good! It's classic.


Recipe

For the Cupcakes

1 1/3 cups flour
1/2 tsp. baking powder
1/2 tsp. baking soda
1/8 tsp. salt
1/2 cup strawberry sauce
1/4 cup milk
1/2 cup butter, room temperature
1 cup sugar
2 large eggs


For the Strawberry Sauce

2 cups of fresh strawberries, stem removed
Sugar to taste


For Strawberry Cream Cheese Frosting

8 ounces cream cheese
1/2 stick butter
3 1/2 - 4 cups powdered sugar, sifted
1/4 cup of strawberry sauce


1. For the Strawberry Sauce, macerate strawberries with about 1-2 tbs sugar for 15 minutes. Put strawberries in a small saucepan and heat under medium heat with lid on. Cook strawberries for approximately 15 minutes till strawberries cook down and become soft and saucy. Adjust sweetness with sugar until you get the desired sweetness. Using a hand blender, puree until you get the desired smoothness or chunkiness. Cool before using in recipe.

2. For the cupcakes, preheat oven to 350 degrees. Grab a large bowl and beat the butter and the sugar together until light and fluffy. Add eggs one at a time. Whisk together flour, baking powder, baking soda and salt in a bowl. Measure out milk and strawberry sauce together.

3. Add about a fourth of the flour to the butter mixture and beat to combine. Add about one third the milk mixture and beat until combined. Repeat, alternating flour and milk and ending with the flour mixture. Scoop into cupcake papers about 3/4 full. Bake for 20-22 minutes.

4. For Strawberry Cream Cheese Frosting, bring cheese and butter to room temperature. Sift powdered sugar into a bowl. Beat butter and cheese at medium speed until creamy. Add half of the sugar, beat until combined. Add strawberry sauce until you achieve the right color and flavor but making sure not to add too much or the frosting will be too soft. Gradually add any remaining sugar until you get to the consistency and sweetness you like.


Sunday, June 15, 2008

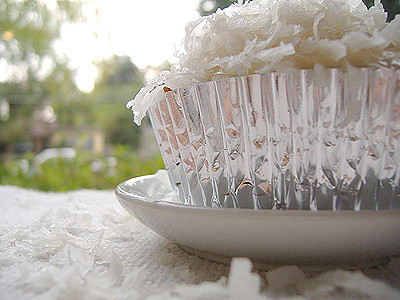
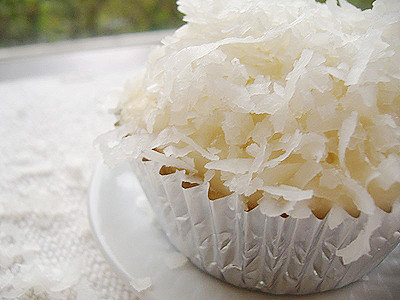
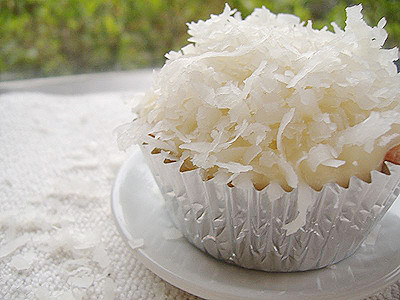
Coconut Cupcakes


Fathers Day is here! A lot of people go out for breakfast, lunch or dinner when these kind of days come (like Mothers Day or Valentines Day, etc, etc). However, we who enjoyed home cooking, choose not to. We'd rather just cook at home and just chill. What's better than that? Enjoying good home cooking and not having to care about much at all; That's awesome!

My dad wanted to have some of his favorite foods for Fathers Day. We slow cooked our favorite BBQ Pull Pork, we made Baked Beans, Potato Salad and Texas Toast. It was a lot of food to begin with, and I didn't really think I was going to bake anything. However, when my Nana and Grandpa came over for fathers day, and saw that I didn't bake anything, they were a bit upset. So, I decided that I'd come up with something good to bake.

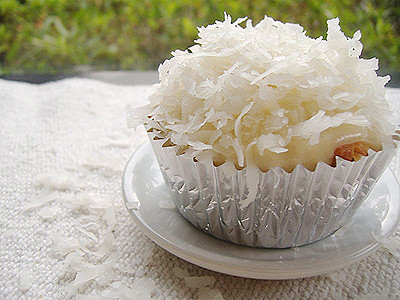
I didn't really want to bake a cake; I didn't want to have something that not everyone would eat.. So I decided to bake cupcakes! My dad likes coconut, so I thought that it'd be a nice treat for him; And something that won't ruin is day of to much calories (He's a calorie counter like me). I remember seeing this recipe while watching Barefoot Contessa one day and they sounded so good!! I kind of altered mine to be without butter, and it turned out really good. Really, really good! The coconut went well with the cream cheese icing. It was really light and delicious.

This was entered into AFAM for June '08.


Recipe

For the Cupcake

1 1/2 cups flour
1 cup sugar
1/2 cup oil
1/2 tsp. baking powder
1/4 tsp. baking soda
1/4 tsp. salt
3 eggs
2 tsp. vanilla
1/2 cup yogurt
1 cup shredded coconut

For the Cream Cheese Icing

8 ounces cream cheese, cold
4 ounces butter, room temperature
1 teaspoon vanilla extract
2 cups confectioners sugar
Milk to thin


1. Preheat the oven to 350 degrees. Line muffin tins with cupcake papers.

2. In a large bowl, beat together the oil, sugar and eggs until thick and smooth. Beat in vanilla. In a medium bowl, shift together flour, baking powder, baking soda, and salt; add to the liquid mixture and beat until smooth. Beat in yogurt. Fold in coconut.

3. Scoop batter into the prepared pans. Bake for 22 minutes. Allow to cool in the pan for 5 minutes then cool completely on a wire rack.

4. For the icing, beat together cream cheese and butter until smooth. Add the vanilla extract; then confectioners sugar, 1 cup at a time, beating well after each addition. Beat in milk, 1 tablespoon at a time, if icing is too thick.

Makes 12-15 Cupcakes


Sunday, May 25, 2008

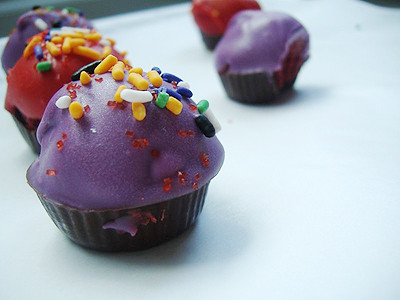
Red Velvet Cupcake Bites


Nope, those are not what you may think they are. They are not cupcakes. They are in fact the red velvet balls that I made at one point. But, they are decorated to look like they are cute, tiny little cupcakes!

I can not take credit for these adorable little cute cupcake bites. I got the idea from the creative genius at bakerella. The idea's she comes up with always leave me speechless. Everything she makes are so cute and so beautifully done. Everything always amazes me. I came across this idea from here when she posted her here. I defiantly saved it to my memory as soon as I saw it. I wanted to make them soon!

It made me so excited when I was told a few people at my moms work wanted me to make the red velvet cake balls I made one time. I couldn't wait to make these. They were so much fun to make and so cute! And of course, they were soo good!


Recipe

1 box cake mix (cook as directed on box for 13 X 9 cake)
1 can cream cheese frosting (16 oz.)
1 package chocolate bark (or candy melts for cupcake bottom)
Colored Candy Melts (for cupcake top)
Candy Cup Mold
Sprinkles and m&ms for decoration


1. After cake is cooked and cooled completely, crumble into large bowl. (The texture should be fine/fluffy)

2. Using the back of a large spoon, mix thoroughly with 1 can cream cheese frosting. (It may be easier to use fingers to mix together, but be warned it will get messy.)

3. Roll mixture into quarter size balls (make sure they are smaller in diameter than that of your candy mold) and lay on wax paper covered cookie sheet.

4. Chill in the freezer for a few minutes, until they are slightly firm, not frozen.

5. Melt chocolate bark and candy melts in microwave per directions on package.

6. Using a spoon or squeeze bottle, fill each mold cavity with a small amount of chocolate. Sorry, I didn't think to measure how much. But as soon as you fill the cavity, go ahead and place one of your rolled balls into it. Carefully push it down until the force causes the chocolate to push up and fill in around the sides of the ball. You may have to experiment with a couple to get the right amount. Stop pushing once the chocolate reaches the top edge.

7. Place the mold tray filled with cupcakes in the freezer for just a few minutes to let the chocolate set. Remove and then gently pull up on the cake ball top to release from candy mold.

8. Now, holding the bottom of the cupcake, dip the top in another color of melted chocolate.

9. Decorate.


Tuesday, May 20, 2008

Bill's Big Carrot Cake


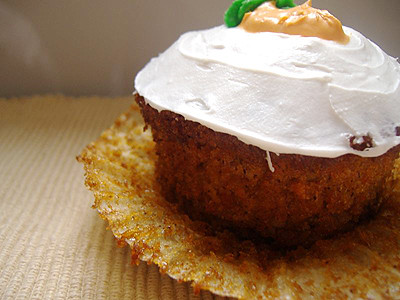
This months challenge for Tuesdays with Dorie was suppose to be Madelines. However, I do not have one of those pans. And, sadly, I could not find one. I went to a craft store where I normally buy my baking equipment, however, they did not have the madeline pan. I was going to order it, but it would not be in till around Wednesday. It really bummed me out because I really wanted the madelines. But, I did get to make these delicious little cakes!

For the people that didn't have the madeline pan (like myself), we were able to use a recipe that was completed in the past. At first, I was going to make the Gooey Chocolate Cakes. After thinking about it, I really wanted to have the Carrot Cake. I hadn't had one in so long. The last one I had was when I was a little girl! My best friends mother made the best Carrot Cake I had ever had. I've really missed that cake. So, I decided that I was going to make Bills Big Carrot Cake. Instead of making it into a cake, I thought making it into cupcakes would be great. They were so good. Brought back memories. I couldn't believe how moist they were! They were amazing! A total must try I have to say.


Recipe

For Cake

1 1/2 cups all purpose flour
1/2 cup almond flour
2 teaspoons baking powder
2 teaspoons baking soda
2 teaspoons ground cinnamon
3/4 teaspoon salt
3 cups grated carrots
1 cup shredded coconut
1/2 cup plump golden raisins
2 cups sugar
1 cup canola oil
4 large eggs


Cream Cheese Frosting

8 ounces cream cheese, softened
4 tbsp. butter, softened
2 tbsp. sour cream
2 tsp. vanilla extract
2 cups confectioners' sugar


1. Preheat the oven to 325 degrees. Butter three 9-x-2-inch round cake pans, flour the insides, and tap out the excess (Or divide it among muffin cups).

2. In a bowl, whisk the flours, baking powder, baking soda, cinnamon and salt. In another bowl, stir together the carrots, chopped nuts, coconut, and raisins.
Working with a stand mixer, preferably fitted with a paddle attachment, or with a hand mixer in a large bowl, beat the sugar and oil together on a medium speed until smooth.

3. Add the eggs one by one and continue to beat until the batter is even smoother. Reduce the speed to low and add the flour mixture, mixing only until the dry ingredients disappear. Gently mix the chunky ingredients. Divide the batter among the baking pans.

4. Bake for 40-50 minutes, until a thin knife inserted into the centers comes out clean. The cakes will have just started to come away from the sides of the pans. Transfer the cakes to cooling racks and cool for about 5 minutes, then run a knife around the sides of the cakes and unmold them. Invert and cool to room temperature right side up.

5. The cakes can be wrapped airtight and kept at room temperature overnight or frozen for up to 2 months.

6. For the frosting, beat cream cheese, butter and sour cream in a medium bowl. Add the vanilla and the confectioners' sugar and mix until smooth. Cool cake completely before frosting. If desired, sprinkle top of cake with chopped nuts and/or sprinkles.


Monday, May 12, 2008

Mocha Cupcakes


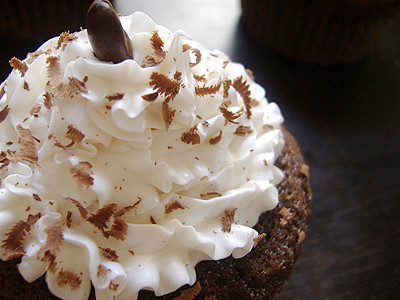
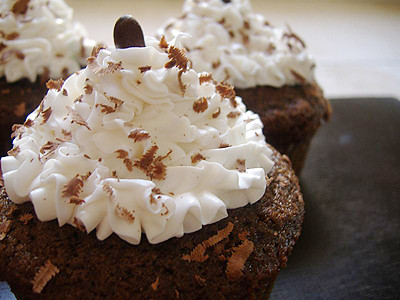
Coffee is most defiantly an addiction of mine. I absolutely love coffee. Anything coffee, I'll have. Baking with coffee, well, its something I love to bake with. From muffins to cupcakes to cookies to pastries. I love it. Muffins are my norm for coffee, but, I really wanted to have a cupcake to do. And what better than to have coffee and chocolate in the little package of a cupcake?

These cupcakes are very moist and super rich that it'll have coffee fanatics like myself jumping with joy. The Kahlua Frosting was fanamnal with these cupcakes. I got the recipe from a friend of mine whom loves cupcakes and loves making homemade frosting. She's totally against store bought frosting (as am I), and when I told her that I was making Mocha Cupcakes, she said that this would be perfect with them. And they were! They were to die for!


Recipe

Cupcakes

1 1/3 cups flour
1/3 cup unsweetened cocoa powder
1 tsp. baking powder
1/2 tsp. baking soda
1/4 tsp. salt
1/2 cup whole milk
1/2 cup strong brewed coffee, room temperature
1/2 cup butter, room temperature
1/2 cup granulated sugar
1/2 cup firmly packed light brown sugar
1 large egg, at room temperature


1. Preheat oven to 350°F. Line 12-cup muffin pan with paper or foil liners. In a large bowl, sift together the flour, cocoa powder, baking powder, baking soda, and salt. Set aside.

2. In another bowl, combine the milk and brewed coffee. Using an electric mixer on medium-high speed, beat the butter and sugars together until light and fluffy, 2-3 minutes. Add the egg and beat until combined.

3. Add the flour mixture in 3 additions, alternating with the milk mixture in 2 additions, beating on low speed until just combined; scrape down the sides of the bowl as needed.

4. Divide the batter evenly among the prepared muffin cups, filling each about 3/4 full. Bake until a toothpick inserted in the center of a cupcake comes out clean, 20-22 minutes. Let the cupcakes cool in the pan on a wire rack for 5 minutes. Transfer the cupcakes to the wire rack and let cool completely, about 1 hour.


Kahlua Frosting

4 ounces cream cheese, room temperature
6 tbsp. butter, room temperature
2 1/2 tbsp. Kahlua
2 cups powdered sugar


1. In a bowl, cream together cream cheese and butter until fluffy. Mix in Kahlua, then powdered sugar in one cup increments until frosting reaches desired consistency. Apply to cupcakes.


Tuesday, April 8, 2008

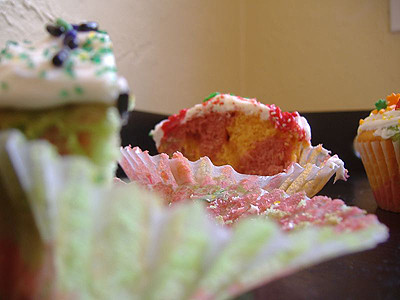
Rainbow Cupcakes


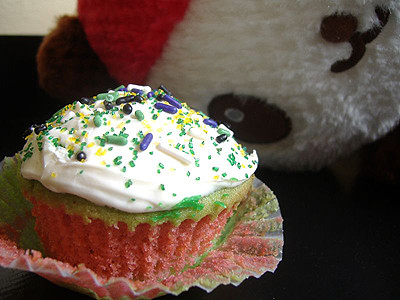
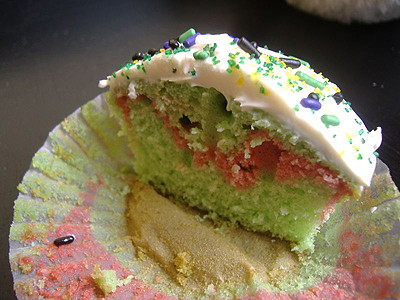
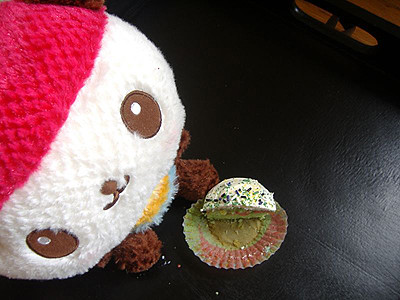
What lurks behind the beautiful cupcake? Well that'd be my new little stuffed animal Apple! Chris bought me her the other day. She's so cute. She's the only one that I like out of the Hello Kitty collection. I don't really like Hello Kitty, or that white.. thing. Or that... Panda thing. I do like Chococat and Kuririn though. As you can see, I know a lot about the little Hello Kitty collection. I'm a bit of a dork. I learned all the names though from my friends baby sister. She' of was obsessed with Hello Kitty; And all the characters! She had a giant Hello Kitty! It was about 5 feet tall. It kind of scared me...

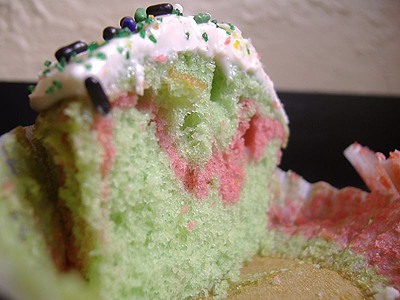
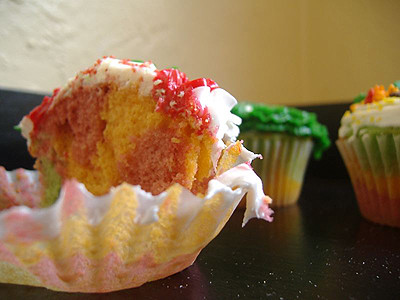
Anyways, thats all beside the point of the reason I made these cupcakes. To be completely honest, and it may seem kind of weird, but when I look at my little stuffed animal Apple, makes me think of... Spring. All the beautiful and bright colors that come along with the season of Spring. Then I thought, well, I could make bright, spring like cupcakes. Which is how I came along to making these little adorable cupcakes.

These cupcakes are super moist! Very delicious, and so fun to make. You can color them and decorate them however you choose. I even got my little brother and my boyfriend doing it. We all came up with our own little creations and spent time together, enjoying each others company. This is one of the things that I really love about making cupcakes. You can have friends and family help out, and we all came make our cupcakes the way we want and decorate them how we'd like them!


Recipe

For Cupcakes

1 1/4 cup flour
1/2 cup butter, room temp
1 1/4 cups sugar
2 large eggs, room temp
1/2 tsp. baking powder
1/4 tsp. baking soda
1/4 tsp. salt
1/2 cup milk
1 tsp. vanilla
Food Coloring


1. Preheat oven to 350 degrees. Beat butter until softened. Add sugar and beat until light and fluffy, about 3 minutes. Add eggs, beating until combined.

2. In a small bowl, whisk the flour, baking powder, baking soda, and salt. Whisk to combine. Measure out the milk and vanilla, then stir to combine.

3. Add about a third of the dry ingredients to the butter/sugar and beat to combine. Add about a half of the milk/vanilla and beat to combine. Continue adding, alternating between dry and wet and finishing with the dry.

4. Divide the batter into a few different bowls (However many different colors your using depends on how many bowls you'll have). Put desired food coloring in each bowl. Do it one drop at a time, stirring each addition drop till you get the color you are wanting.

5. Scoop batter into cupcake cups, alternating with different colored batter, and fill to about 2/3’s full. Bake cupcakes for about 22-25 minutes or until a cake tester comes out clean.


(Apple was very happy ^_^)

For Soft Vanilla Buttercream Frosting

1/2 cup butter, room temperature
1 1/2 cups sifted powdered sugar
1 tsp. vanilla
2 tbsp. milk


1. Beat butter at medium-high speed until creamy. Sift powdered sugar into the mixer bowl (right on top of the beaten butter). Beat to combine.

2. Add the vanilla and the milk. Beat until combined. Spread on top of cupcakes or cake.


Genesis of a Cook
check out Tastespotting