Showing posts with label Fruits. Show all posts

Tuesday, October 7, 2008

Pineapple Bundt Cake


Before summer officially ends in my book and I let the wonderful fall season roll on threw, I had to bake something that had a summer sense to it. The heat is still already looming around in Florida (no surprise), so it really does feel like it's summer still (which, honestly, kind of sucks).

My boyfriends has been wanting me to bake a Pineapple Cake forever. I just haven't had time for the past couple weeks. I've been so busy that I never have to much time for myself, sadly. School is getting pretty hectic and it doesn't help that I'm attending night school as well. So I'm always at school.

Since I had a little time at hand and I too was craving sweets (since I've been on the school diet!!), I finally came around to bake the Pineapple Cake that someone has been nagging at me to bake. I didn't do the traditional Pineapple Cake, I guess you could say. Honestly, I don't like the idea of Pineapple on top. I much preferred the idea of the Pineapple being inside the cake. So I used shredded pineapple.

The cake was dense, but moist and sweet. Really great with morning tea (which is what I've been doing for the past couple morning). A great way to end the summer and let in the flavors of fall crawl in.


Recipe

Pineapple Cake

2 2/3 cups all-purpose flour
1 tsp. baking powder
1 cup butter, softened
1 1/2 cups sugar
1 tsp. cinnamon
1 tsp. salt
2 eggs, lightly beaten
2 egg whites
2 tsp. lemon extract
1 (16 ounce) can crushed pineapple, undrained

Glaze

1 cup powdered sugar
1 tbsp. milk
1/2 tsp. lemon extract


1. Preheat oven to 350 degrees. Grease a 10 inch bundt cake pan.

2. In a mixing bowl, cream butter and sugar until soft. Add cinnamon and salt. Add eggs, egg whites. Add lemon extract. Beat together until fluffy.

3. In another bowl, combine flour and baking powder. Slowly, combine wet ingredients with dry ingredients. Stir in pineapple. Pour into greased bundt pan.

4. Bake at for 55-60 minutes. Cool in pan 10 minutes before removing to a wire rack. Cool. For the glaze, get a small bowl. Sift the powdered sugar. Add milk and lemon extract. If needed more, add in small drops (1/4 to 1/2 tsp. drops). Drizzle over cake.


Sunday, September 28, 2008

Lavash Crackers


For whatever reason, blogger hates me. I had a long, elaborate post about these crackers. I come to see my post and discover that it's not there. I had it on a timed post. I don't think I'll ever do that again... Since I'm a bite crammed in work, I'm going to make this quick, nice and sweet.

This months Daring Bakers Challenge was Lavash Crackers. These crackers were a bit... annoying, if you ask me. I'm a perfectionist, and they were rather, well, rugged most of the time after baking. But, I made several batches of these being that the taste was delicious! I chose to use sea salt, rosemary, black pepper and garlic for these crackers. They're all pretty much my favorite spice, so I thought I'd combine them all for these crackers.

I also wanted to try and get fancy with these crackers. I poke holes into them. I try to make all of them even (I even measured because I wanted to have them all perfect!) and I poked 7 in each cracker. I was a bit nervous how they would turn out... I was unsure as to how they would bake. Whether they would rise or not. But, they turned out great. And these will be something I know I will make time and time again.


Recipe

Lavash Cracker
The Bread Baker’s Apprentice by Peter Reinhart


Recipe

1 1/2 cups unbleached bread flour
1 tsp salt
3/4 tsp active dry yeast
1 tbsp. sugar
1 tbsp. vegetable oil
1 tbsp. sesame seed
1 tsp ground cumin
1/3 to 1/2 cup + 2 Tb water, at room temperature
Poppy seeds, sesame seeds, paprika, cumin seeds, caraway seeds, or kosher salt for toppings


1. Put the active dry yeast with the water and let it sit until it bubbles, about 5 minutes.

2. In a mixing bowl, stir together the yeast mixture with the flour, salt, cumin, sesame seed, sugar, oil, and just enough water to bring everything together into a ball. If your ball is dry and not wet enough, add in some water by the tablespoonfuls.

3. Sprinkle some flour on the counter and transfer the dough to the counter. Knead for about 10 minutes, or until the ingredients are evenly distributed. The dough should pass the windowpane test and register 77 degrees to 81 degrees Fahrenheit. The dough should be firmer than French bread dough, but not quite as firm as bagel dough (what I call medium-firm dough), satiny to the touch, not tacky, and supple enough to stretch when pulled.

4. Lightly oil a bowl and transfer the dough to the bowl, rolling it around to coat it with oil. Cover the bowl with plastic wrap.
Ferment at room temperature for 90 minutes, or until the dough doubles in size. (You can also retard the dough overnight in the refrigerator immediately after kneading or mixing).

5. Mist the counter lightly with spray oil and transfer the dough to the counter. Press the dough into a square with your hand and dust the top of the dough lightly with flour. Roll it out with a rolling pin into a paper thin sheet about 15 inches by 12 inches. You may have to stop from time to time so that the gluten can relax. At these times, lift the dough from the counter and wave it a little, and then lay it back down. Cover it with a towel or plastic wrap while it relaxes. When it is the desired thinness, let the dough relax for 5 minutes. Line a sheet pan with baking parchment.

6. Carefully lift the sheet of dough and lay it on the parchment. If it overlaps the edge of the pan, snip off the excess with scissors.

7. Preheat the oven to 350 degrees Fahrenheit with the oven rack on the middle shelf. Mist the top of the dough with water and sprinkle a covering of seeds or spices on the dough (such as alternating rows of poppy seeds, sesame seeds, paprika, cumin seeds, caraway seeds, kosher or pretzel salt, etc.) Be careful with spices and salt - a little goes a long way. If you want to precut the cracker, use a pizza cutter (rolling blade) and cut diamonds or rectangles in the dough. You do not need to separate the pieces, as they will snap apart after baking. If you want to make shards, bake the sheet of dough without cutting it first.

8. Bake for 15 to 20 minutes, or until the crackers begin to brown evenly across the top (the time will depend on how thinly and evenly you rolled the dough).
When the crackers are baked, remove the pan from the oven and let them cool in the pan for about 10 minutes. You can then snap them apart or snap off shards and serve.


Raspberry Honey Mustard Sauce

1 jar (12 oz. size) black raspberry jam
1/2 cup honey
1/2 cup prepared mustard


1. In small pan, combine jam, honey and mustard, stir constantly, cook over medium heat until jam melts and sauce is smooth. Store in an airtight container in refrigerator.


Monday, September 8, 2008

Orange Cranberry Bundt Cake


Football is back. Honestly, I'm not a huge fan of football. I'm more of a baseball kind of girls. However, here at my house, football is everything. My father is obsessed with football and has since he was in high school to college. You'll definitely know if footballs on or not with him here. You'll hear him screaming at the top of his lungs going "Go, go, go, go!!!" or "What was that!?", and of course, "Yea!!!!!!"

We're FSU fans here. Go Seminoles. I usually watch the big games with my family when they're on. It can be pretty entertaining. Especially when you see the coaches faces turn red from anger. Or when the ref just does a horrible call. I get a kick out of it. I find it funny to see how everyone reacts. It's usually the same. Everyone yells.

Anyways, for the fact that football is coming back, my dad decided to have a family BBQ on Saturday. I wanted to do something to. So I baked. I was going to do a Carrot Cake, but then I came across this recipe over at Culinary Concoctions by Peabody and decided to try it out.

I've never never gotten a bad recipe from her site. All her recipes are fantastic and they never let me down. They're all just amazing. And so was this. I decided to switch the dates that she used and added dried cranberries instead. The smell of is was lovely. Moist and dense and so mouth watering delicious.


Recipe

For the Cake

1/2 cup unsalted butter, at room temperature
1 cup sugar
2 large egg
Zest of 1 medium orange
1 tsp. vanilla
2 cups all-purpose flour
1/2 tsp. baking soda
1/2 tsp. salt
2/3 cup buttermilk
1 cup dried cranberries

For the Glaze

1 cup powder sugar
1/2 cup freshly squeezed orange juice
1 Tbsp. grated orange zest


1. Preheat oven to 350 degrees. Grease and lightly flour a 10-12 cup Bundt pan.

2. Using a mixer fitted with a paddle attachment, cream the butter on medium-high speed about 1 minutes, until fluffy. Add the sugar and cream on medium-high speed about 30 seconds. Add the eggs all at once and continue creaming for one minute. Add the orange zest and vanilla; beat until combined.

3. Add about half the flour, the baking soda, and the salt; mix on medium-low speed until just combined. Add the buttermilk and mix on medium-low speed until just combined. Add the rest of the flour and mix until just combined. Gently stir in the dates.

4. Spoon the batter evenly into the pan. Bake for 40-45 minutes. Let cake cool in the pan about 10 minutes. Invert it onto a rack and cool at least 20 minutes before glazing. Transfer cake to a serving plate.

5. For the glaze, combine the ingredients together and whisk until it becomes a creamy orange color. Pour glaze over cake.Serve at room temperature.


Wednesday, July 23, 2008

Raisin Apple Muffins


About two weeks from now, I'll be leaving for Gatlinburg, Tennessee. I'm really excited. I have not been in the mountains in a very, very, very long time. I use to go all the time as a kid. But, that was usually with my grandparents. My parents aren't necessarily mountainess people. They enjoy the beach. Which is why every year we usually go to the Bahamas or the Keys. However, for what ever reason, both my parents wanted to go the mountains this year.

It was mainly for the fact that my mothers lupus has been getting a little worse this year, making her have to stay out of the sun more often. Which I don't mind. I don't like the sun. It's joked that I'm a vampire. I'm very pale and I don't tan. I could try to tan, but I'll just turn into a tomato. If I could, I would live in an area where light never reached. Somewhere that is always cloudy. That'd be the way to live for me.

Anyways, since I've been just dying to go up the the mountains, I thought about making something that would remind me of it. For me, anything that's reminds me of fall, reminds me of the mountains. I think it was because every time I went to the mountain was usually in the fall. So, Raisin Apple Muffins kind of seemed like fall. Well, for me that is. They're actually pretty healthy for you too. You would never guess either. They taste excellent. They're nice and moist, not greasy, and taste amazing when right out of the oven. Nice and simple.


Recipe

For the Muffins

1 1/2 cups flour
1/2 cup sugar
2 tsp. baking powder
1 tsp. ground cinnamon
1/2 tsp. salt
1 egg
1/2 cup milk
1/4 cup canola oil
1 cup shredded tart apple (I used a cheese shredder)
1/4 cup raisins

For the Crumb Topping

2 tbsp. flour
2 tbsp. quick oats
2 tbsp. brown sugar
1 tsp. ground cinnamon
1 tbsp. cold butter


1. Preheat oven to 375 degrees. Place muffin paper in tins or grease muffin tins. In a bowl, combine the flour, sugar, baking powder, cinnamon and salt. Set aside.

2. In a small bowl, combine the egg, milk and oil. Stir into dry ingredients just until moistened. Fold in the apple and raisins. Evenly divide the batter. Fill the muffin cups about two-thirds full with batter.

3. For topping, in a small bowl, combine the flour, oats, brown sugar and cinnamon; cut in butter until crumbly. Sprinkle over batter. Bake for 15-20 minutes or until a toothpick comes out clean. Cool for 5 minutes before removing from pan to a wire rack.


Friday, July 11, 2008

Strawberry Cupcakes


For me, really hate summer. Honestly I do. I do not like the heat or the humidity that comes. I'm the fall and winter kind of person. There isn't really anything at all that I like about summer... Well, I mean, except for the sales.

Fruit sales to be exact. Fruits, like strawberry's, blueberries, raspberries and watermelon are usually pretty pricey during other seasons and I tend to stay away from really getting to much fruit during fall or winter being that they are to expensive! We really don't want to have to pay for it (we're pretty cheap). But when summer comes, we go crazy on buying fruit!

There are so many things to do with fruits. What we usually do is we make a fruit salad (which doesn't last long around here), parfaits, smoothies, baked goods (what I usually do with them), there's so much you can do with fruit. Over here, strawberries have been Buy 1, Get 1, so it's what we've been getting the most. Also, it's my mums favorite. Ever since she started new medication for her lupus, she's been needing to eat a lot of fruit, like strawberries and grapes, because the new medication she's taking will make her gain a lot of weight if she's not careful. And she'd rather not gain weight so she's been trying to be really careful as to what she eats.

I thought we had a lot of strawberries in the fridge right now so I decided to put the strawberries to better (sweeter) use. It won't be that big of a deal to use some of them for myself. The cupcakes are very simple. The texture of these cupcakes are moist and light and I really, really liked them with the cream cheese frosting. The added flavor to the cream cheese is delicious. I didn't know if it would do much for the frosting but the addiction to it was amazing! It was so good! It's classic.


Recipe

For the Cupcakes

1 1/3 cups flour
1/2 tsp. baking powder
1/2 tsp. baking soda
1/8 tsp. salt
1/2 cup strawberry sauce
1/4 cup milk
1/2 cup butter, room temperature
1 cup sugar
2 large eggs


For the Strawberry Sauce

2 cups of fresh strawberries, stem removed
Sugar to taste


For Strawberry Cream Cheese Frosting

8 ounces cream cheese
1/2 stick butter
3 1/2 - 4 cups powdered sugar, sifted
1/4 cup of strawberry sauce


1. For the Strawberry Sauce, macerate strawberries with about 1-2 tbs sugar for 15 minutes. Put strawberries in a small saucepan and heat under medium heat with lid on. Cook strawberries for approximately 15 minutes till strawberries cook down and become soft and saucy. Adjust sweetness with sugar until you get the desired sweetness. Using a hand blender, puree until you get the desired smoothness or chunkiness. Cool before using in recipe.

2. For the cupcakes, preheat oven to 350 degrees. Grab a large bowl and beat the butter and the sugar together until light and fluffy. Add eggs one at a time. Whisk together flour, baking powder, baking soda and salt in a bowl. Measure out milk and strawberry sauce together.

3. Add about a fourth of the flour to the butter mixture and beat to combine. Add about one third the milk mixture and beat until combined. Repeat, alternating flour and milk and ending with the flour mixture. Scoop into cupcake papers about 3/4 full. Bake for 20-22 minutes.

4. For Strawberry Cream Cheese Frosting, bring cheese and butter to room temperature. Sift powdered sugar into a bowl. Beat butter and cheese at medium speed until creamy. Add half of the sugar, beat until combined. Add strawberry sauce until you achieve the right color and flavor but making sure not to add too much or the frosting will be too soft. Gradually add any remaining sugar until you get to the consistency and sweetness you like.


Wednesday, July 2, 2008

Strawberry Cream Cake


Seems likes it's getting muggier and muggier here in Florida each day. The non stop pouring rain and the rising heat is killer. I love and hate Florida. This being one of the reasons I hate Florida.

Since it's been so very hot out, I haven't really been baking as much as I use to. I mean, why would I stand around a hot oven and sweat my butt off even more than I already am? It also doesn't help that our air conditioner seriously sucks. I swear out conditioner literally loathes us. We've tried so many times to get it fixed, yet, it always decides to brake down and not work. It's always pms-ing!

But, I wasn't going to let the heat keep me from baking for to long. I've been really craving cake lately, which is strange because I don't exactly love cake. I like it, but it's not something I necessarily love. But I wanted it. And the heat was not going to keep me from making cake, no I was not. My mom found a recipe awhile back for a Strawberry Cream Cake in Cooks Illustrated that I knew I wanted to make eventually, but after seeing Lisa's, Pittsburgh Needs Eated, post on the cake, I decided that this was what I was going to make.

The cake turned out excellent! One of the best I've had, seriously. It was so light and so tasty. I couldn't help but get another slice. It was so good. It's a great light and refreshing cake for the summer!


Recipe

Cake

1 1/4 cups flour
1 1/2 tsp. baking powder
1/4 tsp. salt
1 cup sugar
5 large eggs (2 whole and 3 separated)
6 tbsp. butter , melted
2 tbsp. water
2 tsp. vanilla

Strawberry Filling

2 quarts fresh strawberries, washed, dried, and stemmed
4–6 tbsp. sugar
2 tbsp. kirsch
Pinch of salt

Whipped Cream

8 ounces cream cheese, room temperature
1/2 cup sugar
1 tsp. vanilla
1/8 tsp. salt
2 cups heavy cream


1. For the cake,Preheat oven to 325 degrees. Grease and flour round 9 by 2-inch cake pan or 9-inch springform pan and line with parchment paper. Whisk flour, baking powder, salt, and all but 3 tablespoons sugar in mixing bowl. Whisk in 2 whole eggs and 3 yolks (reserving whites), butter, water, and vanilla and whisk until smooth.

2. In clean bowl of standing mixer fitted with whisk attachment, beat remaining 3 egg whites at medium-low speed until frothy, 1 to 2 minutes. With machine running, gradually add remaining 3 tablespoons sugar, increase speed to medium-high, and beat until soft peaks form, 60 to 90 seconds.

3. Stir one-third of whites into batter to lighten; add remaining whites and gently fold into batter until no white streaks remain. Pour batter into prepared pan and bake until toothpick or wooden skewer inserted into center of cake comes out clean, 30 to 40 minutes. Cool in pan 10 minutes, then cool completely for about 2 hours.

4. For the strawberry filling, Halve 24 of best-looking berries and reserve. Quarter remaining berries; toss with 4 to 6 tablespoons sugar (depending on sweetness of berries) in medium bowl and let sit 1 hour, stirring occasionally. Strain juices from berries and reserve (you should have about 1/2 cup). In a food processor fitted with metal blade, give macerated berries five 1-second pulses (you should have about 1 1/2 cups). In small saucepan over medium-high heat, simmer reserved juices and Kirsch until syrupy and reduced to about 3 tablespoons, 3 to 5 minutes. Pour reduced syrup over macerated berries, add pinch of salt, and toss to combine. Set aside until cake is cooled.

5. For the whipped cream, place cream cheese, sugar, vanilla, and salt in bowl of standing mixer fitted with whisk attachment. Whisk at medium-high speed until light and fluffy, 1 to 2 minutes, scraping down bowl with rubber spatula as needed. Reduce speed to low and add heavy cream in slow, steady stream; when almost fully combined, increase speed to medium-high and beat until mixture holds stiff peaks, 2 to 2 1/2 minutes more, scraping bowl as needed.

6. To assemble the cake, slice cake into three even layers (or two like me). Place bottom layer on cardboard round or cake plate and arrange ring of 20 strawberry halves, cut sides down and stem ends facing out, around perimeter of cake layer. Pour one half of pureed berry mixture (about 3/4 cup) in center, then spread to cover any exposed cake. Gently spread about one-third of whipped cream (about 1 1/2 cups) over berry layer, leaving 1/2-inch border from edge. Place middle cake layer on top and press down gently (whipped cream layer should become flush with cake edge). Repeat with 20 additional strawberry halves, remaining berry mixture, and half of remaining whipped cream; gently press last cake layer on top. Spread remaining whipped cream over top; decorate with remaining cut strawberries. Serve, or chill for up to 4 hours.


Sunday, June 29, 2008

Danish Braid


Daring Bakers Challenge has finally come! This months challenge was one that I was pretty excited about. It's actually something that'd I'd been wanting to make for sometime. In fact, I still have in tags in my mems.

After last months challenge, the Opera Cake, which I sadly didn't get to do, I was really bummed. It was something that I really wanted to make too! But, there was a lot going and, unfortunately, I never got around to making it... But, I definitely made sure that this months I'd have time to sit down and bake this months challenge.

Since this was my very first Danish Braid, I kind of struggled with the making of the braid. It doesn't necessarily look like a 'braid', but more so of like a messy design of lines. But, it still look gorgeous in its own way. The whole making of the dough however was very easy. Not difficult at all. It was just when I was cutting the dough that I got aggravated. I screwed up on some of the cutting and I knew that I couldn't just take it back. But I was fine with it.

For the filling, I used a Orange Marmalade. It just sounded something that'd go really well with the dough, in my opinion. I love citrus filling and flavors. So, I knew that for me, as well as everyone else in the house (who all love citrus as much as I) would like the idea as well. In the end, it was really good, and I love having it for breakfast. And, surprisingly, it wasn't that difficult. I plan on making this again. There's so many different filling I could use!


Recipe

For the Dough

1 tbsp. active dry yeast
1/2 cup whole milk
1/3 cup sugar
Zest of 1 orange, finely grated
3/4 tsp. ground cardamom
1 1/2 tsp. vanilla
1/2 vanilla bean, split and scraped
2 large eggs, chilled
1/4 cup fresh orange juice
3 1/4 cups all-purpose flour
1 tsp. salt

For the Butter Block

1/2 pound (2 sticks) cold unsalted butter
1/4 cup all-purpose flour


1. Combine yeast and milk in the bowl of a mixer fitted with the paddle attachment and mix on low speed. Slowly add sugar, orange zest, cardamom, vanilla extract, vanilla seeds, eggs, and orange juice. Mix well.

2. Change to the dough hook and add the salt with the flour, 1 cup at a time, increasing speed to medium as the flour is incorporated. Knead the dough for about 5 minutes, or until smooth. You may need to add a little more flour if it is sticky. Transfer dough to a lightly floured baking sheet and cover with plastic wrap. Refrigerate for 30 minutes.

3. If using without a standing mixer, Combine yeast and milk in a bowl with a hand mixer on low speed or a whisk. Add sugar, orange zest, cardamom, vanilla extract, vanilla seeds, eggs, and orange juice and mix well. Sift flour and salt on your working surface and make a fountain. Make sure that the “walls” of your fountain are thick and even. Pour the liquid in the middle of the fountain. With your fingertips, mix the liquid and the flour starting from the middle of the fountain, slowly working towards the edges. When the ingredients have been incorporated start kneading the dough with the heel of your hands until it becomes smooth and easy to work with, around 5 to 7 minutes. You might need to add more flour if the dough is sticky.

4. For block butter, combine butter and flour in the bowl of a mixer fitted with a paddle attachment and beat on medium speed for 1 minute. Scrape down the sides of the bowl and the paddle and then beat for 1 minute more, or until smooth and lump free. Set aside at room temperature.

5. After the dough has chilled 30 minutes, turn it out onto a lightly floured surface. Roll the dough into a rectangle approximately 18 x 13 inches and 1/4 inch thick. The dough may be sticky, so keep dusting it lightly with flour. Spread the butter evenly over the center and right thirds of the dough. Fold the left edge of the detrempe to the right, covering half of the butter. Fold the right third of the rectangle over the center third. The first turn has now been completed. Mark the dough by poking it with your finger to keep track of your turns, or use a sticky and keep a tally. Place the dough on a baking sheet, wrap it in plastic wrap, and refrigerate for 30 minutes.

6. Place the dough lengthwise on a floured work surface. The open ends should be to your right and left. Roll the dough into another approximately 13 x 18 inch, 1/4 inch thick rectangle. Again, fold the left third of the rectangle over the center third and the right third over the center third. No additional butter will be added as it is already in the dough. The second turn has now been completed. Refrigerate the dough for 30 minutes.

7. Roll out, turn, and refrigerate the dough two more times, for a total of four single turns. Make sure you are keeping track of your turns. Refrigerate the dough after the final turn for at least 5 hours or overnight. The Danish dough is now ready to be used. If you will not be using the dough within 24 hours, freeze it. To do this, roll the dough out to about 1 inch in thickness, wrap tightly in plastic wrap, and freeze. Defrost the dough slowly in the refrigerator for easiest handling. Danish dough will keep in the freezer for up to 1 month.

Makes 2-1/2 pounds dough


For Orange Marmalade

1 1/2 Oranges, peeled
1/4 Lemon, unpeeled
2 3/4 cups cold water
1 3/4 cup Sugar


1. Remove all white membranes from peeled oranges and slice thin. Slice unpeeled lemon. Cover oranges and lemon with water. Let stand in refrigerator for 24 hours. Boil for 3 hours, add sugar and boil 1 more hour. Put into sterile jars and seal.


To Make the Danish Braid


1. Line a baking sheet with a silicone mat or parchment paper. On a lightly floured surface, roll the Danish Dough into a 15 x 20-inch rectangle, 1/4 inch thick. If the dough seems elastic and shrinks back when rolled, let it rest for a few minutes, then roll again. Place the dough on the baking sheet.

2. Along one long side of the pastry make parallel, 5-inch-long cuts with a knife or rolling pastry wheel, each about 1 inch apart. Repeat on the opposite side, making sure to line up the cuts with those you’ve already made.

3. Spoon the filling or marmalade you’ve chosen to fill your braid down the center of the rectangle. Starting with the top and bottom “flaps”, fold the top flap down over the filling to cover. Next, fold the bottom “flap” up to cover filling. This helps keep the braid neat and helps to hold in the filling. Now begin folding the cut side strips of dough over the filling, alternating first left, then right, left, right, until finished. Trim any excess dough and tuck in the ends.

4. Whisk together the whole egg and yolk in a bowl and with a pastry brush, lightly coat the braid. Spray cooking oil (Pam…) onto a piece of plastic wrap, and place over the braid. Proof at room temperature or, if possible, in a controlled 90 degree F environment for about 2 hours, or until doubled in volume and light to the touch.

5. Near the end of proofing, preheat oven to 400 degrees F. Position a rack in the center of the oven.

6. Bake for 10 minutes, then rotate the pan so that the side of the braid previously in the back of the oven is now in the front. Lower the oven temperature to 350 degrees F, and bake about 15-20 minutes more, or until golden brown. Cool and serve the braid either still warm from the oven or at room temperature. The cooled braid can be wrapped airtight and stored in the refrigerator for up to 2 days, or freeze for 1 month.


Tuesday, June 24, 2008

Mixed Berry Cobbler


To be completely frank, I have never had a cobbler in my life, nor have I ever baked one. Shocking, right? But, I guess there's always something that not everyone has tried before. For me, it's the cobbler. I didn't really even know what the heck a cobbler was. From what I heard, it was basically just a fruit filling with a biscuit on top. This was a reason as to why I really never tried a cobbler. It just didn't sound to appealing to me. However, I was extremely excited to find that this weeks challenge for TWD was a Mixed Berry Cobbler. Now I had to try a cobbler.

Now, I knew that making a cobbler was very easy (which this was), and that it didn't take to many ingredients or anything difficult to make it. It was just the taste that matter. But, I didn't see how you could really go wrong. In the end, it was just how sweet you, as the person eating it, would want it. I made mine pretty sweet (I have a major sweet tooth).

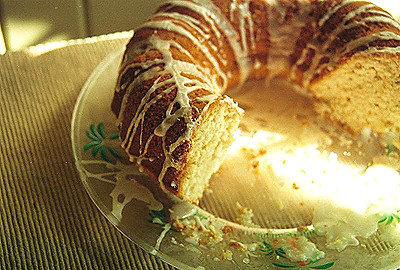
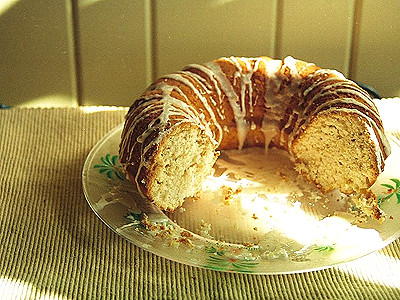
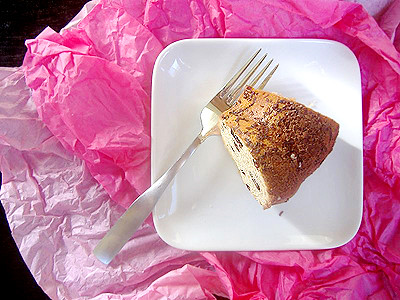
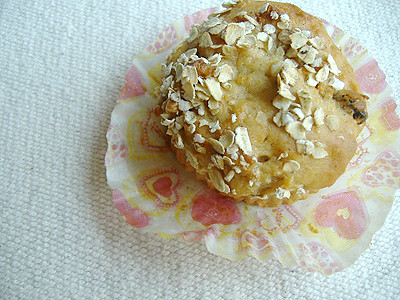
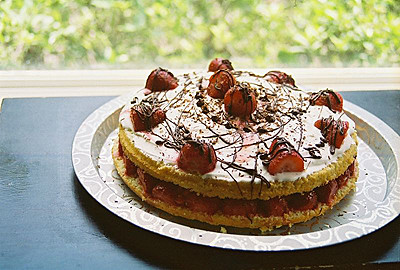
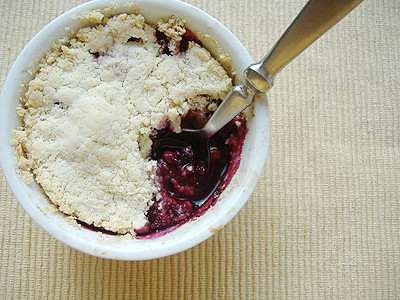
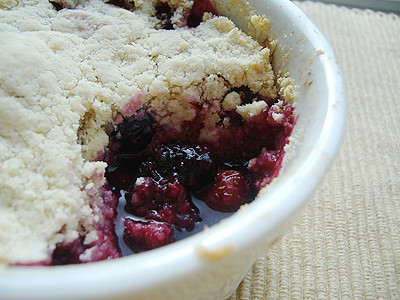
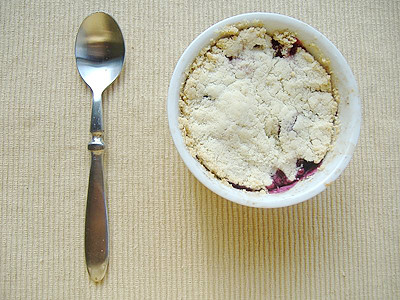
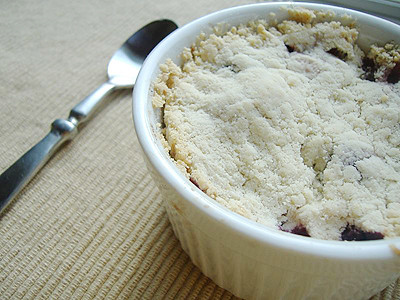
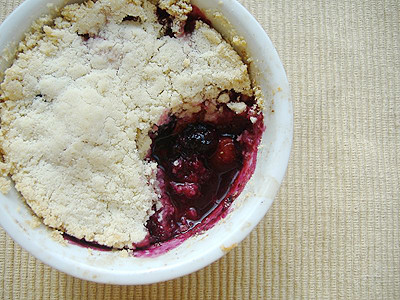
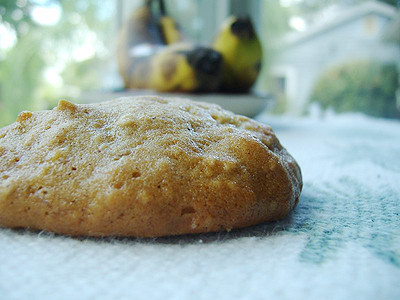
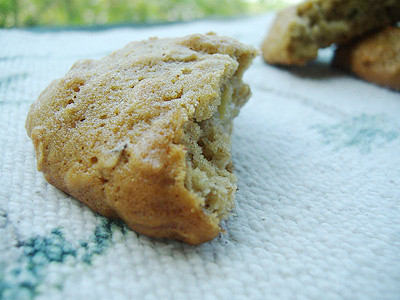
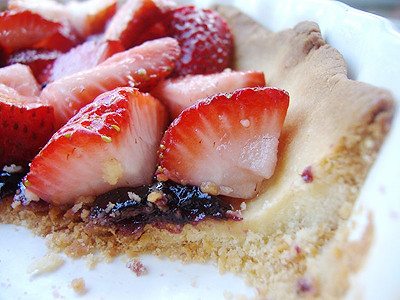
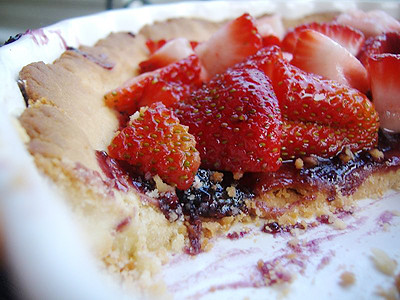
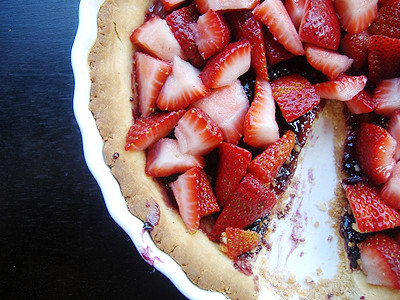
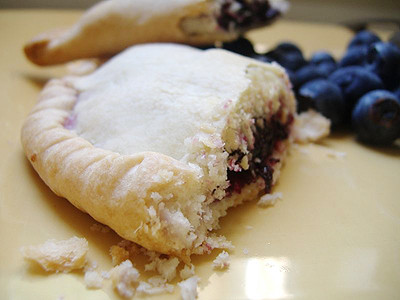
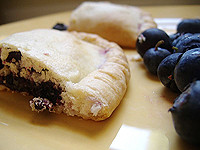
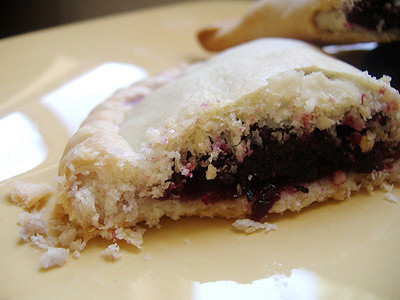
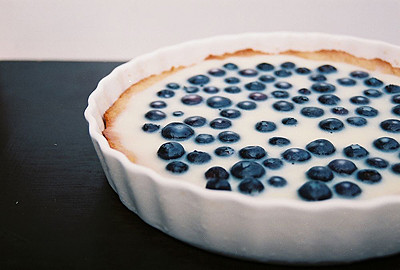
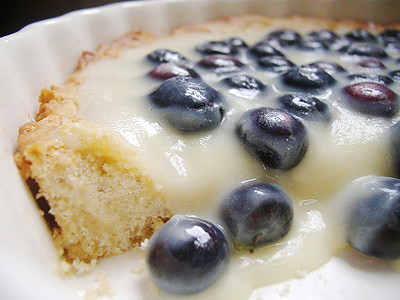
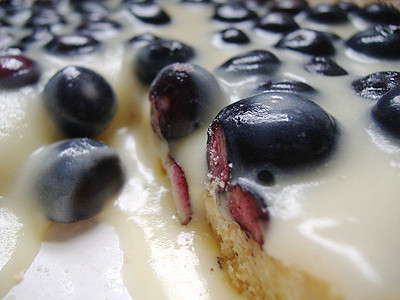
I didn't make it into a huge cobbler. Instead, I made them into individual ramekins (Who knows if I'd really like it or not, or if everyone else would). In my opinion, they looked prettier in little individual portions anyways. I only used blueberries and strawberries (But I used more blueberries than anything ;]). I didn't really have any blackberries or raspberries on hand. If I did, I would have definitely had used them!

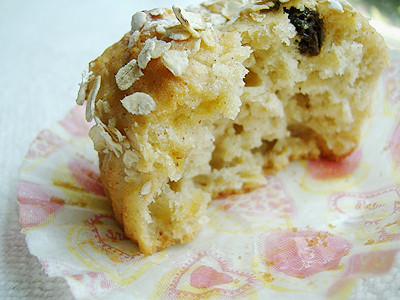
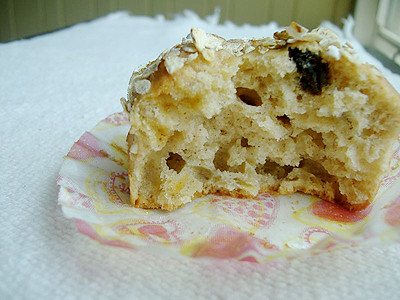
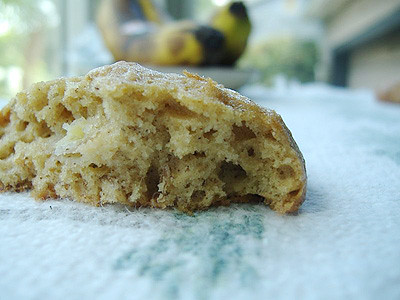
So, what did I think of my first cobbler? Well, after waiting for what seemed like forever and smelling the fruit in oven with my mouth watering, I finally got to take my first bite... And... It was really good! To my surprise, it didn't make me feel bloated for I thought that it might be a bit heavy (I was thinking of pie here...). But it didn't. Which was good. I've now discovered cobbler and it will be something I will make more often now ;]. Go Cobblers! :D


Recipe

For the topping

2 cups flour
1 tbsp. baking powder
3 tbsp. sugar
1/2 tsp. salt
6 tbsp. cold butter, cut up
3/4 cup cold heavy cream

For the filling

5 cups mixed berries, frozen or fresh
4 to 5 tbsp. sugar (depending on your taste)
1 tbsp. cornstarch
Grated zest of 1/2 lemon or lime
1/4 tsp. (or more, to taste) ground black pepper (optional)

Vanilla ice cream, for serving


1. Center a rack in the oven and preheat the oven to 375 degrees. Butter a 9-inch deep-dish pie plate and put it on a baking sheet lined with parchment or a silicone mat.

2. In a large bowl, whisk together the flour, baking powder, sugar and salt. Drop in the butter and, using your fingers, toss to coat the pieces of butter with flour. Quickly, working with your fingertips (my favorite method) or a pastry blender, cut and rub the butter into the dry ingredients until the mixture is pebbly. You'll have pea-size pieces, pieces the size of oatmeal flakes and pieces in between — and that's just right.

3. Pour the cream over the dry ingredients and toss and gently turn the ingredients with a fork until you've got a very soft dough. When the dough comes together, you'll probably still have dry ingredients at the bottom of the bowl — just use a spatula or your hands to mix and knead the dough until it's evenly blended.

4. Don't overdo it; it's better to have a few dry spots than an overworked dough. Even with all the flour mixed in, the dough will be soft and sticky.


5.Turn the dough out onto a sheet of wax paper or plastic wrap, cover with another sheet of paper or plastic and gently press or roll the dough into a circle that is a scant 9 inches in diameter. Don't worry about getting the size exact or about seeing that the edges are even — this is a very homey dessert, and a rough-around the-edges biscuit adds to its charm. Set the dough aside while you prepare the fruit.

6. To make the filling, Toss all the ingredients into a large bowl and stir to mix. Turn the fruit into the buttered pie plate and top with the biscuit. Using a small sharp knife, cut about 6 slits in the dough, just as you would for a piecrust. Then, using either the knife or a large piping tip, cut a circle out of the center of the dough.

7. Bake the cobbler for 60 to 75 minutes, or until the top is puffed and golden brown and the fruit is bubbling steadily up through the center steam hole and all around the scallopy edges of the biscuit. Transfer the pie plate to a rack and let the cobbler cool for at least 30 minutes before serving.

8. Serve the cobbler warm or at room temperature, with ice cream.

STORING: Once the cobbler cools, you can keep it lightly covered for a few hours at room temperature, but you really should enjoy it the day it is made. Don't refrigerate it — the biscuit will lose its appealing texture.


Sunday, June 22, 2008

Mini Banana Crumb Muffins


Baking with bananas again? I know, I know, but I couldn't resist. I love baking with bananas and the left over bananas were extremely ripe (black), which is when they're best to bake with! So, me being me, I couldn't resist to NOT bake something. I almost flipped out when I saw that my father was about to just throw them away! I was about to go total ninja on him when I saw him do that! He definitely learned something from this...

Since I'd already made cookies with bananas in the past couple days, I decided to go with what people would normally bake with bananas; muffins. Easy and delicious. I was going to make regular muffins, but I'd realized the my mini muffin pan was beginning to look lonely (since I hardly ever use it!), so I wanted to put it to go use and make cute little banana muffins. The recipe very simple and they come out so good.

I love baking mini muffins. Something about mini or tiny things always make me squee and say "They're so cute!" Maybe thats just me though... But these mini little muffins were cute. :]


Recipe

For the Muffin

1 1/2 cups flour
1 tsp. baking soda
1 tsp. baking powder
1/2 tsp. salt
3 bananas, mashed
3/4 cup white sugar
1/3 cup packed brown sugar
1/3 cup butter, softened
1 tsp. vanilla
1 egg


For Crumb Topping

1/4 cup sugar
2 tbsp. flour
3/ tsp. ground cinnamon
2 tbsp. butter, softened


1. Preheat oven to 375 degrees. Line a standard or mini muffin pan with muffin papers.

2. In a large bowl, mix together flour, baking soda, baking powder and salt. Set aside. In another bowl, beat together sugars, butter and egg. Add bananas and vanilla.

3. Slowly add the banana mixture into the flour mixture just until moistened. Spoon batter into prepared muffin cups.

4. In a small bowl, mix together sugar, flour and cinnamon. Add butter and combine until mixture resembles coarse cornmeal. Sprinkle topping over muffins.

5. Bake for about 18 to 20 minutes (about 13-15 minutes for mini). Let cool for about 5 minutes before taking out of muffin pan.


Makes about 10-12 standard Muffins (16-18 mini muffins)


Thursday, June 19, 2008

Banana Oatmeal Cookies


Bananas are one of those things that I love to bake with. I never get tired of baking up some comforting banana bread or some big, yummy muffins. I love baking with them and having them. One thing that I've always had trouble finding was a good recipe for banana cookies. I tried my handful of tries and as well as tried several other recipes for banana cookies, but, I've never been to crazy about them. I don't want a cookies that reminds me of eating a banana muffin. I mean, its a cookie, not a muffin.

I recently have seen a lot of people talking about The Essential Chocolate Chip Cookbook by Elinor Klivans. I've heard that it's a really awesome cookbook to have on hand, so, when I got the money, I decided to go check it out. One of the recipes that appealed to me was the Banana Oatmeal Chocolate Chip Cookies. They looked really good, and, healthy. After seeing the blogger Erin Cooks post on the cookies, I decided that I need to bake them right away.

What was so great about these cookies, for me, was that they didn't taste like a banana muffin. They tasted like they were really a Banana Cookies, which, was what I was looking for. I did, however, not add the chocolate chips. I wanted to make these so that my father could eat them too (who doesn't really enjoy chocolate... hard to believe, right?), so I didn't had the chocolate chips. Nonetheless, they still came out really well. This is a recipe I'll be keeping on hand.


Recipe

1 1/4 cups flour
1 tsp. baking soda
1/4 tsp. salt
1 tsp. ground cinnamon
6 tbsp. butter, room temperature
1/2 cup sugar
1/2 cup brown sugar, packed
1 egg
1 tsp. vanilla
1 cup rolled oats
2 bananas, ripe


1. Preheat the oven to 350 degrees. Line 2 baking sheets with parchment paper.

2. In a small bowl, stir the flour, baking soda, salt, and cinnamon together, set aside. In a large bowl, beat the butter and sugars until smoothly blended. Add the egg and vanilla and beat until blended.

3. Slowly add the flour mixture with the butter mixture, mixing just until it is incorporated. Stir in the oatmeal. Use a large spoon to mix in the ripe bananas and mash, mixing just until they are evenly distributed.

4. Drop by tablespoonfuls of dough onto prepared baking sheets. Bake until edges are lightly browned and the tops look dry, about 18 minutes. Cool the cookies on the baking sheet for 10 minutes before transferring to a wire rack to cool completely.

Makes about 2 dozen cookies


Tuesday, June 10, 2008

La Palette’s Strawberry Tart


This weeks TWD challenge was a Strawberry Tart. Perfect for the season. It's summer and you don't necessarily want to be having any heavily sugared desserts. So this was just really perfect.

The recipe is very easy. Not hard at all. I do however have to say that I didn't really like the crust. It's was a bit to flaky like for me. I didn't like it at all. I think next time I will use nuts into the dough. This one just didn't have me at all. It was still good, I just would had used a different tart crust. Like, the one I make for my White Chocolate Blueberry Tart. That crust was amazing!! I think I'll do that next time.


Recipe

For the Filling

Strawberry Jam (I used blueberry to give it a twist)
1 pint strawberries
Sugar (optional)
Whipped Cream (optional)


For the Tart Dough

1 1/2 cups flour
1/2 cup confectioners' sugar
1/4 tsp. salt
1 stick plus 1 tbsp. (9 tbsp.)cold butter, cut into small pieces
1 large egg yolk


1. For the dough, Put the flour, confectioners' sugar and salt in a food processor and pulse a couple of times to combine. Scatter the pieces of butter over the dry ingredients and pulse until the butter is coarsely cut in—you should have some pieces the size of oatmeal flakes and some the size of peas. Stir the yolk, just to break it up, and add it a little at a time, pulsing after each addition.

2. When the egg is in, process in long pulses—about 10 seconds each—until the dough, which will look granular soon after the egg is added, forms clumps and curds. Just before you reach this stage, the sound of the machine working the dough will change—heads up. Turn the dough out onto a work surface and, very lightly and sparingly, knead the dough just to incorporate any dry ingredients that might have escaped mixing.

3. To press the dough into the pan, Butter a 9-inch fluted tart pan with a removable bottom. Press the dough evenly over the bottom and up the sides of the pan, using all but one little piece of dough, which you should save in the refrigerator to patch any cracks after the crust is baked. Don't be too heavy-handed—press the crust in so that the edges of the pieces cling to one another, but not so hard that the crust loses its crumbly texture. Freeze the crust for at least 30 minutes, preferably longer, before baking.

4. To partially or fully bake the crust: Center a rack in the oven and preheat the oven to 375 degrees F.


5. Butter the shiny side of a piece of aluminum foil and fit the foil, buttered side down, tightly against the crust. (Since you froze the crust, you can bake it without weights.) Put the tart pan on a baking sheet and bake the crust for 25 minutes. Carefully remove the foil. If the crust has puffed, press it down gently with the back of a spoon. For a partially baked crust, patch the crust if necessary, then transfer the crust to a cooling rack (keep it in its pan).

6. To fully bake the crust, Bake for another 8 minutes or so, or until it is firm and golden brown. Transfer the tart pan to a rack and cool the crust to room temperature before filling.

7. To patch a partially or fully baked crust, if necessary: If there are any cracks in the baked crust, patch them with some of the reserved raw dough as soon as you remove the foil. Slice off a thin piece of the dough, place it over the crack, moisten the edges and very gently smooth the edges into the baked crust. If the tart will not be baked again with its filling, bake for another 2 minutes or so, just to take the rawness off the patch.

8. Once crust has completely cooled, spread jam on crust. Add strawberries, chopped roughly, on top of the crust. Serve with whipped cream is desired. You can add sugar too to lightly sweeten it.


Wednesday, June 4, 2008

Blueberry Hand Pies


With exams finally over and school coming to an end today, I felt like I should spoil myself a little with the fact of all the stress from studying for exams for the past week. We have a bunch of blueberries that we bought not to long ago that needed to be used (we stocked up on blueberries when there was a sale).

I wanted to make something that would for sure make me feel happy. And what better than pie! A feel good dessert in my opinion. I didn't necessarily want to make a big pie because I knew not everyone would want to eat it (with bikini season here), so I decided to make them in little individual pies. These aren't hard to make at all, and the dough is very good. It's kind of flaky, which I like. If your not into making your own dough or don't have the time, you could always buy store bought dough. That'll be just as good. Either way, they'll turn out great. These were killer!


Recipe

For the Filling

1 cup fresh blueberries
2 tbsp. lemon juice
1 tbsp. cornstarch
1/8 tsp. cinnamon
1/4 cup sugar
Milk for brushing top


For the Dough

1 1/4 cup flour
6 tbsp. butter, cold, cut in small cubes
2 tbsp. shortening
1/8 tsp. salt
3-4 tbsp. ice water


1. For the filling, in a medium heavy saucepan over medium heat cook blueberries, sugar, cornstarch and cinnamon. Stir frequently until mixture comes to a boil and thickens, about 5 minutes. Remove from heat and set aside to cool.

2. To make the dough, get a food processor or use your hand, blend flour, butter, shortening and salt until the mixture resembles a coarse meal and has some pea sized pieces of butter left in it.


3. While pulsing, add water a little at a time until dough comes together when pinched in your hand. Wrap in plastic wrap and refrigerate for at least an hour or up to 1 day.
Preheat oven to 375.

4. When dough is ready, roll chilled pastry out on a lightly floured surface into a 1/8 inch thick rectangle. Cut 4 1/2 inch squares or circles. Fill with about a mounded tablespoon of filling. Seal shut with your fingers . Fold edges over in a decorative shape or seal with the tines of a fork. Re-roll dough scraps to make up to eight circles or squares, allowing it to rest about 10 minutes between rolling.

5. Place hand pie on parchment lined cookie sheet. When all the pies are on the cookie sheet brush with a little milk and generously sprinkle with sugar. Bake about 20-25 minutes until golden brown, rotating cookie sheet half way through baking. Store at room temperature.


Friday, May 30, 2008

White Chocolate Blueberry Tart


Blueberries have been going on sale a lot lately here in Florida, so, I decided to take the opportunity to stock up on a few blueberries since they're always so expensive! And I love blueberries, but buying them as much as I'd like kind adds up to be pretty costly. There were actually a lot of things that I thought of to make with the blueberries, but one thing really stuck with me. A blueberry tart; With chocolate! Oh yea. Winner. Ding, ding, ding! So, that's exactly what I did. Made one awesome blueberry tart.

What I loved most about this was defiantly the crust! The cashews really gave it a awesome taste! If you don't really like cashews though, you could always use other nuts that you prefer. Pecans, almonds, walnuts; Whatever to your choosing. But, I'd have the say that the cashews really complemented with the blueberries and chocolate. I would say try it. I'll defiantly be keeping this recipe for the crust in memory for the future. It was just so good.

The whole things was awesome in general. You have to keep in in the fridge or freezer. For me however, living in the Sunshine State where heat is out enemy, I had to keep it in the freezer since it has been killer hot out. If you were to take ice out of the freezer, it would begin to melt. So I thought I'd be safe and put the tart in the freezer so that I wouldn't have to fear that it would melt! Anyways, I really liked this recipe. Everything came together really well and very much enjoyed it! It's typically a very easy dessert, too! You'll love it!


Recipe

For the Crust

2/3 cup cashews, finely chopped
1 egg, slightly beaten
1/4 cup butter
2/3 cup flour
1/4 cup sugar
1 tsp. orange zest

For the Filling

1 cup white chocolate
2 tbsp. butter
2/3 cup heavy cream
1/2 cup fresh blueberries


1. For the crust, preheat oven to 375 degrees degrees. Lightly grease a 9-inch tart pan or 4 small tarts pans. Place all ingredients for the crust into a food processor, and mix until combined well. Press the mixture into prepared tart pan (or 4 small tart pans), using the back of a small spoon (the mixture will have a crumbly texture). Refrigerate crust for 15 minutes. Bake in preheated oven for 25 to 30 minutes. Let crust cool.

2. Break the chocolate into pieces in a large glass bowl placed over a saucepan of boiling water. Stir occasionally until melted. Remove from heat, and stir in the 2 tbsp. butter until melted. Mix in the heavy cream, and whisk until smooth.

3. Spread the blueberries over the tart crust, then pour the chocolate mixture evenly over the top. Chill in refrigerator for at least 3 hours, so that the chocolate sets. Garnish with walnut halves.

Makes 6 to 8 servings.


Genesis of a Cook
check out Tastespotting