Showing posts with label Daring Bakers Challenge. Show all posts

Saturday, February 28, 2009

Chocolate Valentino


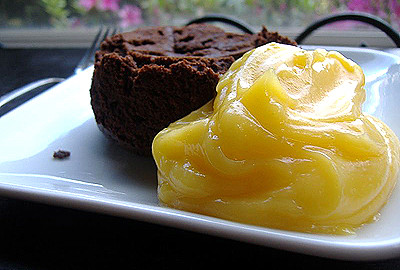
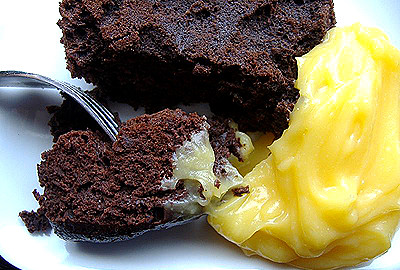
One of my favorite Daring Bakers Challenge, I must admit. Really simple, and really good. That's all I really have to say.


Recipe

February’s challenge is a Flourless Chocolate Cake, Chocolate Valentino, inspired by Malaysia’s “most flamboyant food ambassador”, Chef Wan. Recipe comes from Sweet Treats by Chef Wan

What we Want You to Do:

-Use the following recipe

-Serve with - The original recipe calls for the cake to be served with whipping cream. BUT we decided to make this more of a challenge and ask you to make your own Ice Cream – a first for the DBrs. You can choose any flavour you want and any recipe although we provided two vanilla ice cream recipes. But we are giving you a little freedom here and will allow whipped cream as a topping as well or of course non-dairy whip. Be as creative as you want with your topping. Any fruit puree or sauce would be lovely with this cake.

- Use your favorite chocolate – the finished cake will taste exactly like the chocolate you use. Be creative with your chocolate, if you like a sweeter cake use milk chocolate or a combination of the semisweet and milk chocolate. If you like bittersweet chocolate use that and add sweetness by mixing the semi sweet with bittersweet. If you are daring, try white chocolate. (Dharm used all bittersweet and Wendy used a half bitter/half semi sweet chocolate).

- A higher cocoa percentage increases the bitterness of the chocolate.

-Equipment - it is optional to use a heart shaped pan. For a real Valentino, bake it in a heart shaped pan or cut it out into a heart shape. You may use any shape pan that gives you an area of 50” - 6x8 or 7x7. An 8” spring form pan works with great results as do smaller pans or ramekins.

-An instant read thermometer highly recommended.

Note on recipe - the recipe consists of 3 simple ingredients and how you interpret them is part of the challenge. The simplicity of this recipe gives credit to the ingredients much in the same way of French baguette.

-This recipe comes together very quickly with a hand mixer.

-This is a very decadent cake that will sink a little as it cools but will still hold its shape.

-Very dense and fudgy cake that tastes divine.

-The top forms a light crust kind of like a brownie

Posting Date: February 28, 2009

Printable Recipe:

Chocolate Valentino
Preparation Time: 20 minutes
16 ounces (1 pound) (454 grams) of semisweet chocolate, roughly chopped
½ cup (1 stick) plus 2 tablespoons (146 grams total) of unsalted butter
5 large eggs separated

1. Put chocolate and butter in a heatproof bowl and set over a pan of simmering water (the bottom of the bowl should not touch the water) and melt, stirring often.
2. While your chocolate butter mixture is cooling. Butter your pan and line with a parchment circle then butter the parchment.
3. Separate the egg yolks from the egg whites and put into two medium/large bowls.
4. Whip the egg whites in a medium/large grease free bowl until stiff peaks are formed (do not over-whip or the cake will be dry).
5. With the same beater beat the egg yolks together.
6. Add the egg yolks to the cooled chocolate.
7. Fold in 1/3 of the egg whites into the chocolate mixture and follow with remaining 2/3rds. Fold until no white remains without deflating the batter. {link of folding demonstration}
8. Pour batter into prepared pan, the batter should fill the pan 3/4 of the way full, and bake at 375F/190C
9. Bake for 25 minutes until an instant read thermometer reads 140F/60C.
Note – If you do not have an instant read thermometer, the top of the cake will look similar to a brownie and a cake tester will appear wet.
10. Cool cake on a rack for 10 minutes then unmold.


Sunday, September 28, 2008

Lavash Crackers


For whatever reason, blogger hates me. I had a long, elaborate post about these crackers. I come to see my post and discover that it's not there. I had it on a timed post. I don't think I'll ever do that again... Since I'm a bite crammed in work, I'm going to make this quick, nice and sweet.

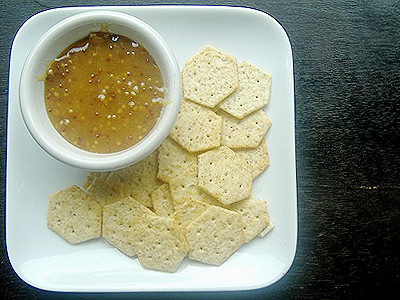
This months Daring Bakers Challenge was Lavash Crackers. These crackers were a bit... annoying, if you ask me. I'm a perfectionist, and they were rather, well, rugged most of the time after baking. But, I made several batches of these being that the taste was delicious! I chose to use sea salt, rosemary, black pepper and garlic for these crackers. They're all pretty much my favorite spice, so I thought I'd combine them all for these crackers.

I also wanted to try and get fancy with these crackers. I poke holes into them. I try to make all of them even (I even measured because I wanted to have them all perfect!) and I poked 7 in each cracker. I was a bit nervous how they would turn out... I was unsure as to how they would bake. Whether they would rise or not. But, they turned out great. And these will be something I know I will make time and time again.


Recipe

Lavash Cracker
The Bread Baker’s Apprentice by Peter Reinhart


Recipe

1 1/2 cups unbleached bread flour
1 tsp salt
3/4 tsp active dry yeast
1 tbsp. sugar
1 tbsp. vegetable oil
1 tbsp. sesame seed
1 tsp ground cumin
1/3 to 1/2 cup + 2 Tb water, at room temperature
Poppy seeds, sesame seeds, paprika, cumin seeds, caraway seeds, or kosher salt for toppings


1. Put the active dry yeast with the water and let it sit until it bubbles, about 5 minutes.

2. In a mixing bowl, stir together the yeast mixture with the flour, salt, cumin, sesame seed, sugar, oil, and just enough water to bring everything together into a ball. If your ball is dry and not wet enough, add in some water by the tablespoonfuls.

3. Sprinkle some flour on the counter and transfer the dough to the counter. Knead for about 10 minutes, or until the ingredients are evenly distributed. The dough should pass the windowpane test and register 77 degrees to 81 degrees Fahrenheit. The dough should be firmer than French bread dough, but not quite as firm as bagel dough (what I call medium-firm dough), satiny to the touch, not tacky, and supple enough to stretch when pulled.

4. Lightly oil a bowl and transfer the dough to the bowl, rolling it around to coat it with oil. Cover the bowl with plastic wrap.
Ferment at room temperature for 90 minutes, or until the dough doubles in size. (You can also retard the dough overnight in the refrigerator immediately after kneading or mixing).

5. Mist the counter lightly with spray oil and transfer the dough to the counter. Press the dough into a square with your hand and dust the top of the dough lightly with flour. Roll it out with a rolling pin into a paper thin sheet about 15 inches by 12 inches. You may have to stop from time to time so that the gluten can relax. At these times, lift the dough from the counter and wave it a little, and then lay it back down. Cover it with a towel or plastic wrap while it relaxes. When it is the desired thinness, let the dough relax for 5 minutes. Line a sheet pan with baking parchment.

6. Carefully lift the sheet of dough and lay it on the parchment. If it overlaps the edge of the pan, snip off the excess with scissors.

7. Preheat the oven to 350 degrees Fahrenheit with the oven rack on the middle shelf. Mist the top of the dough with water and sprinkle a covering of seeds or spices on the dough (such as alternating rows of poppy seeds, sesame seeds, paprika, cumin seeds, caraway seeds, kosher or pretzel salt, etc.) Be careful with spices and salt - a little goes a long way. If you want to precut the cracker, use a pizza cutter (rolling blade) and cut diamonds or rectangles in the dough. You do not need to separate the pieces, as they will snap apart after baking. If you want to make shards, bake the sheet of dough without cutting it first.

8. Bake for 15 to 20 minutes, or until the crackers begin to brown evenly across the top (the time will depend on how thinly and evenly you rolled the dough).
When the crackers are baked, remove the pan from the oven and let them cool in the pan for about 10 minutes. You can then snap them apart or snap off shards and serve.


Raspberry Honey Mustard Sauce

1 jar (12 oz. size) black raspberry jam
1/2 cup honey
1/2 cup prepared mustard


1. In small pan, combine jam, honey and mustard, stir constantly, cook over medium heat until jam melts and sauce is smooth. Store in an airtight container in refrigerator.


Sunday, August 31, 2008

Chocolate Éclairs


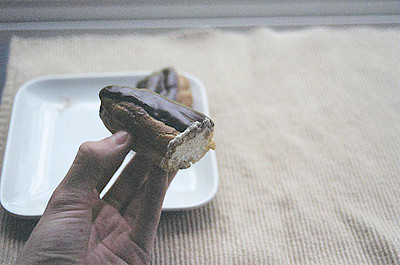
Eclairs were this months Daring Bakers Challenge has come. I was quite excited about this months; as I am with any of them. I had decided to do this months challenge at the beginning of the month for I knew that I wouldn't be able to do anytime later. I would've never had to time.

I've never made Eclairs before. I've also understood the name of Eclairs. It's means "flashing." I wonder what that has anything to do with food. Nonetheless, Eclairs are awesome and I was quite excited about actually making one myself. I've always heard that they're hard. I don't know why people think this. It's kind of like cream puffs. People make them out to seem so difficult when in fact, they're not that hard at all. Making Eclairs isn't that hard at all. You just have to take the time to try.

These were pretty rich. One was enough for me. My little brother, the pickiest person in the house, even liked them. He saw them and actually asked me if he could try one! It took me by surprise, that's for sure. He's an honest kid, like me, so he'd tell me the truth. He said they were really great. He wanted me to make more. He loved the filling and I have to say, so did I. They were great all together. This was a great challenge!


Recipe

Pierre Hermé’s Cream Puff Dough
Recipe from Chocolate Desserts by Pierre Hermé
(makes 20-24 Éclairs)

1/2 cup whole milk
1/2 cup water
1 stick unsalted butter, cut into 8 pieces
1/4 teaspoon sugar
1/4 teaspoon salt
1 cup all-purpose flour
5 large eggs, at room temperature

1. In a heavy bottomed medium saucepan, bring the milk, water, butter, sugar and salt to the
boil.

2. Once the mixture is at a rolling boil, add all of the flour at once, reduce the heat to medium
and start to stir the mixture vigorously with a wooden spoon. The dough comes together very
quickly. Do not worry if a slight crust forms at the bottom of the pan, it’s supposed to. You
need to carry on stirring for a further 2-3 minutes to dry the dough. After this time the dough
will be very soft and smooth.

3. Transfer the dough into a bowl of a mixer fitted with the paddle attachment, or using your
handmixer or if you still have the energy, continue by hand. Add the eggs one at a time,
beating after each egg has been added to incorporate it into the dough.
You will notice that after you have added the first egg, the dough will separate, once again do
not worry. As you keep working the dough, it will come back all together again by the time you
have added the third egg. In the end the dough should be thick and shiny and when lifted it
should fall back into the bowl in a ribbon.

4. The dough should be still warm. It is now ready to be used for the éclairs as directed above.

Notes:
1. Once the dough is made you need to shape it immediately.

2. You can pipe the dough and the freeze it. Simply pipe the dough onto parchment-lined baking
sheets and slide the sheets into the freezer. Once the dough is completely frozen, transfer the
piped shapes into freezer bags. They can be kept in the freezer for up to a month.


Chocolate Pastry Cream
Recipe from Chocolate Desserts by PierreHermé

2 cups whole milk
4 large egg yolks
6 tbsp sugar
3 tbsp. cornstarch, sifted
7 oz bittersweet chocolate, preferably Velrhona Guanaja, melted
2 1/2 tbsp unsalted butter, at room temperature

1. In a small saucepan, bring the milk to a boil. In the meantime, combine the yolks, sugar and cornstarch together and whisk in a heavy‐bottomed saucepan.

2. Once the milk has reached a boil, temper the yolks by whisking a couple spoonfuls of the hot milk into the yolk mixture.Continue whisking and slowly pour the rest of the milk into the tempered yolk mixture.

3. Strain the mixture back into the saucepan to remove any egg that may have scrambled. Place the pan over medium heat and whisk vigorously (without stop) until the mixture returns to a boil. Keep whisking vigorously for 1 to 2 more minutes (still over medium heat).Stir in the melted chocolate and then remove the pan from the heat.

4. Scrape the pastry cream into a small bowl and set it in an ice‐water bath to stop the cooking process. Make sure to continue stirring the mixture at this point so that it remains smooth.

5. Once the cream has reached a temperature of 140 F remove from the ice‐water bath and stir in the butter in three or four installments. Return the cream to the ice‐water bath to continue cooling, stirring occasionally, until it has completely cooled. The cream is now ready to use or store in the fridge.

Notes:
1. The pastry cream can be made 2‐3 days in advance and stored in the refrigerator.

2. In order to avoid a skin forming on the pastry cream, cover with plastic wrap pressed onto the cream.

3. Tempering the eggs raises the temperature of the eggs slowly so that they do not scramble.


Chocolate Glaze
Recipe from Chocolate Desserts by Pierre Hermé
(makes 1 cup or 300g)

1/3 cup heavy cream
3 1/2 oz bittersweet chocolate, finely chopped
4 tsp unsalted butter, cut into 4 pieces, at room temperature
7 tbsp Chocolate Sauce (recipe below), warm or at room temperature

1. In a small saucepan, bring the heavy cream to a boil. Remove from the heat and slowly begin to add the chocolate, stirring with a wooden spoon or spatula.

2, Stirring gently, stir in the butter, piece by piece followed by the chocolate sauce.

Notes:
1. If the chocolate glaze is too cool (i.e. not liquid enough) you may heat it briefly
 in the microwave or over a double boiler. A double boiler is basically a bowl sitting over (not touching) simmering water.

2. It is best to glaze the eclairs after the glaze is made, but if you are pressed for time, you can make the glaze a couple days ahead of time, store it in the fridge and bring it up to the proper temperature (95 to 104 F) when ready to glaze.


Chocolate Sauce
Recipe from Chocolate Desserts by Pierre Hermé
(makes 1½ cups or 525 g)


4 1/2 oz bittersweet chocolate, finely chopped
1 cup water
1/2 cup crème fraîche, or heavy cream
1/3 cup sugar

1. Place all the ingredients into a heavy‐bottomed saucepan and bring to a boil, making sure to stir constantly. Then reduce the heat to low and continue stirring with a wooden spoon until the sauce thickens.

2. It may take 10‐15 minutes for the sauce to thicken, but you will know when it is done when it coats the back of your spoon.

Notes:
1. You can make this sauce ahead of time and store it in the refrigerator for two weeks. Reheat the sauce in a microwave oven or a double boiler before using.
2) This sauce is also great for cakes, ice-cream and tarts.

Start Baking
1. Preheat your oven to 375 degrees F (190 degrees C). Divide the oven into thirds by
positioning the racks in the upper and lower half of the oven. Line two baking sheets with
waxed or parchment paper.

2. Fill a large pastry bag fitted with a 2/3 (2cm) plain tip nozzle with the warm cream puff dough.
Pipe the dough onto the baking sheets in long, 4 to 41/2 inches (about 11 cm) chubby fingers.
Leave about 2 inches (5 cm) space in between each dough strip to allow them room to puff.
The dough should give you enough to pipe 20-24 éclairs.

3. Slide both the baking sheets into the oven and bake for 7 minutes. After the 7 minutes, slip the
handle of a wooden spoon into the door to keep in ajar. When the éclairs have been in the
oven for a total of 12 minutes, rotate the sheets top to bottom and front to back. Continue
baking for a further 8 minutes or until the éclairs are puffed, golden and firm. The total baking
time should be approximately 20 minutes.

Notes:
1. The éclairs can be kept in a cool, dry place for several hours before filling.


Assembling the éclairs:

1. Slice the éclairs horizontally, using a serrated knife and a gently sawing motion. Set aside the
bottoms and place the tops on a rack over a piece of parchment paper.

2. The glaze should be barely warm to the touch (between 95 – 104 degrees F or 35 – 40
degrees C, as measured on an instant read thermometer). Spread the glaze over the tops of
the éclairs using a metal icing spatula. Allow the tops to set and in the meantime fill the
bottoms with the pastry cream.

3. Pipe or spoon the pastry cream into the bottoms of the éclairs. Make sure you fill the bottoms
with enough cream to mound above the pastry. Place the glazed tops onto the pastry cream
and wriggle gently to settle them.

Notes:
1. If you have chilled your chocolate glaze, reheat by placing it in a bowl over simmering water,
stirring it gently with a wooden spoon. Do not stir too vigorously as you do not want to create
bubbles.

2. The éclairs should be served as soon as they have been filled.


Sunday, June 29, 2008

Danish Braid


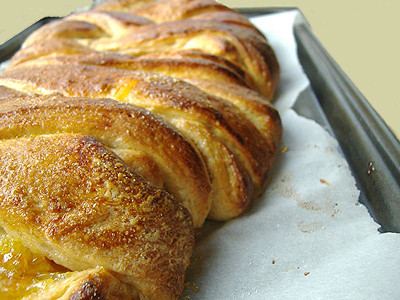
Daring Bakers Challenge has finally come! This months challenge was one that I was pretty excited about. It's actually something that'd I'd been wanting to make for sometime. In fact, I still have in tags in my mems.

After last months challenge, the Opera Cake, which I sadly didn't get to do, I was really bummed. It was something that I really wanted to make too! But, there was a lot going and, unfortunately, I never got around to making it... But, I definitely made sure that this months I'd have time to sit down and bake this months challenge.

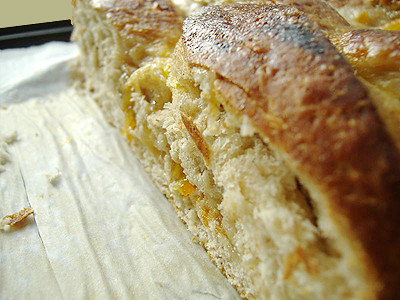
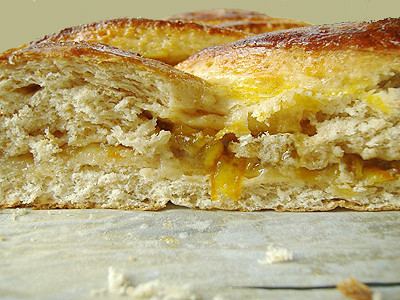
Since this was my very first Danish Braid, I kind of struggled with the making of the braid. It doesn't necessarily look like a 'braid', but more so of like a messy design of lines. But, it still look gorgeous in its own way. The whole making of the dough however was very easy. Not difficult at all. It was just when I was cutting the dough that I got aggravated. I screwed up on some of the cutting and I knew that I couldn't just take it back. But I was fine with it.

For the filling, I used a Orange Marmalade. It just sounded something that'd go really well with the dough, in my opinion. I love citrus filling and flavors. So, I knew that for me, as well as everyone else in the house (who all love citrus as much as I) would like the idea as well. In the end, it was really good, and I love having it for breakfast. And, surprisingly, it wasn't that difficult. I plan on making this again. There's so many different filling I could use!


Recipe

For the Dough

1 tbsp. active dry yeast
1/2 cup whole milk
1/3 cup sugar
Zest of 1 orange, finely grated
3/4 tsp. ground cardamom
1 1/2 tsp. vanilla
1/2 vanilla bean, split and scraped
2 large eggs, chilled
1/4 cup fresh orange juice
3 1/4 cups all-purpose flour
1 tsp. salt

For the Butter Block

1/2 pound (2 sticks) cold unsalted butter
1/4 cup all-purpose flour


1. Combine yeast and milk in the bowl of a mixer fitted with the paddle attachment and mix on low speed. Slowly add sugar, orange zest, cardamom, vanilla extract, vanilla seeds, eggs, and orange juice. Mix well.

2. Change to the dough hook and add the salt with the flour, 1 cup at a time, increasing speed to medium as the flour is incorporated. Knead the dough for about 5 minutes, or until smooth. You may need to add a little more flour if it is sticky. Transfer dough to a lightly floured baking sheet and cover with plastic wrap. Refrigerate for 30 minutes.

3. If using without a standing mixer, Combine yeast and milk in a bowl with a hand mixer on low speed or a whisk. Add sugar, orange zest, cardamom, vanilla extract, vanilla seeds, eggs, and orange juice and mix well. Sift flour and salt on your working surface and make a fountain. Make sure that the “walls” of your fountain are thick and even. Pour the liquid in the middle of the fountain. With your fingertips, mix the liquid and the flour starting from the middle of the fountain, slowly working towards the edges. When the ingredients have been incorporated start kneading the dough with the heel of your hands until it becomes smooth and easy to work with, around 5 to 7 minutes. You might need to add more flour if the dough is sticky.

4. For block butter, combine butter and flour in the bowl of a mixer fitted with a paddle attachment and beat on medium speed for 1 minute. Scrape down the sides of the bowl and the paddle and then beat for 1 minute more, or until smooth and lump free. Set aside at room temperature.

5. After the dough has chilled 30 minutes, turn it out onto a lightly floured surface. Roll the dough into a rectangle approximately 18 x 13 inches and 1/4 inch thick. The dough may be sticky, so keep dusting it lightly with flour. Spread the butter evenly over the center and right thirds of the dough. Fold the left edge of the detrempe to the right, covering half of the butter. Fold the right third of the rectangle over the center third. The first turn has now been completed. Mark the dough by poking it with your finger to keep track of your turns, or use a sticky and keep a tally. Place the dough on a baking sheet, wrap it in plastic wrap, and refrigerate for 30 minutes.

6. Place the dough lengthwise on a floured work surface. The open ends should be to your right and left. Roll the dough into another approximately 13 x 18 inch, 1/4 inch thick rectangle. Again, fold the left third of the rectangle over the center third and the right third over the center third. No additional butter will be added as it is already in the dough. The second turn has now been completed. Refrigerate the dough for 30 minutes.

7. Roll out, turn, and refrigerate the dough two more times, for a total of four single turns. Make sure you are keeping track of your turns. Refrigerate the dough after the final turn for at least 5 hours or overnight. The Danish dough is now ready to be used. If you will not be using the dough within 24 hours, freeze it. To do this, roll the dough out to about 1 inch in thickness, wrap tightly in plastic wrap, and freeze. Defrost the dough slowly in the refrigerator for easiest handling. Danish dough will keep in the freezer for up to 1 month.

Makes 2-1/2 pounds dough


For Orange Marmalade

1 1/2 Oranges, peeled
1/4 Lemon, unpeeled
2 3/4 cups cold water
1 3/4 cup Sugar


1. Remove all white membranes from peeled oranges and slice thin. Slice unpeeled lemon. Cover oranges and lemon with water. Let stand in refrigerator for 24 hours. Boil for 3 hours, add sugar and boil 1 more hour. Put into sterile jars and seal.


To Make the Danish Braid


1. Line a baking sheet with a silicone mat or parchment paper. On a lightly floured surface, roll the Danish Dough into a 15 x 20-inch rectangle, 1/4 inch thick. If the dough seems elastic and shrinks back when rolled, let it rest for a few minutes, then roll again. Place the dough on the baking sheet.

2. Along one long side of the pastry make parallel, 5-inch-long cuts with a knife or rolling pastry wheel, each about 1 inch apart. Repeat on the opposite side, making sure to line up the cuts with those you’ve already made.

3. Spoon the filling or marmalade you’ve chosen to fill your braid down the center of the rectangle. Starting with the top and bottom “flaps”, fold the top flap down over the filling to cover. Next, fold the bottom “flap” up to cover filling. This helps keep the braid neat and helps to hold in the filling. Now begin folding the cut side strips of dough over the filling, alternating first left, then right, left, right, until finished. Trim any excess dough and tuck in the ends.

4. Whisk together the whole egg and yolk in a bowl and with a pastry brush, lightly coat the braid. Spray cooking oil (Pam…) onto a piece of plastic wrap, and place over the braid. Proof at room temperature or, if possible, in a controlled 90 degree F environment for about 2 hours, or until doubled in volume and light to the touch.

5. Near the end of proofing, preheat oven to 400 degrees F. Position a rack in the center of the oven.

6. Bake for 10 minutes, then rotate the pan so that the side of the braid previously in the back of the oven is now in the front. Lower the oven temperature to 350 degrees F, and bake about 15-20 minutes more, or until golden brown. Cool and serve the braid either still warm from the oven or at room temperature. The cooled braid can be wrapped airtight and stored in the refrigerator for up to 2 days, or freeze for 1 month.


Sunday, April 27, 2008

Cheesecake Pops


Cheesecake Pops


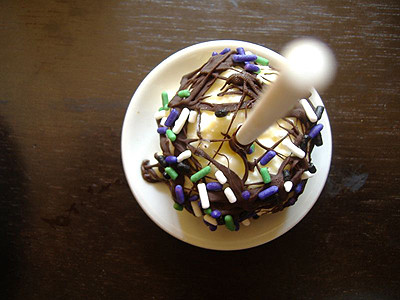
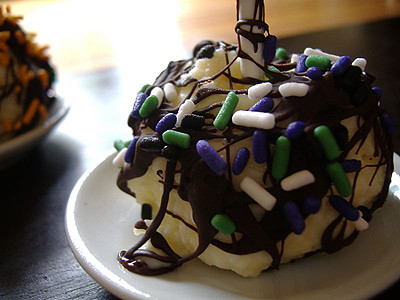
Once again, this months Daring Bakers Challenge is here. To be completely honest, I was hoping for something more... Well, challenging. This months challenge was to make Cheesecake Pops. I don't know if it were just me, but it seemed way to easy. Nonetheless, I still was looking forward to making these. They seemed interesting and I'd never made them before. So I was still all for trying something I'd never made.

The recipe was pretty simple. However, the baking time... It said for 35-45 minutes, but, for me, it took almost an hour. That was probably the only thing that I'd had trouble with. The time. When it came to coating them, I first coated one completely with chocolate. I didn't like it. The chocolate over powered the taste of the cheesecake. You couldn't really taste the cheesecake because the chocolate was over powering it. So, instead of coating it completely with chocolate, I drizzled it. Much better in my opinion.

It was an o.k. pop in my opinion. My taste buds don't necessarily like the taste of just plain cheesecake. I'd want some more flavor in it. I'd probably would had liked it more that way. Nonetheless, it was still a good pop.


Cheesecake Pops


Recipe

5 packages (8-oz. ) cream cheese, room temperature
2 cups sugar
1/4 cup all-purpose flour
Cheesecake Pops1/4 tsp. salt
5 large eggs
2 egg yolks
2 tsp. pure vanilla extract
1/4 cup heavy cream
Boiling water as needed

30-40 lollipop sticks

1 pound chocolate, finely chopped
2 tbsp. vegetable shortening

Assorted decorations such as chopped nuts, colored jimmies, crushed peppermints, mini chocolate chips, sanding sugars, dragees) - Optional

(Note: White chocolate is harder to use this way, but not impossible)


1. Position oven rack in the middle of the oven and preheat to 325 degrees F. Set some water to boil.

2. In a large bowl, beat together the cream cheese, sugar, flour, and salt until smooth. If using a mixer, mix on low speed. Add the whole eggs and the egg yolks, one at a time, beating well (but still at low speed) after each addition. Beat in the vanilla and cream.

3. Grease a 10-inch cake pan (not a springform pan), and pour the batter into the cake pan. Place the pan in a larger roasting pan. Fill the roasting pan with the boiling water until it reaches halfway up the sides of the cake pan. Bake until the cheesecake is firm and slightly golden on top, 35 to 45 minutes.

4. Remove the cheesecake from the water bath and cool to room temperature. Cover the cheesecake with plastic wrap and refrigerate until very cold, at least 3 hours or up to overnight.

5. When the cheesecake is cold and very firm, scoop the cheesecake into 2-ounce balls and place on a parchment paper-lined baking sheet. Carefully insert a lollipop stick into each cheesecake ball. Freeze the cheesecake pops, uncovered, until very hard, at least 1 – 2 hours.

6. When the cheesecake pops are frozen and ready for dipping, prepare the chocolate in the top of a double boiler, stirring often, until chocolate is melted and chocolate and shortening are combined. Stir until completely smooth.

7. Quickly dip a frozen cheesecake pop in the melted chocolate, swirling quickly to coat it completely. Shake off any excess into the melted chocolate. If you like, you can now roll the pops quickly in optional decorations. You can also drizzle them with a contrasting color of melted chocolate (dark chocolate drizzled over milk chocolate or white chocolate over dark chocolate, etc.) Place the pop on a clean parchment paper-lined baking sheet to set. Repeat with remaining pops, melting more chocolate and shortening as needed.

8. Refrigerate the pops for up to 24 hours, until ready to serve.


Cheesecake Pops


Cheesecake Pops

Sunday, March 30, 2008

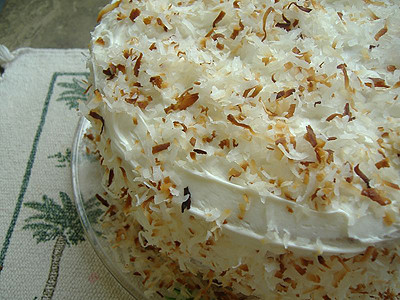
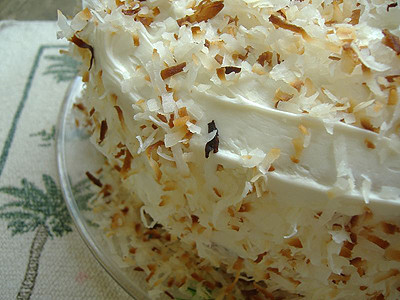
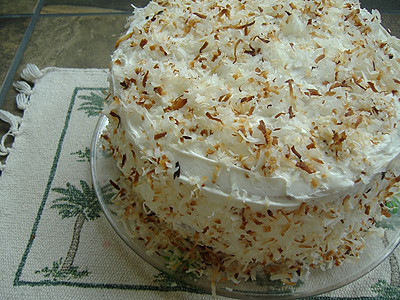
DBC: Perfect Party Cake


This month's Daring Bakers Challenge has finally came. And this months was the Perfect Party Cake. I don't know about everyone else, but these last few challenges has been sort of easy. I'm still waiting on something that just really challenges me. But lately that hasn't been the case...

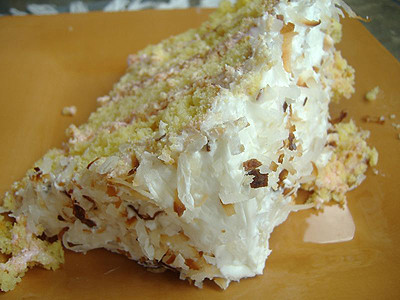
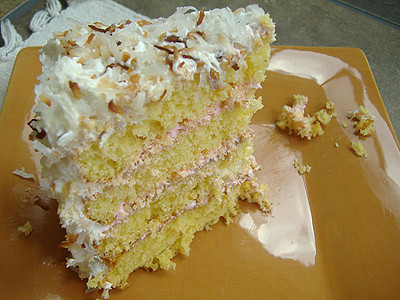
None the less, I was still excited about this months challenge. I'm mean, who doesn't like cake? I pretty much followed the recipe all the way threw, except for the filling. I did not use raspberry because my mothers actually allergic to them. I decided to make a strawberry frosting for the filling because everyone likes strawberries.

I was sort of suprised at how fast this cake went! On the first day I made it, I didn't think to many people would really want to eat some, however, by the time it was 6 pm, more than half the cake was gone! Apparently, my aunt and cousins found out that I had made a cake, and came over to get some. Not that it bothered me, I was actually flattered that they came and got some and loved it.

And it was a very nice came. I especially loved the coconut on top. I toasted my coconut because that how I generally like coconut. It being toasted just tastes so much better in my opinion. This months challenge was a very great cake, and now I'm ready for the next challenge. I'm hoping for something very challenging.


Recipe

For the Cake

2 1/4 cups cake flour
1 tbsp. baking powder
1/2 tsp. salt
1 1/4 cups whole milk or buttermilk
4 large egg whites
1 1/2 cups sugar
2 tsp. grated lemon zest
1 stick (8 tbsp.) unsalted butter, at room temperature
1/2 tsp. pure lemon extract

For the Buttercream
1 cup sugar
4 large egg whites
3 sticks (12 ounces) unsalted butter, at room temperature
1/4 cup fresh lemon juice (from 2 large lemons)
1 tsp. pure vanilla extract

For Finishing
2/3 cup seedless raspberry preserves stirred vigorously or warmed gently until spreadable
About 1 1/2 cups sweetened shredded coconut


1. To make the cake, center a rack in the oven and preheat the oven to 350 degrees F. Butter two 9 x 2 inch round cake pans and line the bottom of each pan with a round of buttered parchment or wax paper. Put the pans on a baking sheet.

2. Sift together the flour, baking powder and salt. Whisk together the milk and egg whites in a medium bowl. Put the sugar and lemon zest in a mixer bowl or another large bowl and rub them together with your fingers until the sugar is moist and fragrant. Add the butter and working with the paddle or whisk attachment, or with a hand mixer, beat at medium speed for a full 3 minutes, until the butter and sugar are very light. Beat in the extract, then add one third of the flour mixture, still beating on medium speed. Beat in half of the milk-egg mixture, then beat in half of the remaining dry ingredients until incorporated.

3. Add the rest of the milk and eggs beating until the batter is homogeneous, then add the last of the dry ingredients. Finally, give the batter a good 2- minute beating to ensure that it is thoroughly mixed and well aerated.

4. Divide the batter between the two pans and smooth the tops with a rubber spatula. Bake for 30-35 minutes, or until the cakes are well risen and springy to the touch – a thin knife inserted into the centers should come out clean

5. Transfer the cakes to cooling racks and cool for about 5 minutes, then run a knife around the sides of the cakes, unfold them and peel off the paper liners. Invert and cool to room temperature, right side up (the cooled cake layers can be wrapped airtight and stored at room temperature overnight or frozen for up to two months).


1. To make the Buttercream, put the sugar and egg whites in a mixer bowl or another large heatproof bowl, fit the bowl over a plan of simmering water and whisk constantly, keeping the mixture over the heat, until it feels hot to the touch, about 3 minutes.

2. The sugar should be dissolved, and the mixture will look like shiny marshmallow cream.
Remove the bowl from the heat. Working with the whisk attachment or with a hand mixer, beat the meringue on medium speed until it is cool, about 5 minutes.

3. Switch to the paddle attachment if you have one, and add the butter a stick at a time, beating until smooth. Once all the butter is in, beat in the buttercream on medium-high speed until it is thick and very smooth, 6-10 minutes. During this time the buttercream may curdle or separate – just keep beating and it will come together again.

4. On medium speed, gradually beat in the lemon juice, waiting until each addition is absorbed before adding more, and then the vanilla. You should have a shiny smooth, velvety, pristine white buttercream. Press a piece of plastic against the surface of the buttercream and set aside briefly.


1. To assemble the cake, using a sharp serrated knife and a gentle sawing motion, slice each layer horizontally in half. Put one layer cut side up on a cardboard cake round or a cake plate protected by strips of wax or parchment paper.

2. Spread it with one third of the preserves. Cover the jam evenly with about one quarter of the buttercream. Top with another layer, spread with preserves and buttercream and then do the same with a third layer (you’ll have used all the jam and have buttercream leftover). Place the last layer cut side down on top of the cake and use the remaining buttercream to frost the sides and top. Press the coconut into the frosting, patting it gently all over the sides and top.


Serving
The cake is ready to serve as soon as it is assembled, but I think it’s best to let it sit and set for a couple of hours in a cool room – not the refrigerator. Whether you wait or slice and enjoy it immediately, the cake should be served at room temperature; it loses all its subtlety when it’s cold. Depending on your audience you can serve the cake with just about anything from milk to sweet or bubbly wine.

Storing
The cake is best the day it is made, but you can refrigerate it, well covered, for up to two days. Bring it to room temperature before serving. If you want to freeze the cake, slide it into the freezer to set, then wrap it really well – it will keep for up to 2 months in the freezer; defrost it, still wrapped overnight in the refrigerator.


Playing Around
Since lemon is such a friendly flavour, feel free to make changes in the preserves: other red preserves – cherry or strawberry – look especially nice, but you can even use plum or blueberry jam.

Fresh Berry Cake
If you will be serving the cake the day it is made, cover each layer of buttercream with fresh berries – use whole raspberries, sliced or halved strawberries or whole blackberries, and match the preserves to the fruit. You can replace the coconut on top of the cake with a crown of berries, or use both coconut and berries. You can also replace the buttercream between the layers with fairly firmly whipped sweetened cream and then either frost the cake with buttercream (the contrast between the lighter whipped cream and the firmer buttercream is nice) or finish it with more whipped cream. If you use whipped cream, you’ll have to store the cake the in the refrigerator – let it sit for about 20 minutes at room temperature before serving.

Friday, February 29, 2008

DBC: French Bread


I was really excited about this months Daring Bakers Challenge. Everyone in my entire family knows for a fact that I am a bread fanatic. I am the queen of eating bread. I seriously live of bread. That, as well as carbs (I eat lots and lots of carbs!). And out of the all the types of breads out there, French Bread has to be one of my absolute favorite breads there is.

The only things that really irritates me about making bread is the time. I know making your own bread at home is usually the best (as well as anything made homemade), however, my patients always grows thin when making yeast bread. One of the main reasons as to why I rarely ever make bread at homemade instead of going to the grocery store to buy bread already made.

This months challenge kind of gave me a reason to have to make it homemade. I've made it probably 5 times know this month. After making it once towards the beginning of the month, I was kind of getting use to having to wait. "Patients is always rewarded in the end." So they say... And it's true.

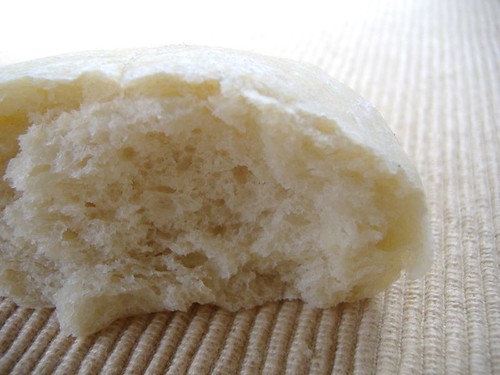
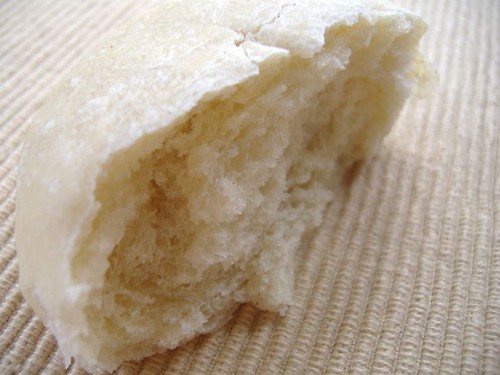
The bread came out really good. I don't think bread really can unnecessarily come out bad if you do it right. I've been enjoying my French Bread this entire month. It's so delicious with Spaghetti with Meat Sauce or Cinnamon-Bacon Carbonara! Or, simply have it alone. Either way, it's delicious!!


Recipe

2 1/4 tsp. dry active yeast
1/3 cup warm water, not over 100 degrees glass measure
3 1/2 cup all purpose flour
2 1/4 tsp salt
1 1/4 cups tepid water @ 70 – 74 degrees/21 - 23C


For the complete recipe, go here. The recipe is HUGE, and it'd take me forever to write it all down up on here. Now, don't let the recipe scare you though. It may be long, but it's not to difficult. Just break it down into steps and you shouldn't have any problem making this delicious bread.

Monday, January 28, 2008

DBC: Lemon Meringue Pie


So, the next Daring Bakers Challenge is here... And I have to say, that I have never been so annoyed and frustrated in a baking process like I did with this challenge. This months challenge was the Lemon Meringue Pie. At first, I thought, "Hmm, I'm sure I can do this with ease." Hah!

I'm not much of a pie maker. And defiantly NOT good at making pie crust whats so ever. I've had a few insisidents were it was just pitiful at how the crust came out for past pie making. But I thought if I really tried and went slow with the process of making it, that It'd come out fine.

Three tries later, I finally get a good pie crust! And I was really proud of how the crust came out. It was almost picture perfect crust. Which is a amazing for someone like me who is pron to messing up pie crusts. So it was a true accomplishment for me.

Then came the filling. This wasn't so frustrated as the crust, it just seemed like it took a while for it to thicken. I thought it'd thicken quicker, but it took some time, for what reasons I don't know. But it eventually thicken. Then I did the meringue. Which, I didn't take to much effort into making with sadly. I just kind of dumped the meringue on top of the pie. I wanted to make the pie look all pretty and cute, but by the time I got to this stage, I was just tired of making this pie that I just wanted to get it done.

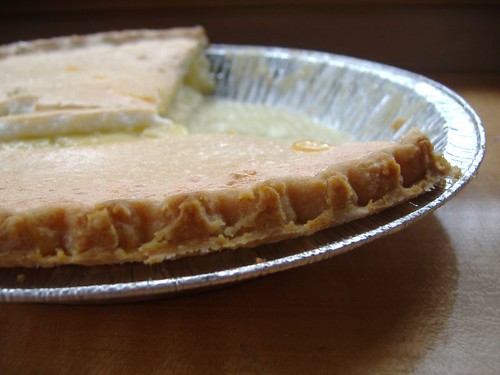
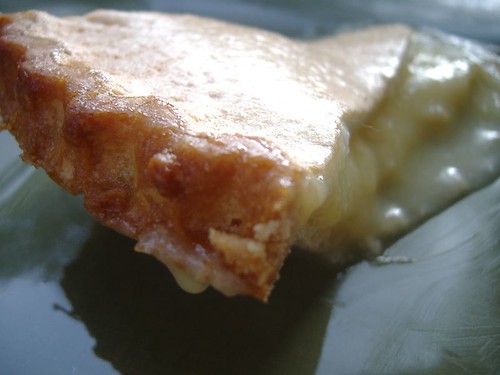
The pie came out good. I wasn't to proud of the finishing product because it didn't look as pretty and beautiful as I had planned. Nonetheless, still tasted wonderful. But I can see myself trying to make this again. Not just to make to eat, but to get it how I wanted it. I'm pretty stubborn, and I wanted it to come out how I wanted, but it didn't. So I have a new goal as of right now. ;]

To check out other Lemon Meringue Pies, go to the Daring Bakers Blogroll.


Recipe

For the Crust

3/4 cup butter; cut into 1/2 inch pieces
2 cups flour
1/4 cup sugar
1/4 tsp salt
1/3 cup ice water

For the Filling

2 cups water
1 cup sugar
1/2 cup cornstarch
5 egg yolks, beaten
1/4 cup butter
3/4 cup fresh lemon juice
1 tbsp lemon zest
1 tsp vanilla extract

For the Meringue

5 egg whites, room temperature
1/2 tsp cream of tartar
1/4 tsp salt
1/2 tsp vanilla extract
3/4 cup sugar


To Make the Crust:
Make sure all ingredients are as cold as possible. Using a food processor or pastry cutter and a large bowl, combine the butter, flour, sugar and salt.Process or cut in until the mixture resembles coarse meal and begins to clump together. Sprinkle with water, let rest 30 seconds and then either process very briefly or cut in with about 15 strokes of the pastry cutter, just until the dough begins to stick together and come away from the sides of the bowl. Turn onto a lightly floured work surface and press together to form a disk.

Wrap in plastic and chill for at least 20 minutes.Allow the dough to warm slightly to room temperature if it is too hard to roll. On a lightly floured board (or countertop) roll the disk to a thickness of 1/8 inch. Cut a circle about 2 inches larger than the pie plate and transfer the pastry into the plate by folding it in half or by rolling it onto the rolling pin. Turn the pastry under, leaving an edge that hangs over the plate about 1/2 inch. Flute decoratively. Chill for 30 minutes.

Preheat oven to 350ºF. Line the crust with foil and fill with metal pie weights or dried beans. Bake for 20 to 25 minutes. Carefully remove the foil and continue baking for 10 to 15 minutes, until golden. Cool completely before filling.


To Make the Filling:
Bring the water to a boil in a large, heavy saucepan. Remove from the heat and let rest 5 minutes. Whisk the sugar and cornstarch together. Add the mixture gradually to the hot water, whisking until completely incorporated. Return to the heat and cook over medium heat, whisking constantly until the mixture comes to a boil. The mixture will be very thick. Add about 1 cup of the hot mixture to the beaten egg yolks, whisking until smooth.

Whisking vigorously, add the warmed yolks to the pot and continue cooking, stirring constantly, until mixture comes to a boil. Remove from the heat and stir in butter until incorporated. Add the lemon juice, zest and vanilla, stirring until combined. Pour into the prepared crust. Cover with plastic wrap to prevent a skin from forming on the surface, and cool to room temperature.


To Make the Meringue:
Preheat the oven to 375ºF. Using an electric mixer beat the egg whites with the cream of tartar, salt and vanilla extract until soft peaks form. Add the sugar gradually, beating until it forms stiff, glossy peaks. Pile onto the cooled pie, bringing the meringue all the way over to the edge of the crust to seal it completely. Bake for 15 to 20 minutes, or until golden. Cool on a rack. Serve within 6 hours to avoid a soggy crust.

Monday, November 26, 2007

DBC: Oatmeal Potato Bread


I'm a bread fanatic and everyone knows this. But, I have yet to ever made bread with yeast for I've always been far to nervous to do so. When I joined Daring Bakers, I knew that the challenges were going to be difficult. But, I told myself I had to try. At the very least, try. When they announced that the November challenge was to be Potato Bread, I instantly got nervous. "Oh no, oh no!" Were my thoughts.

I went threw with it though, and surprisingly, I've come to find that it's not as hard as it seems! Very time consuming and for any one as impatient as me, time seem extremely slow and seems like forever as you vigerously wait for it to finish. Just have to keep telling myself that it would be totally worth it in the end. And boy was it!

I added Oatmeal to my potato bread. Made it a tad bit more unique than just a regular old Potato Bread. But it also cleared some room in my pantry! I had some left over oatmeal so I just threw it into the mixture to heap it up. Though I was kind of skepitical in adding the oatmeal, being that this was my first bread with yeast, I wanted to try anyway. And it turned out lovely in the end.

So my first Daring Bakers Challenge was a sucess! I am so relieved that this came out and also glad to find out that making bread with yeast isn't all that scary. I was so nervous from the beginning, but so glad in the end. And now I have very tasty bread for the rest of the week!


Recipe

4 medium to large floury (baking) potatoes, peeled and cut into chunks
4 cups water
1 tbsp plus 1 tsp salt
2 tsps active dry yeast
6 1/2 cups to 8 1/2 cups unbleached all-purpose flour
1 tbsp unsalted butter, softened
1 cup whole wheat flour
1/2 cup oatmeal


1. Put the potatoes and 4 cups water in a sauce pan and bring to boil. Add 1 tsp salt and cook, half covered, until the potatoes are very tender. Drain the potatoes and save the water. Mash the potatoes well.

2. Measure out 3 cups of the reserved potato water. Place the water and mashed potatoes in the bowl you plan to mix the bread in and stir well before testing the temperature. Should feel barely warm to your hand.

3. Add yeast to 2 cups all-purpose flour and whisk. Add yeast and flour to the cooled mashed potatoes & water and mix well. Allow to sit for 5 minutes. Sprinkle on the remaining 1 tablespoon salt and the softened butter; mix well. Add the 1 cup whole wheat flour and 1/2 cup oatmeal and stir briefly. Add 2 cups of the unbleached all-purpose flour and stir until all the flour has been incorporated.

4. Turn the dough out onto a floured surface and knead for about 10 minutes, incorporating flour as needed to prevent sticking. Place the dough in a large clean bowl or your rising container of choice, cover with plastic wrap or lid, and let rise about 2 hours or until doubled in volume.

5. Turn the dough out onto a well-floured surface and knead gently several minutes. Divide the dough into 2 unequal pieces in a proportion of one-third and two-thirds. Place the smaller piece to one side and cover loosely.

6. Butter a 9X5 inch loaf/bread pan. Flatten the larger piece of dough on the floured surface to an approximate 12 x 8 inch oval, then roll it up from a narrow end to form a loaf. Pinch the seam closed and gently place seam side down in the buttered pan. The dough should come about three-quarters of the way up the sides of the pan. Cover with plastic wrap and let rise for 35 to 45 minutes, until puffy and almost doubled in volume.

7. For the smaller bread, Butter an 8 x 4 inch bread pan. Shape and proof the loaf the same way as the large loaf.
 
 
Genesis of a Cook
check out Tastespotting