Showing posts with label Chocolates. Show all posts

Sunday, May 25, 2008

Red Velvet Cupcake Bites


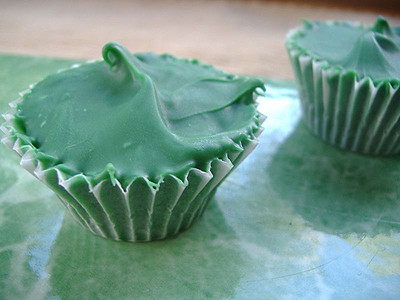
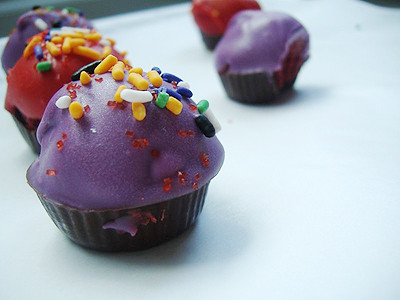
Nope, those are not what you may think they are. They are not cupcakes. They are in fact the red velvet balls that I made at one point. But, they are decorated to look like they are cute, tiny little cupcakes!

I can not take credit for these adorable little cute cupcake bites. I got the idea from the creative genius at bakerella. The idea's she comes up with always leave me speechless. Everything she makes are so cute and so beautifully done. Everything always amazes me. I came across this idea from here when she posted her here. I defiantly saved it to my memory as soon as I saw it. I wanted to make them soon!

It made me so excited when I was told a few people at my moms work wanted me to make the red velvet cake balls I made one time. I couldn't wait to make these. They were so much fun to make and so cute! And of course, they were soo good!


Recipe

1 box cake mix (cook as directed on box for 13 X 9 cake)
1 can cream cheese frosting (16 oz.)
1 package chocolate bark (or candy melts for cupcake bottom)
Colored Candy Melts (for cupcake top)
Candy Cup Mold
Sprinkles and m&ms for decoration


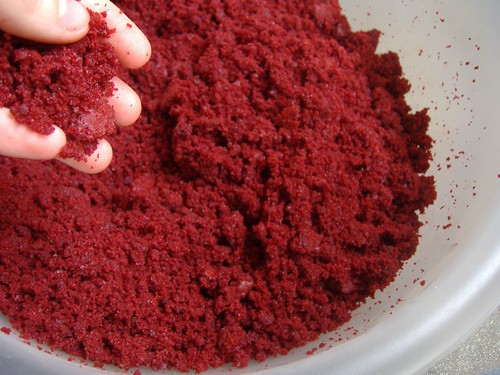
1. After cake is cooked and cooled completely, crumble into large bowl. (The texture should be fine/fluffy)

2. Using the back of a large spoon, mix thoroughly with 1 can cream cheese frosting. (It may be easier to use fingers to mix together, but be warned it will get messy.)

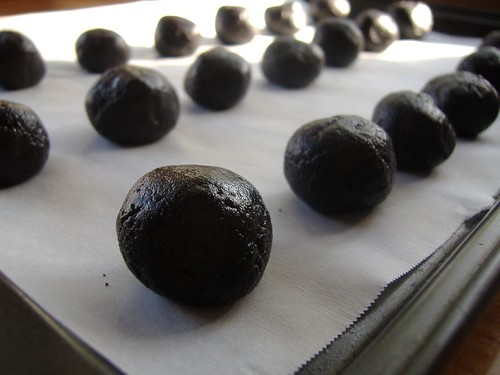
3. Roll mixture into quarter size balls (make sure they are smaller in diameter than that of your candy mold) and lay on wax paper covered cookie sheet.

4. Chill in the freezer for a few minutes, until they are slightly firm, not frozen.

5. Melt chocolate bark and candy melts in microwave per directions on package.

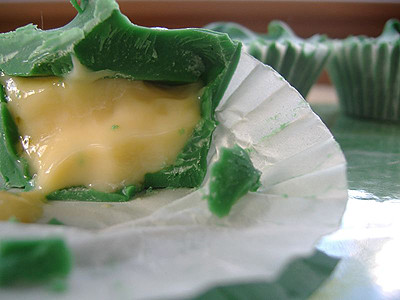
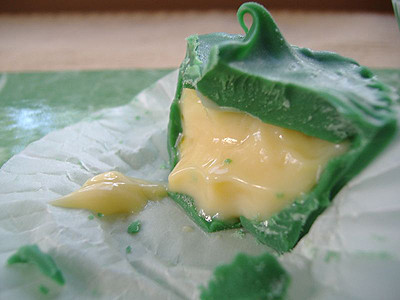
6. Using a spoon or squeeze bottle, fill each mold cavity with a small amount of chocolate. Sorry, I didn't think to measure how much. But as soon as you fill the cavity, go ahead and place one of your rolled balls into it. Carefully push it down until the force causes the chocolate to push up and fill in around the sides of the ball. You may have to experiment with a couple to get the right amount. Stop pushing once the chocolate reaches the top edge.

7. Place the mold tray filled with cupcakes in the freezer for just a few minutes to let the chocolate set. Remove and then gently pull up on the cake ball top to release from candy mold.

8. Now, holding the bottom of the cupcake, dip the top in another color of melted chocolate.

9. Decorate.


Saturday, April 12, 2008

Key Lime Cups


So, I was just sitting around the other day, trying to think of something to do with these green melt away chocolates that I've had. Reason is because I've been eating them all the time now, but it would taste better that have them made into something rather than just eating them by themselves. So, while I was sitting around... It came to me.

Well, it came to me after seeing a Reeces that Chris was eating. Then I just though, "Cups.. Green Cups.. Lime.. Key Lime Cups!" So then I came up with the idea to make Key Lime Cups. They're very simple; A lot like my Peanut Butter Cups, except, not Peanut Butter. The inside is just like a Key Lime Pie filling, but now, put into a chocolate cups. These are well loved, especially with lime fanatics!


Recipe

1 1/2 cups green chocolate melts
1 can sweetened condensed milk
2/3 cup bottled or fresh key lime juice
1 tsp vanilla extract
2 eggs


1. Set 2 dozen mini muffins wrappers on a baking sheet. Melt half of the chocolate, using a microwave-safe bowl and cooking it in short 30 second intervals until smooth.

2. Using a spoon, pour a little bit of chocolate in each muffin wrapper and using a small clean brush to paint the chocolate up the sides of each wrapper. Chill candy for 10 minutes.

3. In a small bowl, whisk together condensed milk, key lime juice, vanilla and eggs . When mixture has come together.

4. Once candy has chilled, spoon generous amounts of key lime mixture into each candy cup. Chill for another 10 minutes.

5. Melt the rest of the chocolate and fill each muffin cup once they have chilled. Chill until set (I would recommend longer than this. Like around a few hours. It taste much better after sitting in the fridge for awhile).


Tuesday, February 12, 2008

Red Velvet Cake Balls


The blog Bakerella is one of the few blogs that I really like to keep checking to see what new ideas shes come up with. And I've been meaning to try making her Red Velvet Cake Balls, and for Valentines Days seemed like the right time to make these up for everyone.

I was going to make the cake batter from scratch instead of making it from the box since I don't really like the make cakes from a box, however, I haven't been feeling to well this week, and to make it from scratch just didn't appeal to me. So I took the easy way and went with what Bakerella did; Made it from the box.

They turned out really good and delicious. It was like a little Red Velvet Cake, in ball form. Can't wait to give these out on Valentines Day.


Recipe

1 box Red Velvet Cake Mix
1 can of cream cheese frosting
1 package semi-sweet chocolate bark


1. Bake the red velvet cake as directed for a 13 x 9" cake. After cake is cooked and cooled, crumble the cake into a large bowl.

2. Mix throughly with 1 can of cream cheese frosting. This will be messy.

3. Roll mixture into quarter size balls and lay on a cookie sheet. Should make 55-60 balls. You can use a 1/2 tbsp. spoon to form balls, or you can just use your hands to form as you please.

4. Chill for several hour. You can do this in the freezer to quicken this.

5. Melt chocolate in a double boiler. Roll balls in chocolate and lay in cookie sheet on wax paper until firm. Then, enjoy!


Saturday, February 9, 2008

Oreo Truffles


Thats right. Oreo Truffles. One of my favorite cookies turned into delicious a treat!

Whats great about these truffles is that they are super simple to make! Not hard at all. I came across this blog called Bakerella not to long and she has so many cute, easy idea of making sweet treats! I love all the ideas that she comes up with. They're all so adorable.

When I saw here Oreo Truffles that she made, I knew I need to make them. So I did just that. And Let me tell you... They're super easy, super quick, and super delicious.


Recipe

1 pkg. Oreo Cookies
1 8 oz. Cream Cheese, softened
White Chocolate Bark


1. Finely crush 7 cookies in a food processor or a ziploc bag and crush to a fine consistency. Reserve for later.* See Notes.

2. Crush remaining cookies and stir in cream cheese. Use the back of a large spoon to help mash the two together.

3. Roll the mixture into 1" balls and place on a wax paper covered baking sheet.

4. Melt chocolate as directed for chocolate and then dip the balls into chocolate. Tap off extra and set on waxed baking sheet. You can sprinkle the top with the 7 crushed cookies, or just kept to eat.

5. Once dry, refrigerate and enjoy.


*Notes:
- You don't have to top the truffles with the reserved cookies. You can just not crush them and eat them.
- It helps to freeze the uncoated balls for a few minutes to keep the mixture from falling apart in the melted chocolate.
- To form balls, you can use 2 tsp. to form each ball to make it easier and so that they are all the same size.
- You can easily half this recipe if you don't want to make to many. This recipe makes about 42 truffles, half of this recipe will probably make 21 truffles.


Thursday, January 10, 2008

Homemade Peanut Butter Cups


I've been wanting to make some peanut butter cups for the longest of times. I'm a pretty huge fan of eating the peanut butter cups, Reese's. And I always thought it would be fun to make my own peanut butter cups instead of buying them. And when my mother bought a bunch; And I mean a BUNCH of chocolate chips yesterday, making peanut butter cups came to head. So, that just what I did. And let me tell ya; They're so good! And it was so easy!


Recipe

1 1/2 cup chocolate chips (semi-sweet, dark chocolate or white chocolate, whatever you prefer. I used a little bit of each kind)
1/2 cup creamy peanut butter
1/2 cup crunchy peanut butter
1/2 cup confectioner's sugar
1/2 tsp. vanilla
Pinch of salt


1. Set 2 dozen mini muffins wrappers on a baking sheet. Melt half of the chocolate, using a microwave-safe bowl and cooking it in short 30 second intervals until smooth.

2. Using a spoon, pour a little bit of chocolate in each muffin wrapper and using a small clean brush to paint the chocolate up the sides of each wrapper. Chill candy for 20-30 minutes.

3. In a small bowl, whisk together peanut butters, sugar, vanilla and salt. When mixture has come together, microwave until very, very soft. About 30 seconds.

4. Once candy has chilled, spoon generous amounts of peanut butter mixture into each candy cup. Chill for another 30 minutes.

5. Melt the rest of the chocolate and fill each muffin cup once they have chilled. Chill until set.

Sunday, November 25, 2007

Snickers Nut n' Peanut Butter Crunch


My favorite candy bar just got better! Peanut Butter Snickers! Alright! I just recently saw this at the store and just had to try it! I remember a while back that they had these out, but before I could try it, they stopped selling them. And I didn't want to miss the opportunity to try these tasty candy bar! So I grabbed them right away!

The Snickers Nut n' Peanut Butter Crunch bar is a chocolate bar that consists of milk chocolate, peanuts and a creamy, peanut butter nougat in place of the original nougat of a Snickers bar. The creamy Peanut Butter nougat gives the chocolate bar a whole new, wonderful, creamy, delicious taste that your taste buds are having a party as you bite into the chocolate bar!

I absolutely love Peanut Butter to be completely honest. If I could, I would eat it straight from the jar all the time. However, one, that's extremely unhealthy, and two, I don't want to gain 15 pounds. So I distant myself from Peanut Butter for I will mostly over do it on Peanut Butter.

If your craving chocolate, nuts and peanut butter all at the same time, this is defiantly the chocolate bar to grab hold of! All of some of the most delicious things all put straight into a delicious and creamy chocolate bar. I would have really, really, really enjoyed this so much more if they replaced the milk chocolate with dark chocolate. The richness of the dark chocolate would have made it so much better!

Saturday, October 6, 2007

Marble Slab Creamery II


Ice Cream comfort, please?


Ice Cream always makes me feel better and I needed something. I didn't feel any guilt towards having ice cream today since I hadn't had anything all day. I've been feeling really down in the dumps lately for several reasons. From my family issues to my own personal issues, everything had been going insane.

It was hot for once today. It's been raining daily here in Florida and it hasn't been the usual hot weather. It's been warm. At a comfortable temperature. Not the usual blazing heat that it usually is.

I don't mind the raining weather. I actually prefer it. But since it was hot for once and I wanted a treat, So, I drove to Marble Slab Creamery.


They had a new flavor today. Chocolate Mint Ice Cream. They usually have Mint or Peppermint, which is my favorite, but they replaced those with this. I love minty flavors, so I defiantly was going to try this.

I really liked this flavor. It reminded me a lot of the Peppermint Ice Cream. Just, it didn't have the little bits of candy in it. I got mine with Chocolate Chips and Brownie in a White Chocolate Sprinkle Waffle Bowl. Sinful, yes, but, it was the only thing I had today.

Me being the nice sister I am, I got my little brother one. I got him the same flavor with M&M's. What he always has in his ice cream...
 
 
Genesis of a Cook
check out Tastespotting