Wednesday, April 30, 2008

Red Velvet Cake


Today, it was my fathers birthday. He usually doesn't like to do anything to extravagant for his birthday. He prefers to just have a relaxing day from everything really. My father is a hard working business man and spends every second of the day dealing with work. He'll get calls at midnight from workers asking him what to do or that they need help. Managing the Orange Business with orange pickers whom tend to forget a lot of things you tell them to do can be rather annoying...

My dad is always thankful whenever he gets a day to just relax and not have a care in the world (though, I think anyone would like days like that). I to like to just relax on my birthday. Its a day in celebration of you. Spend it as you'd want. Which is what my dad did. He had my nana and grandpa (his parents) come over for the day and to have a cook out. Trevor's little friend Phillip as well as Chris also came. My fathers wanted steak, potato's, corn and... His all time favorite cake... Red Velvet Cake.

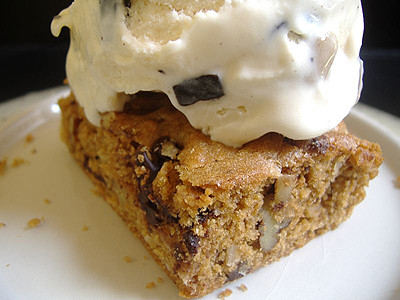
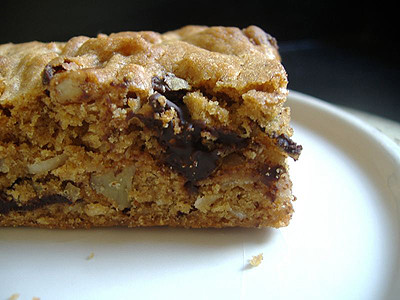
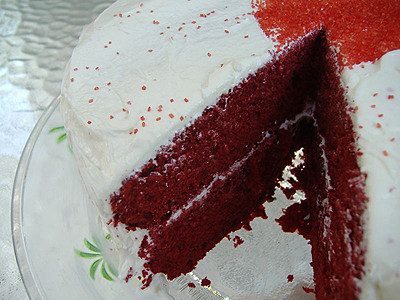
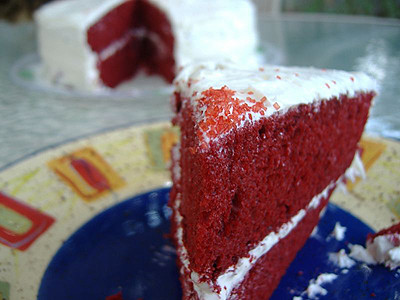
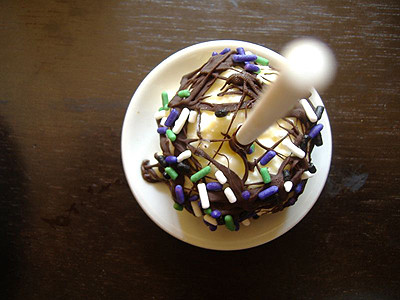
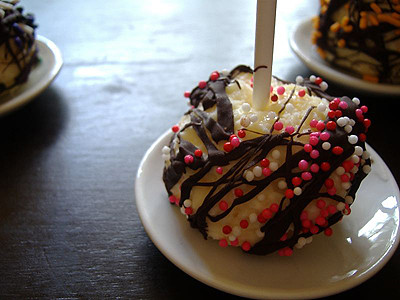
My dads not to much of a sweet person (nor is many in my family) but when it comes to Red Velvet Cake, my dads all over it. I too have to say that it's a pretty darn delicious cake. One of the best really. And I wanted to make this for my dad on his birthday. The cake is so moist, a very light cake, and so delicious it'll leave you wanting seconds. It's amazing.


Cake

2 1/2 cups all-purpose flour
1/2 cup unsweetened cocoa powder
1 tsp. baking soda
1/2 tsp. salt
1 cup butter, softened
2 cups sugar
4 eggs
1 cup sour cream
1/2 cup milk
1 ounce red food coloring
2 tsp. vanilla extract

Cream Cheese Frosting

8 ounces cream cheese, softened
4 tbsp. butter, softened
2 tbsp. sour cream
2 tsp. vanilla extract
2 cups confectioners' sugar


1. Preheat oven to 350 degrees. Grease and flour two round 9-inch cake pans.

2. For the cake, Sift together flour, cocoa, baking soda and salt; set aside. Cream butter and sugar in a large mixing bowl with electric mixer until fluffy, about 5 to 7 minutes. Beat in eggs one at a time. Mix in sour cream, milk, food color and vanilla. Gradually blend in flour mixture, just until incorporated. Do not over blend.

3. Pour batter into cake pans evenly. Bake 35 to 40 minutes or until toothpick inserted in center comes out clean. Cool 10 minutes before removing from pan to cool completely on wire rack.

4. For the frosting, beat cream cheese, butter and sour cream in a medium bowl. Add the vanilla and the confectioners' sugar and mix until smooth. Cool cake completely before frosting. If desired, sprinkle top of cake with chopped nuts and/or sprinkles.

Makes 12-16 servings
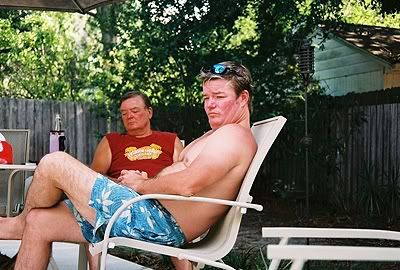


Dad relaxing.


Here's Trevor and his cute little friend Phillip.


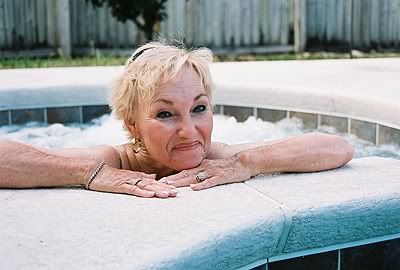
My nana. She's a cutie.


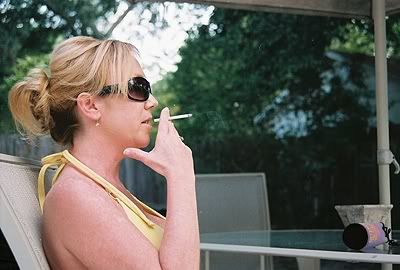
My mom... She has a horrible habit.

Sunday, April 27, 2008

Cheesecake Pops


Cheesecake Pops


Once again, this months Daring Bakers Challenge is here. To be completely honest, I was hoping for something more... Well, challenging. This months challenge was to make Cheesecake Pops. I don't know if it were just me, but it seemed way to easy. Nonetheless, I still was looking forward to making these. They seemed interesting and I'd never made them before. So I was still all for trying something I'd never made.

The recipe was pretty simple. However, the baking time... It said for 35-45 minutes, but, for me, it took almost an hour. That was probably the only thing that I'd had trouble with. The time. When it came to coating them, I first coated one completely with chocolate. I didn't like it. The chocolate over powered the taste of the cheesecake. You couldn't really taste the cheesecake because the chocolate was over powering it. So, instead of coating it completely with chocolate, I drizzled it. Much better in my opinion.

It was an o.k. pop in my opinion. My taste buds don't necessarily like the taste of just plain cheesecake. I'd want some more flavor in it. I'd probably would had liked it more that way. Nonetheless, it was still a good pop.


Cheesecake Pops


Recipe

5 packages (8-oz. ) cream cheese, room temperature
2 cups sugar
1/4 cup all-purpose flour
Cheesecake Pops1/4 tsp. salt
5 large eggs
2 egg yolks
2 tsp. pure vanilla extract
1/4 cup heavy cream
Boiling water as needed

30-40 lollipop sticks

1 pound chocolate, finely chopped
2 tbsp. vegetable shortening

Assorted decorations such as chopped nuts, colored jimmies, crushed peppermints, mini chocolate chips, sanding sugars, dragees) - Optional

(Note: White chocolate is harder to use this way, but not impossible)


1. Position oven rack in the middle of the oven and preheat to 325 degrees F. Set some water to boil.

2. In a large bowl, beat together the cream cheese, sugar, flour, and salt until smooth. If using a mixer, mix on low speed. Add the whole eggs and the egg yolks, one at a time, beating well (but still at low speed) after each addition. Beat in the vanilla and cream.

3. Grease a 10-inch cake pan (not a springform pan), and pour the batter into the cake pan. Place the pan in a larger roasting pan. Fill the roasting pan with the boiling water until it reaches halfway up the sides of the cake pan. Bake until the cheesecake is firm and slightly golden on top, 35 to 45 minutes.

4. Remove the cheesecake from the water bath and cool to room temperature. Cover the cheesecake with plastic wrap and refrigerate until very cold, at least 3 hours or up to overnight.

5. When the cheesecake is cold and very firm, scoop the cheesecake into 2-ounce balls and place on a parchment paper-lined baking sheet. Carefully insert a lollipop stick into each cheesecake ball. Freeze the cheesecake pops, uncovered, until very hard, at least 1 – 2 hours.

6. When the cheesecake pops are frozen and ready for dipping, prepare the chocolate in the top of a double boiler, stirring often, until chocolate is melted and chocolate and shortening are combined. Stir until completely smooth.

7. Quickly dip a frozen cheesecake pop in the melted chocolate, swirling quickly to coat it completely. Shake off any excess into the melted chocolate. If you like, you can now roll the pops quickly in optional decorations. You can also drizzle them with a contrasting color of melted chocolate (dark chocolate drizzled over milk chocolate or white chocolate over dark chocolate, etc.) Place the pop on a clean parchment paper-lined baking sheet to set. Repeat with remaining pops, melting more chocolate and shortening as needed.

8. Refrigerate the pops for up to 24 hours, until ready to serve.


Cheesecake Pops


Cheesecake Pops

Thursday, April 24, 2008

Banana Piña Colada Muffins


To start this post off, I have to say; These have to be some of the best banana muffins I've ever tried!! Seriously, no joke. They seriously taste as though they came straight out from a bakery! It was when I pasted a local bakery that I decided today to bake Banana. And when I thought about it, I hadn't some in awhile, and, it felt like a great time to bake some.

When summer comes around, fruit is something that most people eat because it's hot, and, eating hot food or heavy food just doesn't sound good when you dieing from heat. You want some light and fresh tasty. Fruit is exactly that. And it's been feeling a lot like summer here in Florida. So we've got a lot of fruit floating around here. So, to but the bananas to use, I decided to make them into muffins.

I'm not joking when I say that these are good; Because they really have to be some of the best muffins I have ever made! Coconut and raisins, in my opinion, team beautifully together (especially in that famous rum drink, the piña colada for some of you). The two play just as nicely together in this whole-grain muffin. Banana adds pleasingly moist texture, and an additional taste of the tropics.


Recipe

2 cups flour
1/2 cup diced dried pineapple
1/2 cup raisins
1/2 cup butter
1/2 cup brown sugar, light or dark
1 tsp. vanilla extract
3/4 tsp. coconut flavor or rum flavor (optional)
1 1/2 cups mashed ripe bananas (about 3 large bananas)
1/4 cup honey
2 large eggs
3/4 tsp. baking soda
3/4 tsp. baking powder
1/4 tsp. cinnamon
1/2 tsp. salt
1/3 cup shredded coconut


1. Preheat your oven to 350 degrees. Line 12 muffin cups with muffin cups.

2. In a large bowl, beat together the butter, sugar, vanilla, and coconut or rum flavor. Add the bananas, honey, eggs, baking soda, baking powder, nutmeg, and salt, beating until smooth.

3. Stir in the flour, then add the pineapple and raisins. Spoon the batter into the muffin cups and sprinkle each muffin with coconut.

4. Bake the muffins for 25 to 28 minutes, or until a tester inserted into the center comes out clean. Remove from the oven, and let set for 5 minutes. Take muffins out of muffins cups and serve warm, or at room temperature. Store in an air tight container.


Tuesday, April 22, 2008

Mint Chocolate Chip Ice Cream


Mint ice cream is love. Well, for me it is. I don't think there is any ice cream out there that taste better than mint ice cream. There a lot of people that disagree with me, it's pretty contriversal, especially with my boyfriend and my mom. It's funny how we can get into the silliest of arguments. Well, they're not really arguments, there just debates I guess.

My boyfriend loves birthday cake ice cream. I however loath birthday cake ice cream. Something about just... grosses me out. The taste all together just doesn't taste right to me. And my mom loves Rocky Road. I do like Rocky Road Ice Cream as well, I just don't love it. My brother is on my side with Mint Ice Cream being the best. He's a mint lover like myself. And since I just recently got an Ice Cream Maker (finally!), I wanted to make his and my favorite Ice Cream; Mint Chocolate Chip.

I did not come up with this recipe, I actually found it at Simple Recipes by Elise. I love a lot of the things she comes up with, and I finally came around to trying one of hers out. And I got to tell you; It tasted so good! I didn't add as much chocolate as she did. I didn't want to much chocolate it it. It came out so creamy, silky, and, of course, minty! This is defiantly something I am going to be making over and over and over again.


Recipe
Adapted here from Simply Recipes

3 cups fresh mint leaves, rinsed, drained, packed
1 cup milk
2 cups heavy cream
2/3 cup sugar
1/4 tsp. salt
6 egg yolks
3-4 ounces dark chocolate, chopped (keep in freezer til used)


1. Firstly, take the fresh mint leaves, rid the stems, then rinse, drain, and pack it. Put the mint leaves in a heavy saucepan with the 1 cup of milk and 1 cup of the cream. Heat until just steaming (do not let boil), remove from heat, cover. Let stand for 30 minutes. Reheat the mixture until steaming, remove from heat and let stand for 15 more minutes.

2. While the mint is infusing in step 1, prepare the remaining cream over an ice bath. Pour the remaining 1 cup of cream into a medium size metal bowl, set in ice water (with lots of ice) over a larger bowl. Set a mesh strainer on top of the bowls. Set aside.

3. Strain the milk cream mixture into a bowl, pressing against the mint leaves with a rubber spatula in the sieve to get the most liquid out of them. Return the milk cream mixture to the saucepan. Add sugar and salt to the mixture. Heat until just steaming again, stirring until sugar has dissolved. Remove from heat.

4. Whisk the egg yolks in a medium sized bowl. Slowly pour the heated milk cream mixture into the egg yolks, whisking constantly so that the egg yolks are tempered by the warm mixture, but not cooked by it. Scrape the warmed egg yolks back into the saucepan.

5. Return the saucepan to the stove, stirring the mixture constantly over medium heat with a wooden spoon, scraping the bottom as you stir, until the mixture thickens and coats the spoon so that you can run your finger across the coating and have the coating not run. This can take about 10 minutes.

6. Pour the custard through the strainer and stir into the cold cream to stop the cooking.

7. Chill the mixture thoroughly in the refrigerator (at least a couple of hours) or stir the mixture in the bowl placed over the ice bath until thoroughly chilled (20 minutes or so). Freeze the mixture in your ice cream maker according to the manufacturer's instructions.

8. Once the ice cream has been made in the ice cream maker it should be pretty soft. Gently fold in the finely chopped chocolate. Put in an airtight container and place in the freezer for at least an hour, preferably several hours. If it has been frozen for more than a day, you may need to let it sit at room temperature for a few minutes to soften it before serving.


Saturday, April 19, 2008

Blueberry Ice Cream


There are many things that I like, but, for me, ice cream is just pure love. It's almost like a comfort food for me. So rich and creamy... Never leaves me hangin. When I was a little kid, I use to go to my grandma's house everyday. I always saw her and I always was with her. We use to be real close. She was like my mom. She took care of me through most of my childhood. Since my parents we're always working, she became my mom.

One of things I use to do with her all the time was bake and cook. She's want really got me into baking and cooking. She's also the person that developed my love for burnt food... Yes, I like food to be slightly burnt. She burnt a lot of things. But, one of the things me and her use to do was make homemade ice cream. Real homemade. Not with the help of a machine. The real deal. And I was thinking about the times we spent together, and I just felt the need to make some to bring back memories.

Add this to the running for ARF/5-A-Day Tuesday.


Recipe

2 cups blueberries
3/4 cup sugar
1/8 teaspoon salt
1 cup milk
1 1/2 cups heavy cream


1. Get out a plastic container out (or churner) to be ready to pour ice cream in. Drop the blueberries, sugar and salt in a sauce pan and turn to medium-high heat. Bring to a boil over moderate heat, mashing berries and stirring with a fork. Simmer mixture, stirring frequently, for about 5 minutes; cool slightly.

2. In a blender, puree mixture with milk just until smooth and stir in cream. Chill this mixture until cold in the fridge or an ice bath. Churn in an ice-cream machine until thick or place in a plastic container, pop it in the freezer and give it a good whip every few hours.


Thursday, April 17, 2008

Orange Blackberry Muffins


Lately, I don't know about other places, but lately here in Orlando, blackberries have been on sale. I'm guessing it the season for them? I really have no idea. I don't really know anything about berries. I only know about oranges since my fathers in the citrus business. But since they've been on sale, I thought, you know, why not get them. I mean, theres a lot I can bake and make with them.

I thought of added orange to these, you know, since they've just been laying around. My dad had just brought home a bunch of oranges recently, so I thought I might as well make use of them. It made the muffins just that much more better. So moist in the inside, and the blackberries; Oh my god, I just love berries when they are baked in the oven! When you take that first bite, and the berries are still hot and soft; It's just unbelievable.


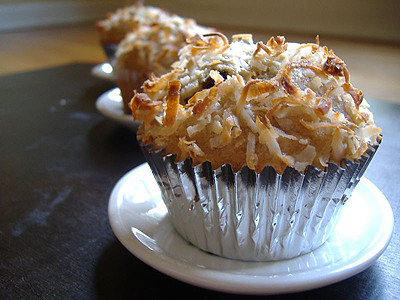
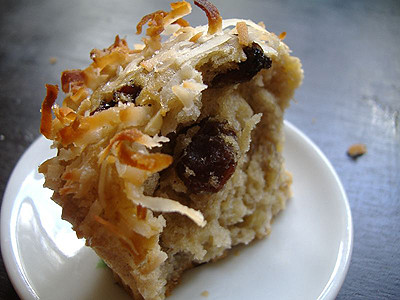
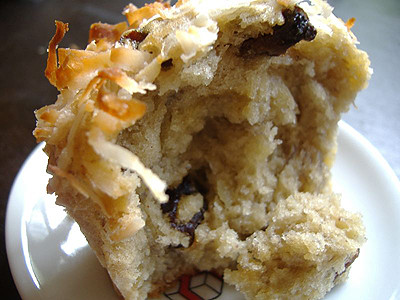
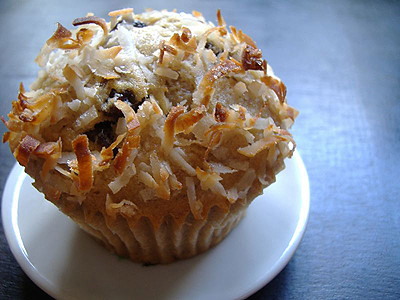
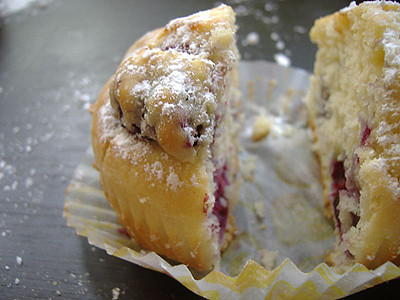
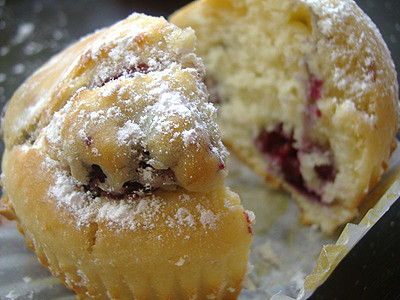
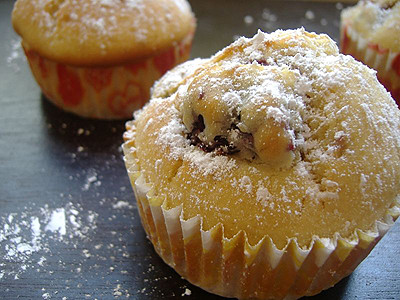
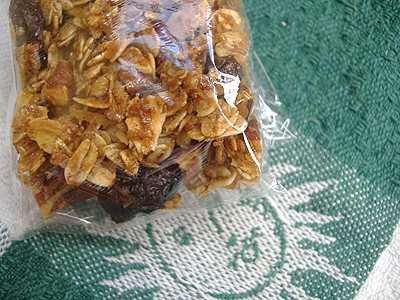
Theres an event that I recently found that I found pretty interesting. And I've yet to participate in it. It's a new blogging event called 'Snack Shots', and when the new event came up for muffins, I decided, why not enter it in? So, I've decided to enter my yummy Orange Blackberry Muffin into the running for Snack Shots #3; Muffins. Details for this event can be found here.


Recipe

2 cups all-purpose flour
2 1/2 teaspoons baking powder
1/4 teaspoon baking soda
1/4 teaspoon salt
1/3 cup sugar
1/2 cup butter, melted
Zest and juice of 1 orange
3/4 cup buttermilk
2 large eggs
3 tablespoons honey
1 cup blackberries, fresh

Decorating sugar, for topping (optional)


1. Preheat the oven to 400 degrees. Butter or spray the 12 molds in a regular-size muffin pan or fit the molds with paper muffin cups.

2. Pour the orange juice into a large glass measuring cup or a bowl and pour in enough buttermilk to make 1 cup. Whisk in the eggs, honey and melted butter.

3. In a large bowl, rub sugar and orange zest together with fingertips until the sugar is moisten and you can smell the orange. Whisk in the flour, baking powder, baking soda and salt. Pour the liquid ingredients over the dry ingredients and gently but quickly stir to blend. Stir in the blackberries. Divide the batter evenly among the muffin cups.

4. Bake for about 22 to 25 minutes. If you want, you can decorating the muffins with sugar. Just sprinkle on the sugar after the muffins have baked for 10 minutes. Transfer the pan to a rack and cool for 5 minutes before carefully removing each muffin.


Wednesday, April 16, 2008

Raisin Nut Granola


Aside from having cereal for breakfast, granola is one of my favorite food to have for breakfast. And I've finally gotten around to posting about this; My favorite granola. It's such a great breakfast food. Gives you plenty of energy to start off your day, and, the good perk about it is; its great for you! But, I would say, that making it homemade is the way to go. I don't really enjoy the store bought granola.

I had one experience when I thought about buying a store bought brand... Me being me, I look at the nutritional facts all the time. I try to make sure what it is I'm buying is actually good for you (I think this habit is rubbing off on my little brother; He now points out whats on the nutrition label). I forget what brand of granola this one I look at, for I'm not to familiar with the different kinds of brands, but I kid you not; This granola was loaded with 40g of sugar!! That'd cause a diabetic to drop down in a heart beat!

It just shocked me. I feel bad for the people who didn't look at the nutritional label. I mean, god... Thats a lot of sugar. And that's just ridiculous! Thats when I decided to just stick to making homemade granola. And this granola; It's killer. This is my favorite granola to make. I totally go bonkers for it, and I've even gotten my boyfriend into it (who is trying to eat more healthy..). A lot of the time, I just eat this plain. I don't usually add milk to it. From time to time, when I've been wanting milk, I'll add a little. But I think it's great just as it.

I'll even make parfaits with this. With some yogurt, or, make caramlized bananas with granola. Either ways, its great. And my dad is crazy for this stuff. He'll usually have some before working out. My mom however... She's not a breakfast eater. Which I tell her is bad!! But not that she listens...

"The most important meal of the day, lalalala, yay!" - Spongebob

Listen to Spongebob people!


Recipe

3 cups rolled oats
1 cup pecans, chopped
1 cup cashews, chopped
1/2 cup shredded sweet coconut
1/4 cup plus 2 tablespoons dark brown sugar
1/4 cup plus 2 tablespoons maple syrup
1/4 cup honey
3/4 teaspoon salt
2 tsp. cinnamon
1 tsp. vanilla
1 cup raisins


1. Preheat oven to 250 degrees.

2. In a large bowl, combine the oats, nuts, coconut, and brown sugar. In a separate bowl, combine maple syrup, honey, and salt. Combine both mixtures and pour onto 2 sheet pans. Bake for 1 hour and 15 minutes, stirring every 15 minutes to achieve an even color.

3. Remove from oven and transfer into a large bowl. Add raisins and mix until evenly distributed. Store at room temperature for up to a week.


Tuesday, April 15, 2008

Pecan Crunch Granola Bars


So, I've seen plenty of granola bar recipes floating around on several websites, that I finally decided to make my own granola bars. My dad was especially happy about this; Being that these were going to be homemade granola bars. He doesn't like anything store bought. He likes anything that is homemade and thats the way he likes it. So he was especially happy about this.

I originally wanted to have dried blueberries in these, however, I could not find any in the store, and I didn't have the time or the patients to make my own dried blueberries. I wanted to make granola bars today. And I had to make granola bars with my favorite nut; Pecans! In the end, it was much better that I used raisins instead of blueberries. I have a feeling that the blueberries the pecans wouldn't have made a good pair. With the cinnamon, everything just came together wonderfully.

One tip I have when making these; LET THEM COOL! If you do not let them cool completely, they will fall apart on you. Then you would had destroyed a beautiful creation.


Recipe

2 cups rolled oats
1/2 cup sunflower seeds
1/4 cup wheat germ
1/4 cup shredded coconut
1 cup pecans, chopped into little pieces
1/2 cup honey
1/4 cup brown sugar, packed
2 tbsp. butter, melted
2 tsp. cinnamon
1 tsp. salt
2 tsp. vanilla
1 cup dried raisins (or any dried fruit)


1. Butter a 9 by 9-inch glass baking dish and set aside. Preheat the oven to 350 degrees F.

2. Spread the oats, sunflower seeds, almonds, and wheat germ onto a half-sheet pan. Place in the oven and toast for 15 minutes to toast.

3. While thats going, combine the honey, brown sugar, butter, cinnamon, extract and salt in a medium saucepan over medium heat. Cook just until the brown sugar has completely dissolved.

4. Once the oat mixture is done, remove it from the oven and reduce the heat to 300 degrees. Immediately add the oat mixture to the liquid mixture, add the dried fruit and coconut, and stir to combine.

5. Turn mixture out into the prepared baking dish and press down, evenly distributing the mixture in the dish and place in the oven to bake for about 35 minutes. Remove from the oven and allow to cool completely. Cut into squares and wrap up for snacks or store in an airtight container for up to a week.


Saturday, April 12, 2008

Key Lime Cups


So, I was just sitting around the other day, trying to think of something to do with these green melt away chocolates that I've had. Reason is because I've been eating them all the time now, but it would taste better that have them made into something rather than just eating them by themselves. So, while I was sitting around... It came to me.

Well, it came to me after seeing a Reeces that Chris was eating. Then I just though, "Cups.. Green Cups.. Lime.. Key Lime Cups!" So then I came up with the idea to make Key Lime Cups. They're very simple; A lot like my Peanut Butter Cups, except, not Peanut Butter. The inside is just like a Key Lime Pie filling, but now, put into a chocolate cups. These are well loved, especially with lime fanatics!


Recipe

1 1/2 cups green chocolate melts
1 can sweetened condensed milk
2/3 cup bottled or fresh key lime juice
1 tsp vanilla extract
2 eggs


1. Set 2 dozen mini muffins wrappers on a baking sheet. Melt half of the chocolate, using a microwave-safe bowl and cooking it in short 30 second intervals until smooth.

2. Using a spoon, pour a little bit of chocolate in each muffin wrapper and using a small clean brush to paint the chocolate up the sides of each wrapper. Chill candy for 10 minutes.

3. In a small bowl, whisk together condensed milk, key lime juice, vanilla and eggs . When mixture has come together.

4. Once candy has chilled, spoon generous amounts of key lime mixture into each candy cup. Chill for another 10 minutes.

5. Melt the rest of the chocolate and fill each muffin cup once they have chilled. Chill until set (I would recommend longer than this. Like around a few hours. It taste much better after sitting in the fridge for awhile).


Thursday, April 10, 2008

Peanut Butter Chocolate Chunk Blondies


You know, I think that maybe no one would ever have guessed that I liked blondies more than I liked brownies. Since I make brownies all the time, one would most likely think that I loved brownies more than a decadent, lushes blondie. Oh how wrong people would be if they were to believe such a thing...

I'm a serious addict when it comes to blondies. One of the reasons that I don't make them that often is because, if I have the chance to eat the entire thing of baked blondie, I will... No joke. Not it one day, but I'll defiantly be snatchy when it comes to my blondies. If I see someone taking one, I'll be right behind them as they walk, staring them down with evil eyes for they had taken one of my precious blondies! Haha, ok, that may seem crazy, and I'm not to the extreme of such, but I really do love blondies and I will eat loads and loads of them, which, is the reason why I don't make them all the time.

With brownies, being that they are so extremely rich, that just having one is far enough for me. It's to rich that I can't extend even just one. With blondies however, I never get tired of the chewy, melt in your mouth taste. I find that any blondie taste amazing and I also find it hard for there to be a 'bad' blondie. Same as how I feel about brownies. I don't think there is really a 'bad' brownie; Not that I've experienced yet.

I find that blondies are best with pecans, chocolate, and coconut. I think the combination is just wonderful and amazing together. I think the combination of pecans, chocolate, and coconut alone is a great combination (as you will seem to find out...)! But, when you put that combination into a blondie; Ohh! It's just to die for. But, you'll die of true bliss happiness if you take a big, huge scoop of ice cream and top it on a blondie. Just to die for.


Recipe

1 1/2 cups all-purpose flour
1 tsp. baking powder
1 tsp. cinnamon
1/4 tsp. salt
1/2 cup butter, softened
1/2 cup peanut butter
1 1/4 cups firmly packed light brown sugar
2 large eggs
1 1/2 tsp. vanilla
1 cup semi-sweet chocolate, chopped
1/2 cup pecans, chopped
1/2 cup flaked coconut


1. Preheat the oven to 350. Butter and flour a 9" x 12" baking pan. In a medium bowl, whisk or sift together the flour, baking powder, cinnamon and salt. Set aside.

2. In another bowl, mix the butter and peanut butter until fluffy. Add the sugar and mix until combined. Add the eggs and vanilla and mix until combined. With the mixer running on low speed, slowly add the dry ingredients, mixing until just combined.

3. Using a spatula or wooden spoon, fold in the chocolate, peanuts and coconut. Bake for about 30 minutes, or until the blondies have just begun to brown around the edges. Allow them to cool completely before cutting.


Tuesday, April 8, 2008

Rainbow Cupcakes


What lurks behind the beautiful cupcake? Well that'd be my new little stuffed animal Apple! Chris bought me her the other day. She's so cute. She's the only one that I like out of the Hello Kitty collection. I don't really like Hello Kitty, or that white.. thing. Or that... Panda thing. I do like Chococat and Kuririn though. As you can see, I know a lot about the little Hello Kitty collection. I'm a bit of a dork. I learned all the names though from my friends baby sister. She' of was obsessed with Hello Kitty; And all the characters! She had a giant Hello Kitty! It was about 5 feet tall. It kind of scared me...

Anyways, thats all beside the point of the reason I made these cupcakes. To be completely honest, and it may seem kind of weird, but when I look at my little stuffed animal Apple, makes me think of... Spring. All the beautiful and bright colors that come along with the season of Spring. Then I thought, well, I could make bright, spring like cupcakes. Which is how I came along to making these little adorable cupcakes.

These cupcakes are super moist! Very delicious, and so fun to make. You can color them and decorate them however you choose. I even got my little brother and my boyfriend doing it. We all came up with our own little creations and spent time together, enjoying each others company. This is one of the things that I really love about making cupcakes. You can have friends and family help out, and we all came make our cupcakes the way we want and decorate them how we'd like them!


Recipe

For Cupcakes

1 1/4 cup flour
1/2 cup butter, room temp
1 1/4 cups sugar
2 large eggs, room temp
1/2 tsp. baking powder
1/4 tsp. baking soda
1/4 tsp. salt
1/2 cup milk
1 tsp. vanilla
Food Coloring


1. Preheat oven to 350 degrees. Beat butter until softened. Add sugar and beat until light and fluffy, about 3 minutes. Add eggs, beating until combined.

2. In a small bowl, whisk the flour, baking powder, baking soda, and salt. Whisk to combine. Measure out the milk and vanilla, then stir to combine.

3. Add about a third of the dry ingredients to the butter/sugar and beat to combine. Add about a half of the milk/vanilla and beat to combine. Continue adding, alternating between dry and wet and finishing with the dry.

4. Divide the batter into a few different bowls (However many different colors your using depends on how many bowls you'll have). Put desired food coloring in each bowl. Do it one drop at a time, stirring each addition drop till you get the color you are wanting.

5. Scoop batter into cupcake cups, alternating with different colored batter, and fill to about 2/3’s full. Bake cupcakes for about 22-25 minutes or until a cake tester comes out clean.


(Apple was very happy ^_^)

For Soft Vanilla Buttercream Frosting

1/2 cup butter, room temperature
1 1/2 cups sifted powdered sugar
1 tsp. vanilla
2 tbsp. milk


1. Beat butter at medium-high speed until creamy. Sift powdered sugar into the mixer bowl (right on top of the beaten butter). Beat to combine.

2. Add the vanilla and the milk. Beat until combined. Spread on top of cupcakes or cake.


Sunday, April 6, 2008

Peanut Butter and Banana Sandwich


Supposedly the Peanut Butter and Banana idea came from the all time famous star, Elvis Presley. The 'Peanut Butter and Nanner' what they considered it. Whether that may be true or not, I got to say, the man had great taste. Peanut Butter and Banana themselves are great. Both have a creamy texture, and are just delicious in general. Putting both Peanut Butter and Banana together; Well, it just equals to a great combination!

I grew up eating this with my Grandpa and Nana when ever I went over to they're house. They're the grandparents. They want to spoil you. Give you all the things that you couldn't get because your parents said so. Like, getting the snacks you mother never let you have like oreos or goldfishes, or getting the expensive toy that you parents said you didn't need, or going to Chunk E' Cheese from time to time, or staying up late watching movies, or going outside to play; At which my grandparents did. I was extremely spoiled as a child by my grandparents; To be honest, I still am.

But, even now, I still always look forward to having a Peanut Butter and Banana Sandwich for lunch with my Nana. The warm melted peanut butter with the warm, creamy bananas is something I can never get tired of. Its a comfort sandwich. One of the best.


Recipe

2 tbsp. peanut butter (preferably smooth)
2 slices sandwich bread
1 small ripe banana, mashed with a fork (about 1/4 cup)
2 tbsp. butter


1. Spread peanut butter evenly on 1 slice of bread, then spread mashed banana on other slice, leaving a 1/4-inch border around edge. Close sandwich, gently pressing bread slices together.

2. Heat butter in an 8- to 10-inch heavy skillet over moderate heat until foam subsides, then fry sandwich, turning over once, until golden brown, about 2 minutes total.

3. Eat immediately with a knife and fork


Makes 1 Sandwich
 
 
Genesis of a Cook
check out Tastespotting