Tuesday, January 29, 2008

Pop-Tarts


Here at my house, we are big time lovers for pop-tarts. We eats pop-tarts like we breath air. Thank god that we have fast metabolisms, for if we didn't, we'd be bigger than an obese elaphant! So very thankful for that.

I came across this recipe for homemade pop-tarts awhile back when I was browsing threw Peabody's recipe index. When I found it, I knew right away that I wanted to make it. But, I'd never gotten to it. It just kind of sat there in my memories. Till now.

It was actually really easy to make, it didn't take much effort. I made it with two different flavors; Strawberry and Blueberry. There were more Strawberry than Blueberry though... I would have make more blueberry pop-tarts rather than strawberry; because I'm a huge fan for blueberries, But, large majority of people in my family don't like blueberries to much and prefer strawberries much more than blueberries.

I thought the blueberry ones were better ;]


Recipe
For Pie Crust

1 1/2 cups flour
1/2 tsp. salt
1/4 cup shortening
1/4 cup butter, softened
3 tbsp. cold water

For Filling

Jam (your choice)

For Glaze

1 cup powdered sugar
milk to thin

Sprinkles


1. Preheat oven to 450 degrees. Combine flour and salt in a large bowl. Add shortening and butter and blend with a fork, pastry cutter, or your hands. Blend until mixture is fairly coarse. Add water, 1 tbsp. at a time, gently mixing dough after each addiction until dough forms a ball.

2. Place dough on a lightly floured surface and roll into a square/rectangle. To about 1/8 thickness. Cut out long strips about 2 inches wide and 3 inches long. Repeat until dough runs out.

3. Take one pie crust rectangle and lace 1 tsp. of jam on top. Cover with another piece of pie crust and crimp all four edges. Repeat with the rest of dough. Place Pop-tarts on a baking sheet with parchment paper, and bake for 7-8 minutes.

4. While pop-tarts are baking, make glaze. Place powdered sugar in a bowl. Pour milk slowing until it has a consistancy of really thick syrup. 1/2 a tbsp. to 1 tbsp. might be enough.

5. Once pop-tarts are done and cooled, top with glaze. Sprinkle and decorate with colorful sprinkle

Monday, January 28, 2008

DBC: Lemon Meringue Pie


So, the next Daring Bakers Challenge is here... And I have to say, that I have never been so annoyed and frustrated in a baking process like I did with this challenge. This months challenge was the Lemon Meringue Pie. At first, I thought, "Hmm, I'm sure I can do this with ease." Hah!

I'm not much of a pie maker. And defiantly NOT good at making pie crust whats so ever. I've had a few insisidents were it was just pitiful at how the crust came out for past pie making. But I thought if I really tried and went slow with the process of making it, that It'd come out fine.

Three tries later, I finally get a good pie crust! And I was really proud of how the crust came out. It was almost picture perfect crust. Which is a amazing for someone like me who is pron to messing up pie crusts. So it was a true accomplishment for me.

Then came the filling. This wasn't so frustrated as the crust, it just seemed like it took a while for it to thicken. I thought it'd thicken quicker, but it took some time, for what reasons I don't know. But it eventually thicken. Then I did the meringue. Which, I didn't take to much effort into making with sadly. I just kind of dumped the meringue on top of the pie. I wanted to make the pie look all pretty and cute, but by the time I got to this stage, I was just tired of making this pie that I just wanted to get it done.

The pie came out good. I wasn't to proud of the finishing product because it didn't look as pretty and beautiful as I had planned. Nonetheless, still tasted wonderful. But I can see myself trying to make this again. Not just to make to eat, but to get it how I wanted it. I'm pretty stubborn, and I wanted it to come out how I wanted, but it didn't. So I have a new goal as of right now. ;]

To check out other Lemon Meringue Pies, go to the Daring Bakers Blogroll.


Recipe

For the Crust

3/4 cup butter; cut into 1/2 inch pieces
2 cups flour
1/4 cup sugar
1/4 tsp salt
1/3 cup ice water

For the Filling

2 cups water
1 cup sugar
1/2 cup cornstarch
5 egg yolks, beaten
1/4 cup butter
3/4 cup fresh lemon juice
1 tbsp lemon zest
1 tsp vanilla extract

For the Meringue

5 egg whites, room temperature
1/2 tsp cream of tartar
1/4 tsp salt
1/2 tsp vanilla extract
3/4 cup sugar


To Make the Crust:
Make sure all ingredients are as cold as possible. Using a food processor or pastry cutter and a large bowl, combine the butter, flour, sugar and salt.Process or cut in until the mixture resembles coarse meal and begins to clump together. Sprinkle with water, let rest 30 seconds and then either process very briefly or cut in with about 15 strokes of the pastry cutter, just until the dough begins to stick together and come away from the sides of the bowl. Turn onto a lightly floured work surface and press together to form a disk.

Wrap in plastic and chill for at least 20 minutes.Allow the dough to warm slightly to room temperature if it is too hard to roll. On a lightly floured board (or countertop) roll the disk to a thickness of 1/8 inch. Cut a circle about 2 inches larger than the pie plate and transfer the pastry into the plate by folding it in half or by rolling it onto the rolling pin. Turn the pastry under, leaving an edge that hangs over the plate about 1/2 inch. Flute decoratively. Chill for 30 minutes.

Preheat oven to 350ºF. Line the crust with foil and fill with metal pie weights or dried beans. Bake for 20 to 25 minutes. Carefully remove the foil and continue baking for 10 to 15 minutes, until golden. Cool completely before filling.


To Make the Filling:
Bring the water to a boil in a large, heavy saucepan. Remove from the heat and let rest 5 minutes. Whisk the sugar and cornstarch together. Add the mixture gradually to the hot water, whisking until completely incorporated. Return to the heat and cook over medium heat, whisking constantly until the mixture comes to a boil. The mixture will be very thick. Add about 1 cup of the hot mixture to the beaten egg yolks, whisking until smooth.

Whisking vigorously, add the warmed yolks to the pot and continue cooking, stirring constantly, until mixture comes to a boil. Remove from the heat and stir in butter until incorporated. Add the lemon juice, zest and vanilla, stirring until combined. Pour into the prepared crust. Cover with plastic wrap to prevent a skin from forming on the surface, and cool to room temperature.


To Make the Meringue:
Preheat the oven to 375ºF. Using an electric mixer beat the egg whites with the cream of tartar, salt and vanilla extract until soft peaks form. Add the sugar gradually, beating until it forms stiff, glossy peaks. Pile onto the cooled pie, bringing the meringue all the way over to the edge of the crust to seal it completely. Bake for 15 to 20 minutes, or until golden. Cool on a rack. Serve within 6 hours to avoid a soggy crust.

Thursday, January 24, 2008

Fettuccine Alfredo


Fettuccine Alfredo is such an easy dish to make, that's what I love about it so much. My boyfriend doesn't really enjoy pasta as much as I; He'd rather eat a much of sweets and gummy bears. He's a big fan with sweets like I. That why I was surprised to hear him as me to make Fettuccine Alfredo for him today.

Didn't take long at all to make. It's pretty easy, simple and fast to make. Came out really good and creamy, and my boyfriend was really satisfied with it. I think he ate a bit to much though... He was so full that he couldn't get out of bed! His excuse was, "It was just so good..."


Recipe

18 ounces fettuccine pasta
2 1/2 cup heavy cream
1/2 cup fresh lemon juice
12 tbsp. butter (1 1/2 cups)
2 cups parmesan cheese
2 tsps. grated lemon zest
Pinch of grated nutmeg
Ground white pepper
Salt


1. Cook the pasta in a large pot of boiling water until tender, but still firm to the bite, stirring occasionally. About 4 minutes. Drain.

2. Stir 2 cups of heavy cream and lemon juice in a heavy large skillet to blend. Add the butter and cook over medium heat just until the butter melts, stirring occasionally. About 3 minutes. Remove from heat.

3. Add the pasta to the cream mixture and toss. Add the remaining 1/2 cup of heavy cream, and parmesan to the cream sauce in the skillet. Add the lemon zest, nutmeg, salt, and white pepper. Toss the pasta mixture over low heat until the sauce thickens. About 1 minute. Serve.

Thursday, January 17, 2008

Spicy Baked Macaroni


Giada never lets me down.

The other day, I was watching 'Everyday Italian' with Giada De Laurentiis, and she made something that sound just so delicious! I love Baked Macaroni and Cheese, but when I say her making this Spicy Macaroni with tomatoes, mushrooms and spinach; I was intrigued. And I knew I defiantly wanted to make this as soon as possible.

When I told everyone that I was making this, they were all also very interested as to how this would taste. That is, except my boyfriend. He's a very, very picky eater. But, he loves Macaroni and Cheese and he didn't really like the idea of ruining Macaroni and Cheese by having all the things that were in this recipe. But, I told him had to at least try it.

No only was I in love with this, but my entire family fell in love with this recipe! Honestly, it may be better than the original Baked Macaroni. It was just enlightening and all the flavors contrasted very well together! And... My boyfriend even liked it! Kudos!


Recipe

1 pd. elbow macaroni pasta
3 tbsp. olive oil
1/2 cup mushrooms, sliced
2 cloves garlic, chopped
1 (14.5 ounce) can diced tomatoes
1 (10 ounce) package frozen spinach, thawed and drained
1/2 tsp. red pepper flakes
1/2 cup bread crumbs
1/4 cup grated parmesan, plus 1/3 cup
2 tbsp. butter, softened, plus 2 tablespoons
12 ounces mozzarella cubed (about 2 cups)
1/4 tsp. ground nutmeg


1. Preheat oven to 350 degrees.

2. Bring a large pot of salt water to a boil over high heat. Add the pasta and cook until tender, for about 8 to 10 minutes. Drain pasta.

3. In a large skillet, heat the olive oil on medium heat. Add the mushrooms and garlic. Cook until the mushrooms are tender, about 7 minutes. Add the tomatoes, red pepper flakes and spinach. Stir to combine and cook until heated through, about 5 minutes.

4. In a small bowl, mix together the bread crumbs and parmesan. Spread the softened butter in a 9 by 13 inch baking dish and sprinkle half of the bread crumbs mixture inside the dish to coat.

5. In a large bowl, combine the vegetable mixture with the cooked pasta, cubed mozzarella, the remaining bread crumbs and nutmeg. Spoon into the baking dish and top with and remaining bread crumbs, and dot the top with remaining butter. Bake until the top is golden brown, about 30 to 40 minutes. Serve and enjoy!

Wednesday, January 16, 2008

Loaded Banana Bread


So, I came up with this today while cleaning out the pantry. A few weeks ago, a family friend was cleaning his house up and getting rid of things that he no longer needed. Since his wife is no longer living with him, he had no need for all the baking supply she left at the house nor did she want them. Being the kind person he is, he gave all of it to me! And there was a lot!

PhotobucketI got so much that I was seriously overwhelmed! I didn't know what to do with all of it! I'd never had so many things to make! Nonetheless, I was so happy to know that I had to many hings to use to bake with. And today I was trying to clean it up and decided to whip this up.

This Banana Bread serious is loaded. With Peanut M&M's, Peanut Butter Chips, Dark Chocolate Chips and Walnuts; It's just love in a loaf of bread.


Recipe

1 1/2 cups flour
1/2 whole wheat flour
2 tsp. baking powder
1/2 tsp. baking soda
1/4 tsp. salt
1/4 tsp. grated nutmeg
1 tbsp. grated orange peel
2 large banana's, ripe
1/4 cup walnuts, chopped
1/4 cup dark chocolate chips
1/4 cup peanut butter chips
1/2 cup peanut M&M's, crushed slightly
2 large eggs
3/4 cup packed brown sugar
8 tbsp. butter, melted
1/4 cup whole milk


1. Preheat oven to 350 degrees. Butter a 9 x 5" or a 8 x 4" loaf pan.

2. In a large bowl, mix together the flour, whole wheat flour, baking powder, baking soda, salt, nutmeg and orange peel. Set aside.

3. In a medium bowl, mix together brown sugar and melted butter. Add eggs and mix together. Add milk and mashed banana's into mixture, mixing well. Add to flour mixture being careful not to over mix.

4. Fold in dark chocolate chips, peanut butter chips, peanut M&M's and walnuts. Pour into buttered pan and top with extra walnuts, if desired. Bake for about 50-55 minutes or till done. Cool in pan for several minutes before transferring to wire rack to cool completely.

Sunday, January 13, 2008

Banana Nut Bread


I am a Banana Bread freak, which, many know. And I've gone threw my share of different Banana Bread recipes. I'm always trying to find a really tasty recipe for Banana Bread. The regular Banana Nut Bread has always been my favorite, and I thought I had already found a recipe that I thought was the best; Till I found this one.

I was reading a bread baking book the other day at my local Barnes and Noble when I came across this recipe. The recipe used only brown sugar, no white sugar, which I'd not really done in my banana breads. I may have used both, but each banana bread I'd made had white sugar in it. And theres also whole wheat flour in it, which makes it healthier (Banana Bread can be healthy!).

So I got the recipe and decided to try it out. And I am in love with this Banana Bread. I didn't think any recipe could top the one I usually use, but this stumped the old recipe. Everything in it just came out wonderfully and balanced well. Very, very delicious bread, thats all I got to say.


Recipe

1 1/2 cups flour
1/2 whole wheat flour
2 tsp. baking powder
1/2 tsp. baking soda
1/4 tsp. salt
1/4 tsp. grated nutmeg
1 tbsp. grated orange peel
2 large banana's, ripe
3/4 cup walnuts, chopped
2 large eggs
3/4 cup packed brown sugar
6 tbsp. butter, melted
1/2 cup whole milk


1. Preheat oven to 350 degrees. Butter a 9 x 5" or a 8 x 4" loaf pan.

2. In a large bowl, mix together the flour, whole wheat flour, baking powder, baking soda, salt, nutmeg and orange peel. Set aside.

3. In a medium bowl, mix together brown sugar and melted butter. Add eggs and mix together. Add milk and mashed banana's into mixture, mixing well. Add to flour mixture being careful not to over mix.

4. Fold in 1/2 cup of the walnuts into batter. Pour into buttered pan and top with reserved walnuts. Bake for about 50-55 minutes or till done. Cool in pan for several minutes before transferring to wire rack to cool completely.


Saturday, January 12, 2008

Tahiti Blondies


Oh. My. God.

I honestly don't know if I have ever had a blondie that tasted to good. I can't even come up with words that can simply describe the oozing goodness these delectable little delicious things of goodness are! They're just... So good!

I saw these blondies the other day while watching Food Networks 'Throwdown with Bobby Flay' with a throw down on Blondies. He has against these two guys with a little company called 'Sugar Daddys' that specialize in Blondies and Brownies.

They're most popular blondie, the Tahiti Blondie caught my eye. It's a blondie with coconut, pecans (or cashews), dark chocolate and white chocolate. It has a hint of pineapple in it, however, I did not add it because I didn't have it on hand. Nonetheless, they still came out wonderful.

After seeing they're blondie, I just had to make those blondies! Sad things about them; Sugar Daddy doesn't give out they're recipe. So, I did the best I could to copy they're recipe. I didn't do everything as they did for certain reasons. They used cashews, but I used pecans. They used pineapple, but I added none. Though these aren't the real Sugar Daddy's blondies, I think that they're close enough, and are just delicious! I added extra coconut and pecans for topping and I cut them into circles with a round cookie cutter.


Recipe

1 1/2 cup flour
1 1/2 cup light brown sugar
1 tsp. baking powder
1/4 tsp. salt
3/4 cup butter, melted
2 large eggs
4 tsp. vanilla
1 cup pecans, chopped
1 1/2 cup shredded coconut
1/2 cup semi-sweet chocolate chips
1/2 cup white chocolate chips


1. Preheat oven to 350 degrees and line a 9 x 13 baking pan with parchment paper.

2. In a medium bowl, whisk together flour, baking powder and salt and set aside.

3. In another bowl, whisk together butter and brown sugar until combined. Add eggs and vanilla to mixture and mix well. Take the dry ingredients and fold into wet ingredients until combined.

4. Fold in chocolates, coconut and pecans into batter. Try not to over mix. Pour batter into prepared baking pan and smooth out with a spatula or spoon. Top with extra coconut, chocolate and pecans (optional).

5. Bake for about 25-28 minutes, or until top light golder brown on the top. Do not over bake! Cool to room temperature before cutting.


Thursday, January 10, 2008

Homemade Peanut Butter Cups


I've been wanting to make some peanut butter cups for the longest of times. I'm a pretty huge fan of eating the peanut butter cups, Reese's. And I always thought it would be fun to make my own peanut butter cups instead of buying them. And when my mother bought a bunch; And I mean a BUNCH of chocolate chips yesterday, making peanut butter cups came to head. So, that just what I did. And let me tell ya; They're so good! And it was so easy!


Recipe

1 1/2 cup chocolate chips (semi-sweet, dark chocolate or white chocolate, whatever you prefer. I used a little bit of each kind)
1/2 cup creamy peanut butter
1/2 cup crunchy peanut butter
1/2 cup confectioner's sugar
1/2 tsp. vanilla
Pinch of salt


1. Set 2 dozen mini muffins wrappers on a baking sheet. Melt half of the chocolate, using a microwave-safe bowl and cooking it in short 30 second intervals until smooth.

2. Using a spoon, pour a little bit of chocolate in each muffin wrapper and using a small clean brush to paint the chocolate up the sides of each wrapper. Chill candy for 20-30 minutes.

3. In a small bowl, whisk together peanut butters, sugar, vanilla and salt. When mixture has come together, microwave until very, very soft. About 30 seconds.

4. Once candy has chilled, spoon generous amounts of peanut butter mixture into each candy cup. Chill for another 30 minutes.

5. Melt the rest of the chocolate and fill each muffin cup once they have chilled. Chill until set.

Monday, January 7, 2008

Chocolate Mint Butter Cake


It was my little brother 13th birthday today. He can now officially consider himself a teenager (He's been dieing to be able to say he's a teen. It's kind of cute). I felt a little bad for him though because none of his friends could come spend time with him on his birthday. His best friend just recently moved back to New Orleans (him and his family evacuated here before Katrina hit), and all his other good friends were out of town. So I felt a little bad for him...

Nonetheless, I think he enjoyed his birthday very much. We took him rock climbing, which he absolutely loves to do, we got him all the silly little games that he's been wanting (which all together cost about $300! Ridiculous how much games have been getting!), and I made him a cake which he absolutely loved because it had one of his favor things; Mint!

My little brother loves anything and everything that has to do with Mint. So I wanted to make him a cake with that flavoring. To make it a little more minty, I found these mint chocolate chips at the grocery store (ding, ding!) so I got those to add to his cake to make it really sweet and minty. The finish product turned out pretty good, and he loved it, which made me really happy to know that he loved it and enjoyed his birthday. That's what mattered to me. I just wanted to make him happy.


Recipe

For Cake

2 1/4 cups flour
1/3 cup cocoa powder
2 cups sugar
4 ounces unsweetened chocolate, chopped
1/2 cup mint chocolate chips
2 tsp. baking powder
1 tsp. baking soda
1/4 tsp. salt
1 cup boiling water
1 cup butter
3 eggs
2 tsp. mint extract
1 cup milk

For Frosting

1 cup butter
4 cups powdered sugar
1/8 tsp. salt
2 tbsp. milk
2 tsp. vanilla


Cake

1. Preheat oven to 350 degrees. Butter two 9-inch round baking pans. Set aside.

2. In a stainless steel or heatproof bowl, place the chopped chocolate, mint chocolate chips and cocoa powder. Pour the boiling water over and stir until they have melted. Set aside to cool while you make the batter.

3. In a seperate bowl , whisk the flour, baking powder, baking soda and salt. Set aside.

4. In another bowl, cream the butter. Gradually add the sugar and continue beating until the mixture is fluffy. Add the eggs one at a time, mixing well after each addiction. Add the mint extract and melted chocolate mixture and beat to combine.

5. Add the milk and flour mixture in three additions, beginning and ending with the flour mixture. Beat until incorperated.

6. Divide batter evenly into prepared baking pans. Bake for about 35-40 minutes or until toothpick inserted into the middle comes out clean. Let cool for 10 minutes before taking out of pan. Place on wire rack and let cool completely before frosting.


Frosting

1. In a large bowl, beat butter, 2 cups of powdered sugar and salt until blended. Add milk and vanilla.

2. Add remaining sugar and beat until incorperated. Beat frosting until fluffy and smooth. Makes about 2 1/2 cups.

Saturday, January 5, 2008

Caramel Toffee Cheesecake


To be completely honest, I have yet to have ever made a cheesecake. Cheesecake is a very rich dessert and I don't have it very often, but, when I do have it, when I bite in to that creamy, decadent texture that cheesecake has; I'm in heaven. I don't even know if words can necessarily describe just how delicious a cheesecake is.

I remember the first cheesecake I ever had was a Caramel Cheesecake. I believe I was at the Cheesecake Factory when I had it and I was about 8 years old. I think they may have put a bit to much sugar because I was jumping off the way after I had and was a bit wee hyper. My parents weren't to happy with how hyper I became. But, I do remember that it was so, so, so, sooo good though.

So, remember how delicious the Caramel Cheesecake was, I wanted to make something like that. But, instead, I added toffee chips, which I found was a great addition to the cheesecake. And in the end, my first cheesecake came out so, so good. Better than the Cheesecake Factory's I must say. Though, I think anything homemade is always better than one that you eat out from.


Recipe

1 1/4 cups graham cracker crumbs
2 tbsp. sugar
1/4 cup butter, melted

2 lbs. cream cheese
2 cups sugar
2 tbsp. flour
4 eggs
2 egg yolks
1 tsp. vanilla
3/4 cup toffee pieces

1 cup sugar
6 tbsp. butter
1/2 cup heavy whipping cream


Cheesecake


1. Preheat oven to 350 degrees.

2. For the crust, combine the graham cracker crumbs, 2 tbsp. of sugar and melted butter. Press into the bottom of a 10 inch spring form pan. Bake crust for 10 minutes and set aside.

3. For the filling, mix the cream cheese and sugar with a paddle attachment on medium speed for about 3 minutes. Add in the flour on low speed. Add eggs one at a time, scraping down the sides and the bottom after each egg. Add the egg yolks and vanilla. Fold in toffee pieces.

4. Pour the filling into the prepared pan. Wrap aluminum foil around the outside of the pan and bake in a water batch for approximately 1 1/2 hours. A knife inserted should come out clean when cake is done. Chill cake overnight and then top when caramel sauce.


Caramel Sauce

1. Heat sugar on high heat in a heavy-bottomed 2 quart sauce pan. As the sugar begins to melt, stir constantly with a whisk. As soon as the sugar crystals begin to melt (should be dark amber in color), immediately add the butter to the pan. Continue to whisk until butter has melted.

2. Once the butter has melted, take the pan off the heat. Count to three, then add the cream to the pan and continue to whisk to incorporate. Whisk until caramel sauce is smooth. Let cool in pan for a few minutes

Wednesday, January 2, 2008

Cinnamon Buns


Year 2007 is out the door; Year 2008 is here. Which means new goals and new me. Every year, everyone usually gives them self a goal to achieve with the coming of the new year. Whether it be to lose weight, to get a job, to travel somewhere or to become famous; Everyone makes some kind of goal for the new year.

Usually, I don't put to much thought in to a goal for the new year nor did I ever really care. This year however, I made a goal that I am going to make myself commit! No slacking or by passing it. This year, I want to challenge myself. To challenge myself beyond my comfort zone. More so than ever. I want to bake things that I've always been afraid of. I want to be better; A better baker. And I'm committed! I will do it!

One of the things I've always been iffy about making is Cinnamon Buns. Just hearing the thought of it kind of scared me. So much time and you must, must, must be exact with a lot of what your doing in the making of Cinnamon Buns or else it will bit you in the butt when you finish. That made me nervous. So I've never really brought myself to even try making them...

But, its a new year and I am going to stay committed to stepping out of my comfort zone and trying harder recipes; Challenging myself beyond. So what better than attempting to make Cinnamon Buns? So I woke up early this morning to get started.

One downside for me in making Cinnamon Buns is; I don't have an electric mixer. Yep, I have to do it all by hand. Fun, right? No, not really. I think I got a work out on my arms with all the folding, stirring and kneading. It truly was a pain in my behind. But I wanted to make them. And I managed.

But I think the thing that bugged me the most was the time. Honestly, I'm a very impatient kind of person. I hate waiting. Its something I hate to do. But if I wanted to have beautiful, delicious Cinnamon Buns, I had to wait. Though I did it, it drove me truly insane! I was literally jumping with joy when it finally came to actually putting the buns into the oven to actually bake!!

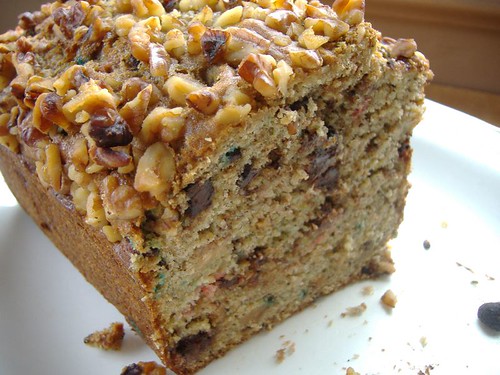
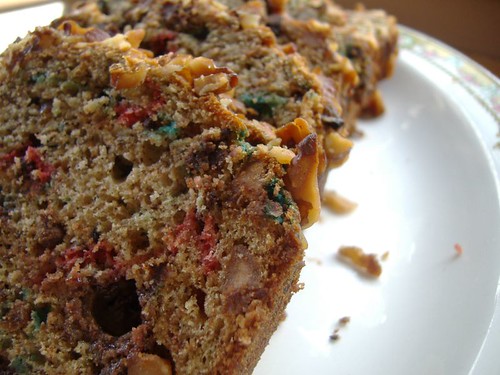
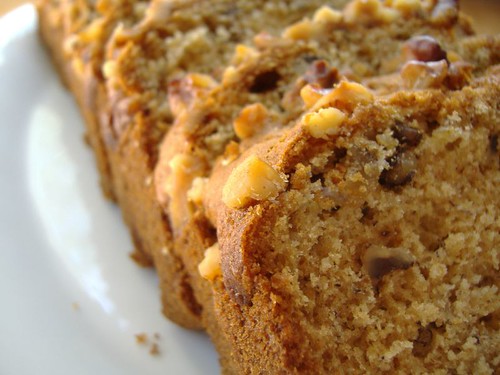
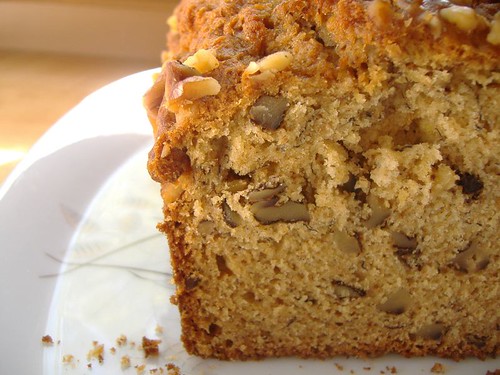
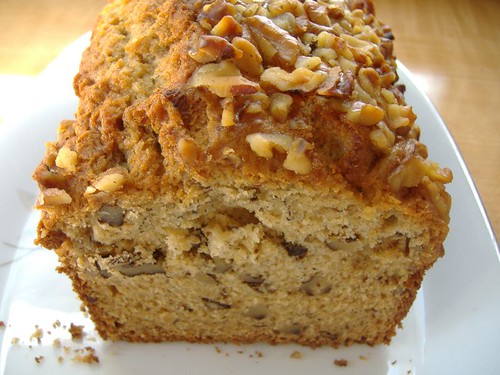
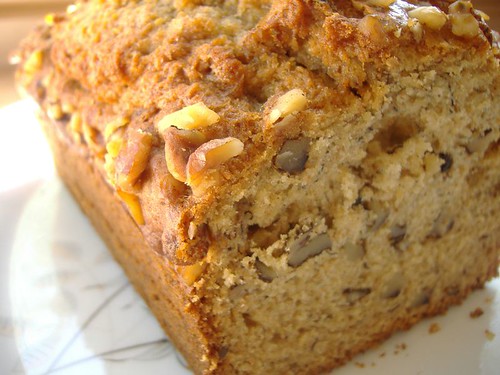
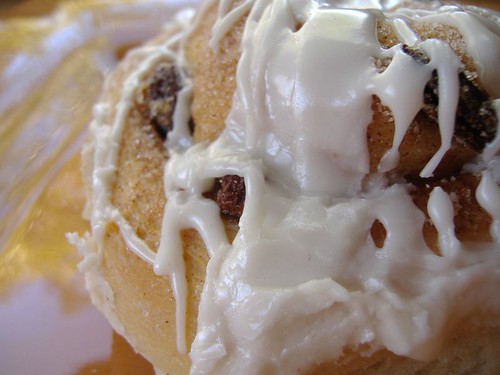
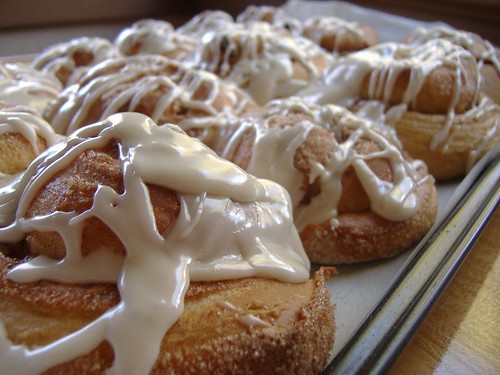
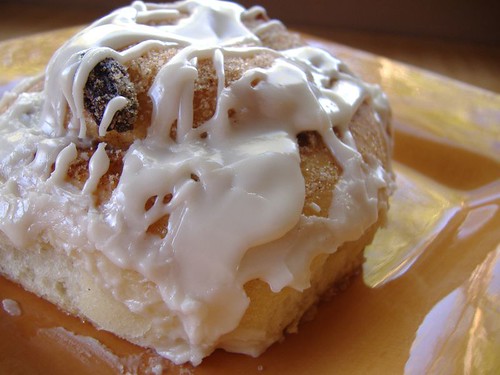
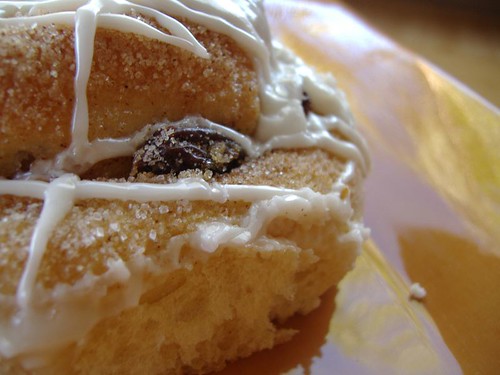
And in the end, I was very happy with myself. I finally did it. I made the Cinnamon Buns that I'd been so afraid of making! And they actually came out! They were very tasty, so light and soft. I was in heaven. I added raisins to half the batch because I love raisins in my Cinnamon Buns. I would have done all of them the same, however, I have a few raisin hater in the house...


Recipe

6 1/2 tbsp. sugar
1 tsp. salt
5 1/2 tbsp. shortening or unsalted butter
1 large egg, slightly beaten
1 tsp. grated lemon zest
3 1/2 cups flour
2 tsp. instant yeast
1 1/8 to 1 1/4 cup milk, room temperature
1/2 cup cinnamon sugar (6 1/2 tbsp. sugar plus 1 1/2 tsp. ground cinnamon)
1/2 cup raisins (optional)


4 cups powdered sugar
1 tsp. lemon extract
6 tbsp. to 1/2 cup milk


Cinnamon Buns

1. Cream together the sugar, salt and butter(or shortening) using a large metal spoon. (If using a mixer, mix on medium-high speed). Whip in the egg and lemon zest. (You can substitute the lemon zest with lemon, lime, vanilla extract, etc.).

2. Add the flour, yeast and milk to the mixture. Stir by hand until dough forms a ball (Or mix on low speed). Knead by hand for 12 to 15 minutes or until the dough is silky and supple, tacky but not sticky. (If using a mixer, switch to dough hook and increase speed to medium, mixing for approximately 10 minutes). You may need to add a little flour or water while mixing to achieve this texture.

3. Lightly oil a large bowl and transfer the dough to the bowl, rolling it around to coat it with oil. Cover the bowl with plastic wrap. Ferment at room temperature for about 2 hours or until dough doubles in size.

4. When doughs doubled in size, mist the counter with spray oil and transfer the dough to the counter. Lightly dust a rolling pin and roll out the dough into a rectangle, about 2/3 inches thick and 18 wide by 9 inches long (14 inches wide by 12 inches long if you want larger buns). Don't roll dough to thin or finished buns with be tough.

5. Sprinkle dough with cinnamon sugar and roll the dough up into a cigar-shaped log, creating a cinnamon-sugar spiral as you roll. With the seam side, cut the dough into 12 to 16 pieces each 1 1/4 inches thick (8 to 12 pieces each 1 3/4 inches thick for larger buns).

6. Line 1 or more pans with baking parchment and place buns 1/2 inch apart so that they aren't touching but are close enough to each other. Proof at room temperature for 75 to 90 minutes or until pieces have grown into one another and have nearly doubled in size.

7. Preheat oven to 350 degrees. Bake cinnamon buns for 20 to 30 minutes or until golden brown. Cool buns in pan for 10 minutes and then streak white fondant glaze across the top while they're still warm. Remove buns from pan and place on a cooling rack to cool for at least 20 minutes before serving.
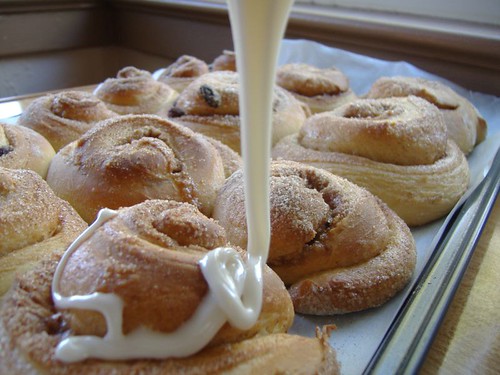


White Fondant Glaze

Cinnamon buns are usually topped with a white glaze called fondant. There are many ways to make fondant glaze, but here is a very simple way to make it.

1. Sift powdered sugar into a bowl. Add 1 tsp. lemon extract and 6 tbsp. to 1/2 cup milk, briskly whisking until sugar is dissolved. Add the milk slowly and only using as much as needed to make a thick, smooth paste.

2. When the buns have cooled but are still warm, streak the glaze over them by dipping the tines of a fork or a whisk into the glaze and waving the fork or whisk over the top of the buns. Wait 20 at least 20 minutes before serving.


Genesis of a Cook
check out Tastespotting